
Jira: Pushing Tracked Time to Issues
Connect Jira Cloud under API & Integrations and SCREENish adds a worklog to a Jira issue with each member's approved time on that project for the day. When a day changes because more entries are approved, the same worklog is updated, so an issue never collects duplicates. Optionally an activity review opens an issue of its own.
What you need from Jira
- Your site address — the
https://your-company.atlassian.netyou sign in to. Jira Cloud only: a Jira Server or Data Center behind your firewall is not reachable from SCREENish and the connection is refused. - The e-mail of your Atlassian account, the one that owns the worklogs.
- An API token. Open id.atlassian.com > Security > Create and manage API tokens, create one, and copy it. The token acts as you in Jira, so the account needs permission to log work on the issues involved. SCREENish stores it encrypted and never shows it again; you can revoke it from the same Atlassian page at any time.
- The issue key for each project, for example
OPS-12. One SCREENish project maps to one issue.
Connecting
- Open API & Integrations in the left menu. If it is your first connection, accept the API access terms shown at the top.
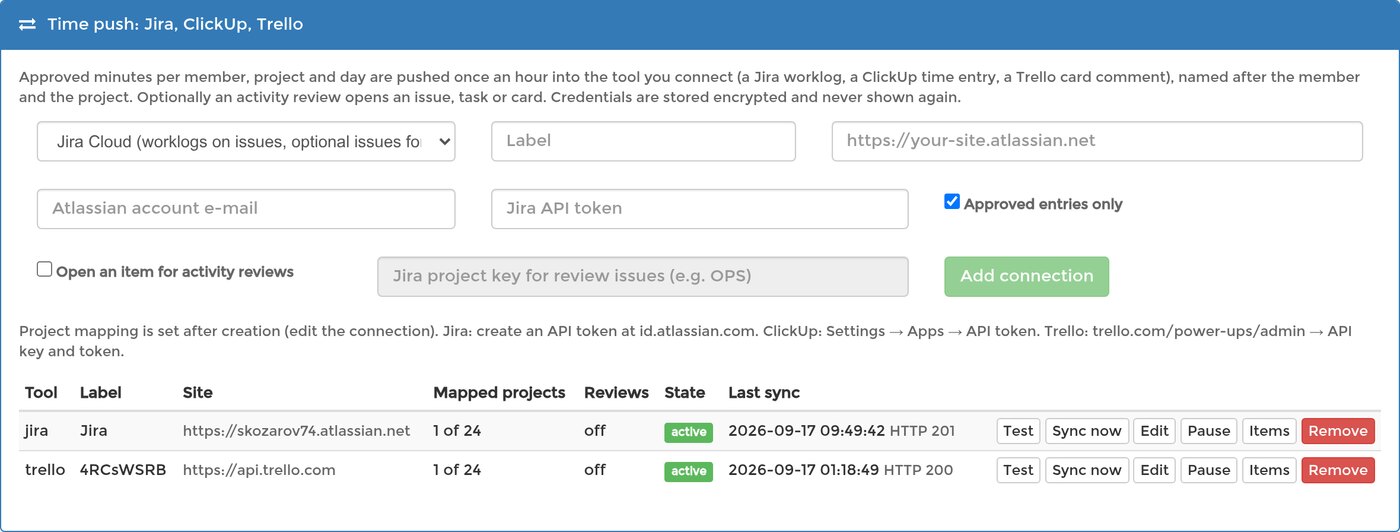
- In Time push: Jira, ClickUp, Trello choose Jira, give the connection a label, paste the site address, the account e-mail and the API token, and press Add connection.
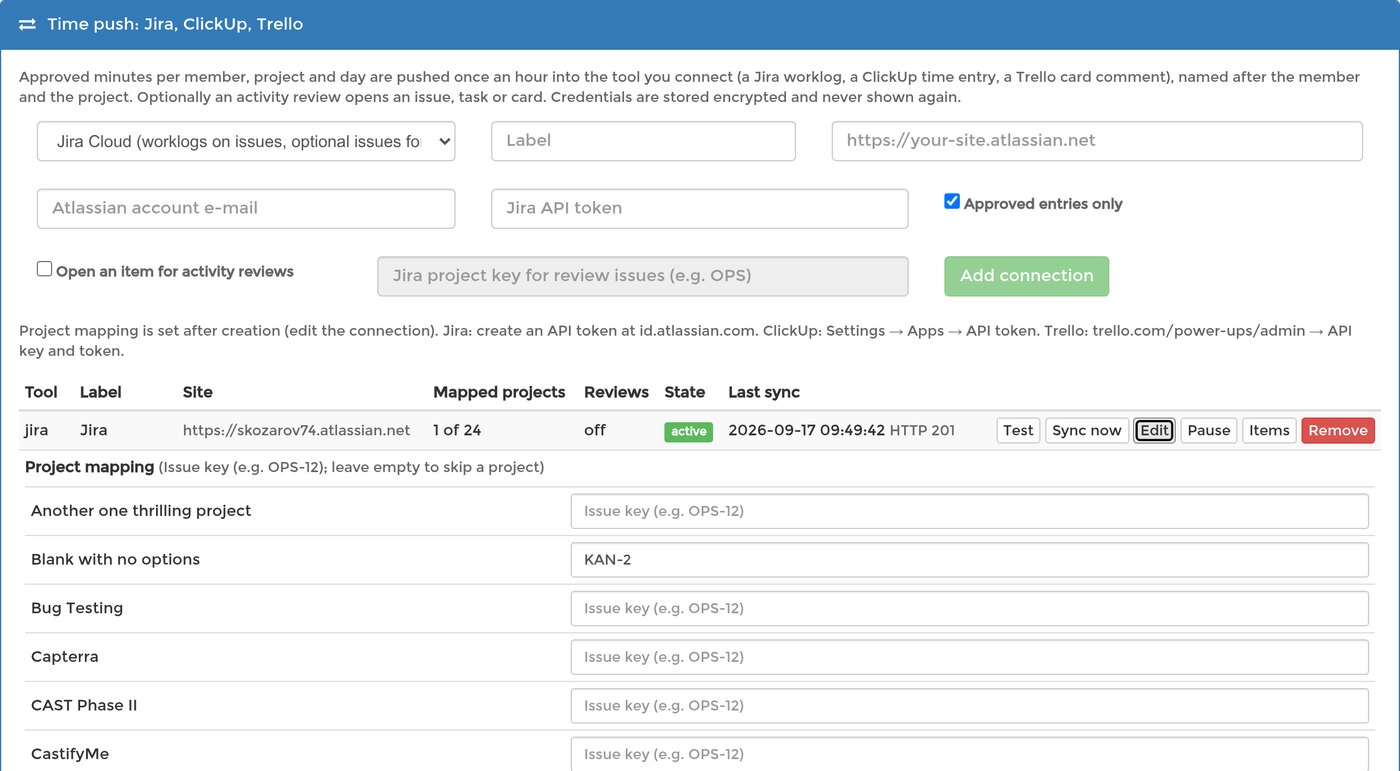
- Press Edit on the new row and, next to each project that should reach Jira, type the issue key. Projects left empty are skipped. Press Save.
- Press Test: it should read Connected as your Atlassian display name. Then press Sync now.
What appears in Jira
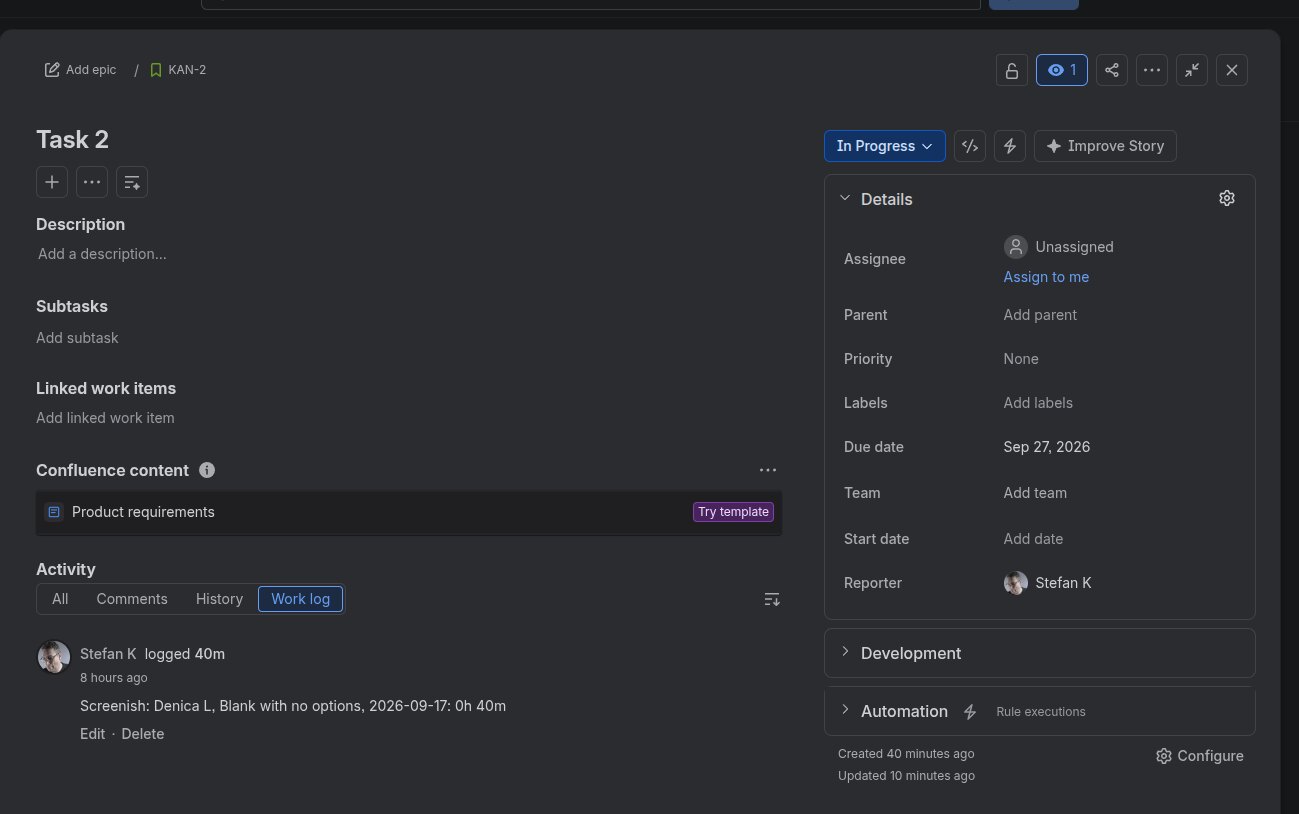
Each mapped issue receives one worklog per member and day, dated to that day, with the duration as time spent and a comment naming the member and the project — for example Screenish: Ann Lee, Support Team, 2026-09-17. The worklog carries the member's name, the project and the duration and nothing else: no screenshots, application names, window titles or pay rates ever leave SCREENish through a connection.
How often, and what is pushed
- SCREENish pushes automatically once an hour and looks at the last three days, so time approved later still reaches the issue. Sync now runs the same push immediately.
- With Approved entries only (the default) only approved time is pushed; a day with no approved entries produces no worklog. Turn it off in Edit to push every entry.
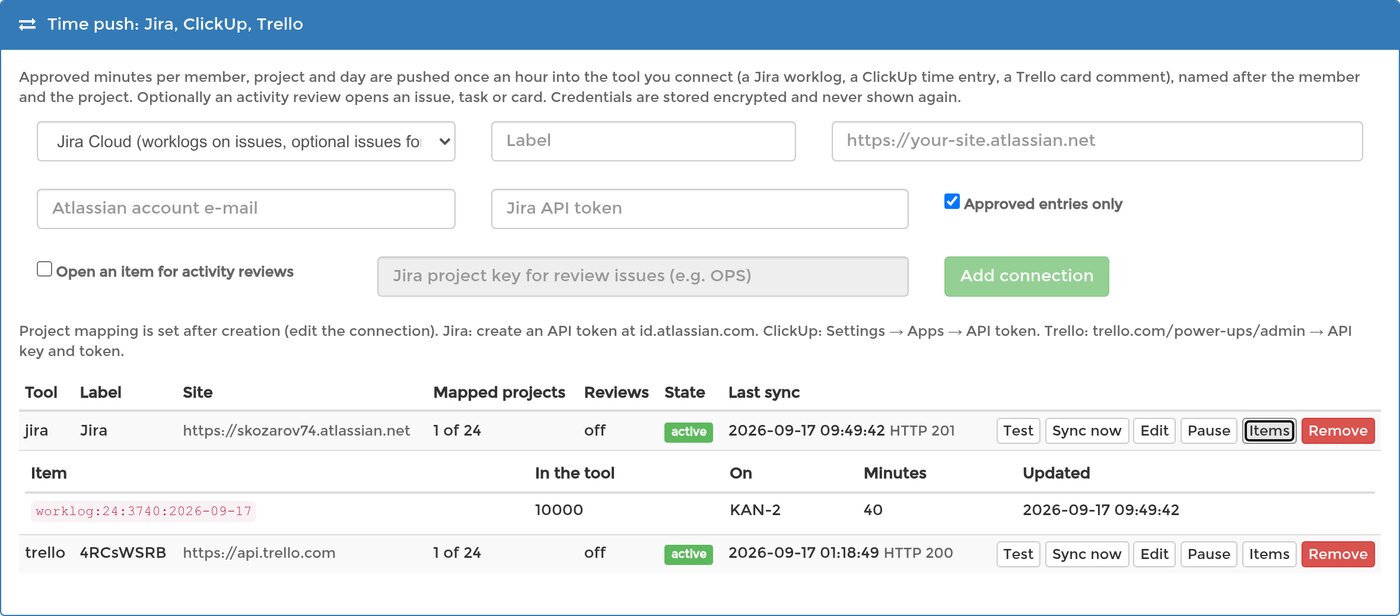
- Items lists what was pushed: the member, project and day, the Jira worklog it became, and the minutes it carries.
Activity reviews as issues
Turn on Open an item for activity reviews in Edit and enter the project key that should receive them — OPS, not an issue key. Each new activity review then creates a Task named after the member, the severity and the day, with the time window in its description. It is a flag for human review, not a finding; nothing about how the review was detected is sent.
Pausing, replacing the token, removing
- Pause stops pushing without losing the mapping; Resume continues.
- If Jira keeps refusing the connection — a revoked token, a changed password, an issue that was deleted or moved — SCREENish pauses it after repeated failures and shows the reason on the row. Paste a new token under Edit → Replace credentials and resume.
- Remove erases the stored credentials and the list of pushed items; worklogs already written stay in Jira.
The same panel connects ClickUp (time entries on tasks) and Trello (comments on cards) in the same way, with a task id or a card instead of an issue key.