
How SCREENish Time Tracking with screenshots helps you manage Employees and Costs



Team Projects
and assign them to your Employees. SetEmployee Weekly Limits and Hourly Rates
.
Projects with Phone Tracking
for your Mobile Teams andProjects with Computer Tracking
for your In-house or Remote Teams.
Distraction Filters
,Idle Time
, andUsed Programs Reports.

Share with your Clients
your project's progress with asingle click.

Analyze your team's Time sheets, Screenshots, Activity Levels, Employee's GPS records, Used Programs, Visited Websites, Idle Time, Payrolls, and Graphs.
Enjoy up to 30% higher productivity and performance in just a week!
Start saving money with SCREENish
It's free - no credit card required!
Please use search box and links
- About SCREENish Time Tracking
- Activity Review: Checking Unusual Activity
- Adding a Payment Method
- Adding a Project Description
- Android GPS Tracking
- API & Integrations: Connecting SCREENish to Your Other Tools
- API Keys: Creating, Limiting and Revoking Them
- App Sign-In: "This app version is no longer allowed by your employer"
- Approvals: Applying Your Rule to Past Screenshots
- Approvals: Automatic Screenshot Approval
- Approvals: Bulk Approving One Worker
- Approving or Rejecting Work
- Assigning a Project to an Employee
- Billing: Company Details on Your Invoices
- Billing: Finding Your Invoices
- Changing Hourly Rates Retroactively
- Changing Your Avatar
- Changing Your Email Address
- Changing Your Name
- Changing Your Password
- Checking Employee Activity and Productivity
- Checking Employee Working Hours
- Choosing PC or Phone Tracking for a Project
- Choosing Your Subscription Plan
- Chrome Extension: Choosing the Project Manager and Project
- Chrome Extension: Fixing Clock Errors
- Chrome Extension: Getting Started
- Chrome Extension: How Activity Levels Are Measured
- Chrome Extension: Team Huddle — Calls, Chat and Files
- Chrome Extension: What It Records (and What It Doesn't)
- Chrome Extension: Working Offline
- ClickUp: Pushing Tracked Time to Tasks
- Client Sharing: What Your Client Can See
- Consent: Requesting Consent from Your Team
- Consent: Responding to a Consent Request
- Creating and Deleting Projects
- Deactivating and Reactivating Employees
- Downloading Accounting Reports
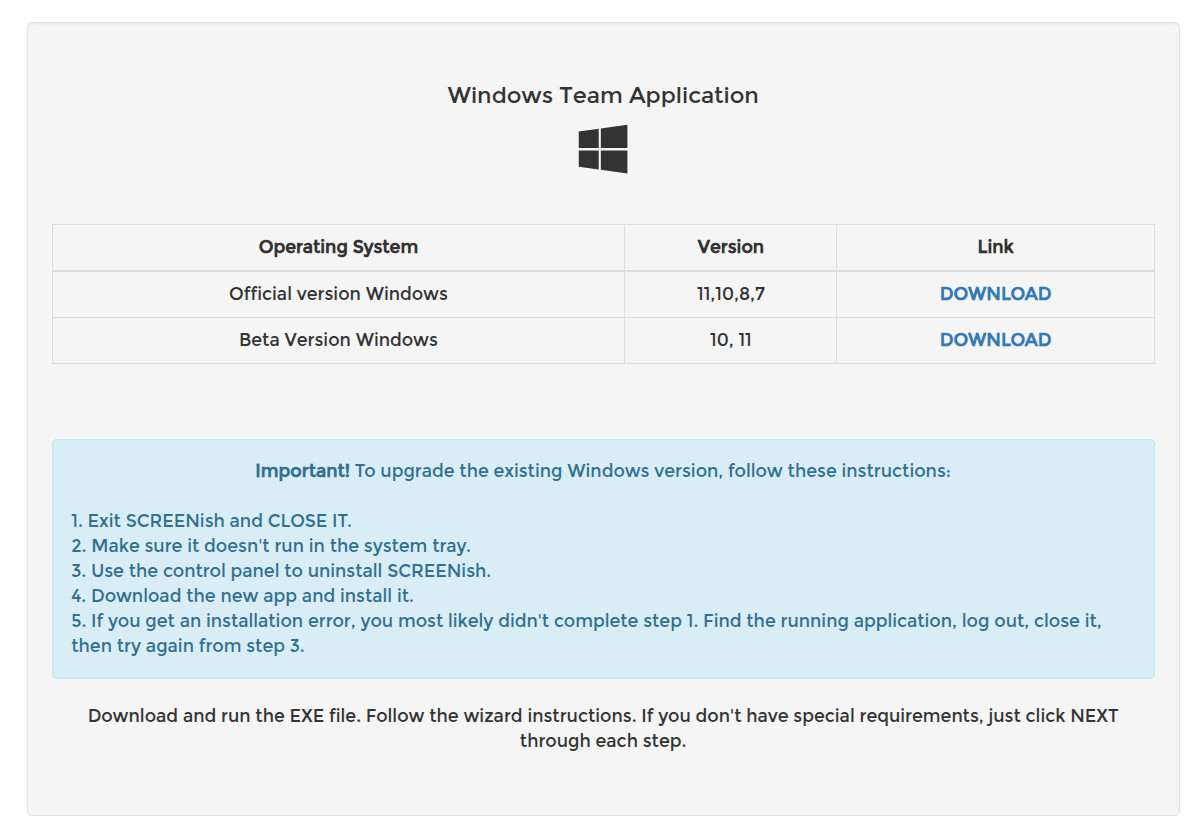
- Downloading the SCREENish App
- Enabling Manual Time Entry
- Face Recognition: Approving Employee Photos
- Face Recognition: Enabling It for an Employee
- Face Recognition: How It Works
- Face Recognition: Setting the Match Rate
- Face Recognition: Setting Up Your Photo
- Face Recognition: What Employees See
- Finding Pending Invitations
- Fixing System Time Errors
- Getting the App Again
- Google Calendar: Showing Tracked Time as Calendar Events
- Google Sheets: A Live Timesheet That Updates Itself
- How to Invite Employees
- Installing SCREENish on Mac
- Inviting Your Team
- Jira: Pushing Tracked Time to Issues
- Linux: Wayland Screenshot Support
- Low Memory: Freeing Up Space on the Windows System Drive (C:)
- Low Memory: Turning On Virtual Memory (Pagefile) in Windows
- Low Memory: What the Warning Means and How to Fix It
- Mac: Fixing Activity Tracking Issues
- Mac: Fixing Screenshot Issues
- Making an Employee a Delegated Manager
- Managing Email Report Subscriptions
- Microsoft Teams, Discord and Google Chat: Getting SCREENish Alerts
- Monitoring Employee Work
- Premium Hours: Paying a Higher Rate for Set Hours
- Project Monitoring Options: Allow Diagnostic Collection
- Project Monitoring Options: Screenshots, Programs and Idle Time
- Project Monitoring Options: When Setting Changes Take Effect
- Projects: Requiring the Latest App Version (Blocking the Legacy App)
- Projects: The Complete Guide
- QuickBooks Time and Payroll: Exporting Timesheets
- Registration
- Removing a Project from an Employee
- Renaming a Project
- Reviewing Your Work Log (Employee View)
- Screenshots: Capturing All Monitors
- Screenshots: Choosing a Privacy Blur Mode
- Screenshots: Deleted and Idle Markers in Work Logs
- Screenshots: Deleting Your Own Screenshots
- Screenshots: When Smart Blur Blurs the Whole Screen
- Securing Your Account with Two-Factor Authentication
- Setting Employee Hourly Rates
- Setting Up Distraction Rules
- Setting Up Email Payroll Reports
- Setting Weekly Time Limits
- Setting Your Default Currency
- Setting Your Time Zone
- Sharing Project Progress with Clients
- Slack: Getting SCREENish Alerts in a Channel
- Starting Time Tracking (Employee View)
- Startup Wizard: Setting Up Your Team on First Sign-In
- Team Huddle: Calls, Chat and Files
- Team Overview: Choosing Which Widgets You See
- Team Overview: Integrity Signals (Idle, Manual Time, Activity Index)
- Team Overview: Rankings and the 7-Day Trend
- Team Overview: Staff Coverage by Hour
- Team Overview: The Monthly Attendance and Overtime Report
- Team Overview: Your Whole Team on One Page
- Tracking Salaried Employees
- Tracking Your Own Time: Setting Up as a Freelancer
- Trello: Pushing Tracked Time to Cards
- Using Active Programs Reports
- Using Notes and Reminders
- Using the Idle Time Feature
- Using the Prevent Distractions Feature
- Video Presentations and Screen Sharing
- Viewing Active Employees
- Viewing Employee Payroll
- Viewing Hours Spent on a Project
- Viewing Project Payroll
- Viewing Team Workflow
- Viewing Your Total Hours (Employee View)
- Windows: Fixing the 0xc0000142 Startup Error
- Work Logs: Camera Notices During Face Verification
- Work Logs: Machine and System Info
- Workforce Monitoring Notice: The Screen Workers See at Sign-In
- Zapier, Make and n8n: Automating SCREENish Without Code
About SCREENish Time Tracking
SCREENish is time tracking software with screenshots for remote, hybrid and in-house teams. A lightweight desktop app for Windows, Mac and Linux records the hours your employees work, takes periodic screenshots, and measures activity and idle time — and the employer dashboard turns all of that into work logs, attendance and overtime reports, payroll and invoices. Teams in the field can use phone tracking instead of the desktop app.
How tracking works
An employee downloads the app, logs in, picks a project and presses start. While the timer runs, the app captures screenshots at random moments within each 10-minute interval — on every monitor, with an optional privacy blur — and records activity as input counts (clicks, keys, scrolling), never what is actually typed. Idle periods are detected automatically, and employees can attach notes describing what they worked on.
What managers see
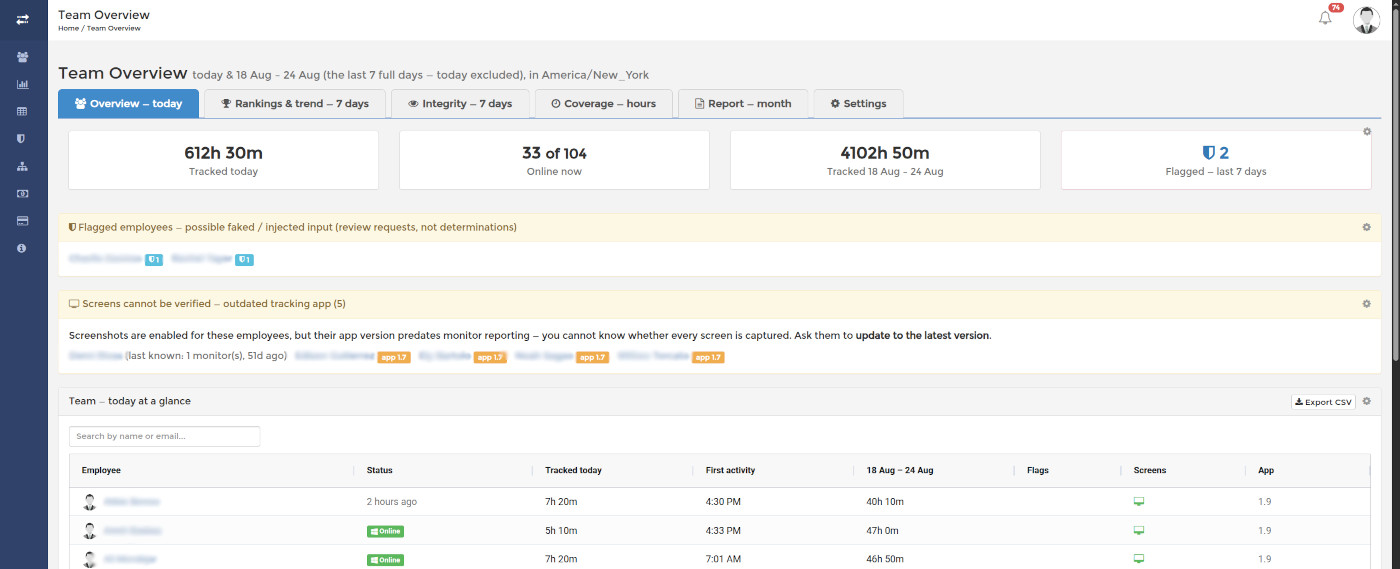
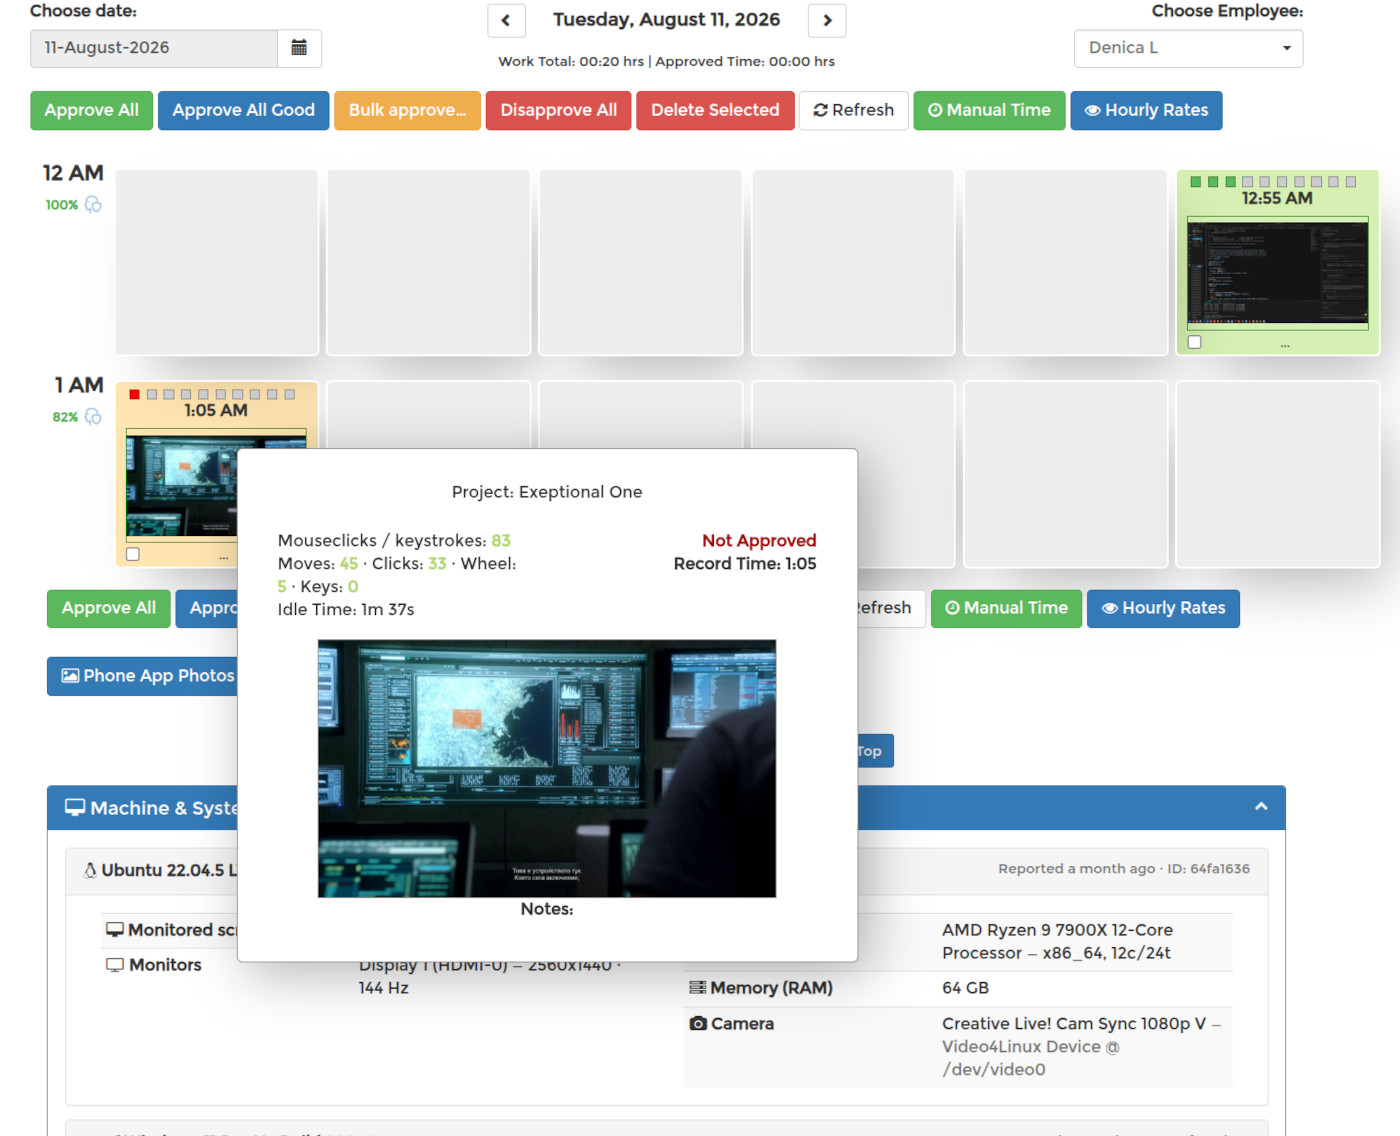
The work log shows every employee's day slot by slot: screenshots, activity level, idle time, notes and the programs they used — see Checking Employee Activity and Productivity. The Team Overview page puts the whole roster on one screen — who is online, who started when, rankings, integrity signals and staff coverage by hour — and the monthly attendance and overtime report automates the end-of-month sheet: worked and missed days, attendance percentage, weekday and weekend overtime.
Projects, rates and rules
Everything is controlled per project and per employee: hourly rates, weekly hour limits, whether manual time entries are allowed, which monitoring options run (screenshots, program reports, idle reports), and distraction reporting that measures the time spent on marked websites and apps. Projects: The Complete Guide walks through every option, and this guide explains when setting changes take effect.
Payroll and billing
Tracked hours multiplied by the rates you set become payroll per employee and per project, and your subscription invoices are always available in the dashboard.
Getting started
Invite your employees by email, assign them projects, and tracking starts with their first timer. One principle runs through the whole product: the numbers suggest — flags, indexes and thresholds are requests to look closer, and a human always decides.
Activity Review: Checking Unusual Activity
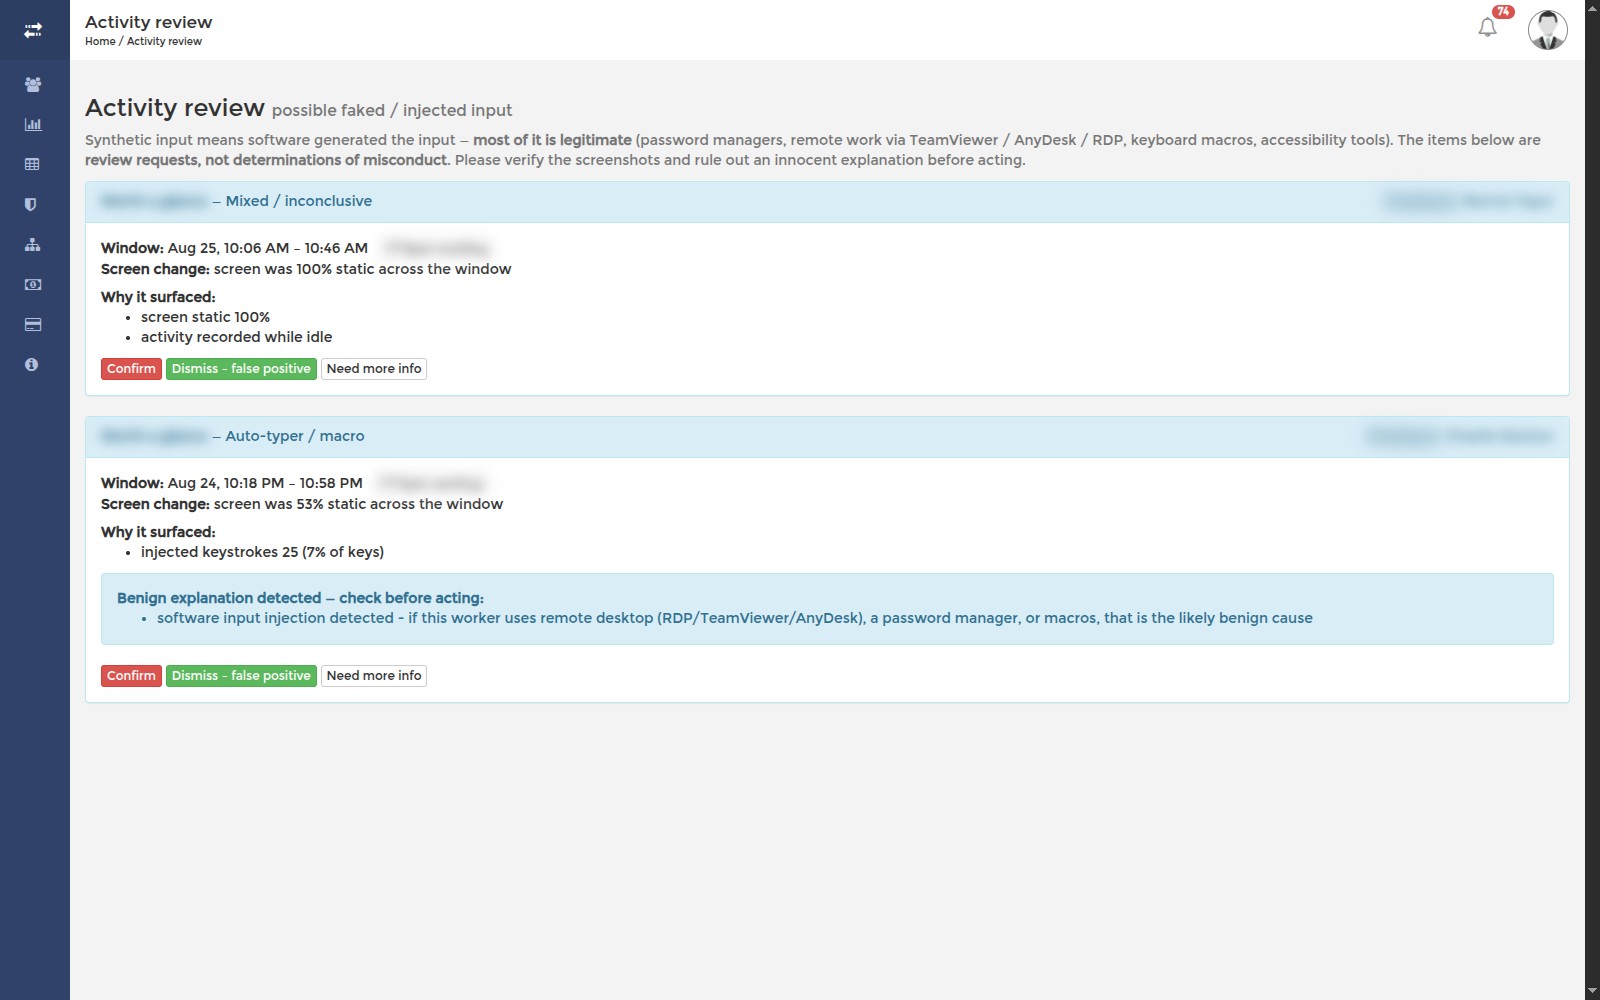
SCREENish can flag a stretch of tracked time that looks like it may have been produced by an auto-clicker, a mouse jiggler or a similar tool. Anything it notices goes to Activity review for a person to look at. It is never an automatic accusation — no time is rejected and nobody is penalised unless you decide to act.
Each card explains Why it surfaced. When there is a legitimate reason for what was seen, such as a remote-desktop session, the card says Benign explanation detected — check before acting. Take that seriously: it usually means nothing is wrong.
Read the card, open the screenshots, then choose Confirm, Dismiss – false positive, or Need more info. When in doubt, talk to the person before you confirm anything.
Adding a Payment Method
Go to SUBSCRIPTION and click ADD PAYMENT METHOD. We accept Visa, Mastercard, Maestro, and Discover.

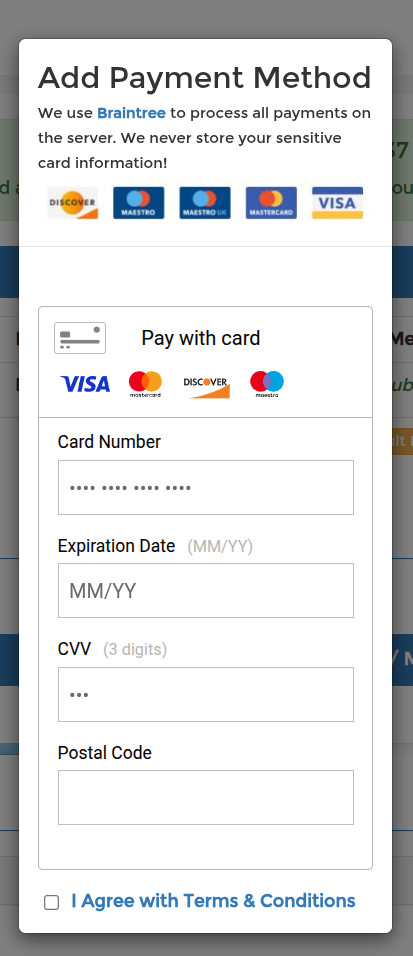
Fill out the form, agree to the Terms of Service, and click ADD PAYMENT METHOD. That's it!
Open as its own page TopAdding a Project Description
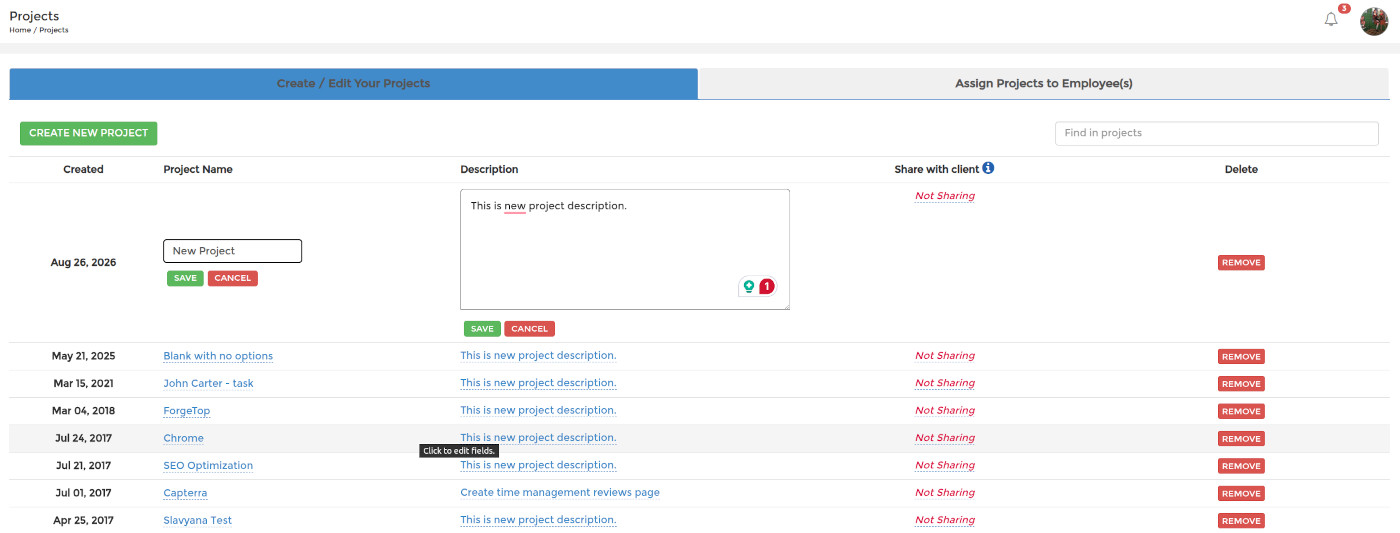
In the PROJECT menu, click on the project description field to edit it. Click Save when done, or Cancel to discard changes.
Android GPS Tracking
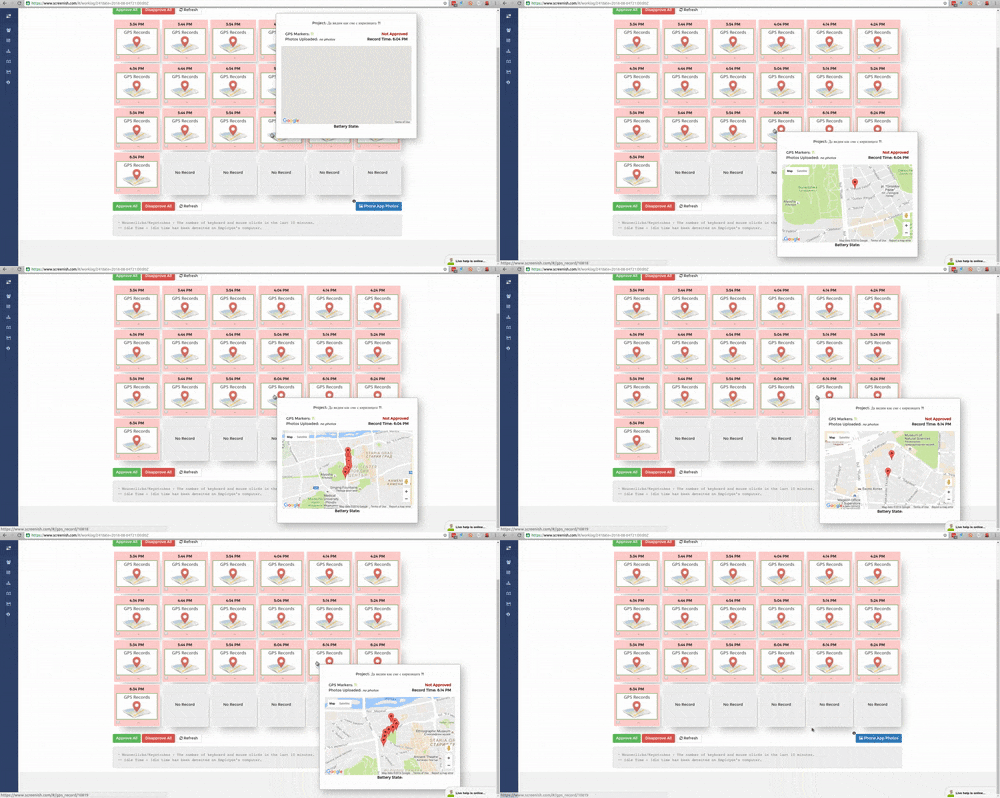
For employees using the Android Time and GPS tracking app, go to WORK LOGS, select an employee and date. You'll see their recorded activity including location, time, notes, and photos. Approve or reject time entries as usual.
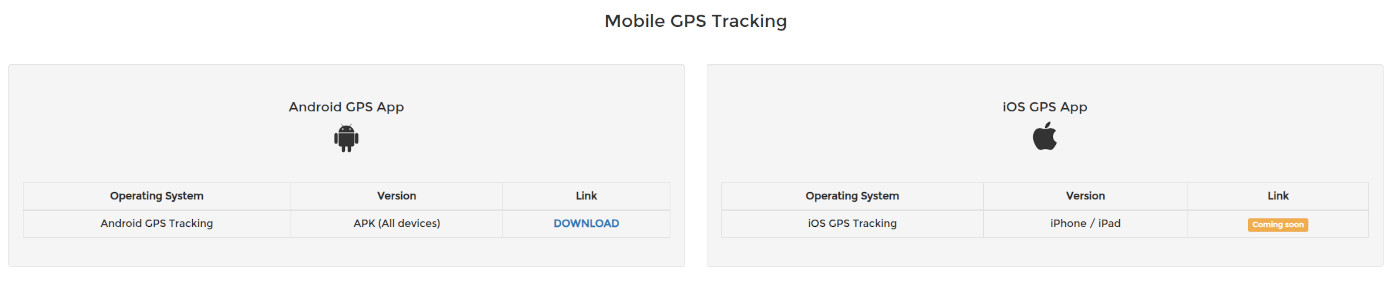
Employees install the Android app from the Downloads page — a single APK that runs on all devices; an iOS version is coming soon. See Downloading the SCREENish App.
API & Integrations: Connecting SCREENish to Your Other Tools
API & Integrations in the left menu is where SCREENish meets the rest of your stack. From that one page you can send alerts into a chat channel, push tracked time into Jira, ClickUp or Trello, subscribe a calendar or a spreadsheet to a live feed, download a timesheet for your accountant, and issue API keys for your own software. Everything is created there, and everything can be revoked there.
Before the first connection: the API access terms
The first time you open the page SCREENish shows the API access terms. Tick the box and press Accept. The acceptance is recorded with the version, the moment and who accepted it on behalf of the organisation, and until it is given no key, connection or feed link can be created. The text stays available afterwards from the Show the text link under the heading.
The five routes out
- Chat alerts. A readable message in Slack, Microsoft Teams, Discord or Google Chat when someone starts or stops tracking, when an activity review opens, or as a daily summary. See Slack: Getting SCREENish Alerts in a Channel.
- Time push. Approved time lands as a Jira worklog, a ClickUp time entry or a Trello comment, once an hour, per member and day.
- Feeds. A private link your calendar or spreadsheet refreshes on its own: calendar events or a live timesheet.
- Accounting exports. A CSV timesheet for a period, ready for QuickBooks Time or a payroll import. See QuickBooks Time and Payroll: Exporting Timesheets.
- API and webhooks. An API key for your own software, and signed webhooks for Zapier, Make and n8n or anything you write yourself.
What leaves SCREENish, and what never does
Every route above carries the same narrow set: hours, activity counts, member and project names, and verdicts — an activity review was opened, a face check passed or failed. None of them carries screenshots, application names, window titles, biometric data or pay rates. That is clause 3.5 of the Data Processing Agreement, and no key, connection or feed link can widen it. A destination you configure is your recipient: once a message reaches your Slack workspace or your Jira site, what happens to it is governed by your agreement with that provider.
Who can set it up, and what is recorded
- The page needs an active subscription. Delegated managers who reach the dashboard see the same page and the same buttons.
- Recent activity at the bottom lists every change — a key created or revoked, a connection added, paused or removed, a feed link issued, terms accepted — with the time and who did it.
- Keys, connections and feed links live with the account. Closing the account erases the stored credentials.
Secrets are shown once
An API key, a webhook signing secret and a feed link are each displayed once, in a yellow box at the moment they are created. Copy them then. If one is lost, revoke it and create another — SCREENish cannot show it again.
The technical description of every endpoint, parameter and header lives on the developers page.
Open as its own page TopAPI Keys: Creating, Limiting and Revoking Them
An API key lets your own software read hours, members, projects and activity out of SCREENish, and — with the wider scope — write manual time back. Create one under API & Integrations > API keys: type a label, choose the scope, press Create key. The key appears once, in a yellow box, with a Copy button. It is never displayed again.

The two scopes
- Read only — the account, team members, projects, time entries, timesheets, activity, activity reviews and face-check verdicts. This is the right choice for a dashboard, a report or a spreadsheet job.
- Read + write — the same, plus creating manual time entries and managing webhook subscriptions. Automation platforms that register their own webhook need this one.
Limiting a key to your servers
The Allowed addresses field takes a list of IPv4 or IPv6 addresses, or ranges in CIDR form (203.0.113.5, 10.0.0.0/8). From anywhere else the key is refused, even though it is valid. Leave the field empty and the key works from any address. Use it whenever the caller is a server with a fixed address; skip it for a laptop or a cloud automation whose addresses change.
Using the key
Send it as a bearer token in the request header:
Authorization: Bearer sk_live_...
A key passed in the address bar as a query parameter is refused even when correct, so that it never ends up in a server log or a browser history.
Seeing what a key did
Press Activity on a key's row. Every call it has made is listed: the moment, the address it came from, the endpoint, the filters used, the answer's status, how many records were returned and how long it took. The key's row itself shows when it was last used and how many times. This is the record to reach for when you want to know what a vendor's integration has actually been reading.
Limits
- 120 requests a minute per key. Beyond that the answer is a 429 with the seconds to wait; every answer carries the remaining budget in its headers.
- A request may span at most 92 days, and lists return up to 200 rows a page.
- A key works while the account has an active subscription, and is deleted when the account closes.
Revoking
Press Revoke. The key stops working immediately and stays in the table, greyed out and dated, so the record of what it did is not lost. Revoke and re-create rather than reuse when a key has been pasted somewhere public, when a contractor leaves, or when you simply cannot find it — there is no way to display an existing key again.
Endpoint-by-endpoint documentation, with parameters and answer shapes, is on the developers page; the machine-readable description is at /api/v1/openapi.json.
Open as its own page TopApp Sign-In: "This app version is no longer allowed by your employer"
If the SCREENish app shows This app version is no longer allowed by your employer when you sign in, your employer now requires the latest version of the time tracking app. Your account and password are fine: install the current app and sign in again. Your projects, settings and tracked time are kept.
How to update to the latest version
- Open www.screenish.com in a browser and sign in with the same email and password you use in the app.
- Open Downloads in the left menu.
- Download the current app for your system: on Windows the Official version Windows row (Windows 10 and 11); on macOS the Official App MacOS universal build; on Linux the AppImage.
- Install it and open it. You can uninstall the old app afterwards.
- Sign in with your usual email and password and start the timer as before.
The current app keeps itself up to date, so this message does not come back after future releases.
If you cannot install the current app
- Windows 7 or 8. The current app runs on Windows 10 and 11 only. Tell your employer: they can allow the legacy app for you with one click (Allow legacy app on their Projects page), and you keep using the Legacy version Windows download.
- No permission to install software. Ask your IT administrator to install the current app from the Downloads page, or ask your employer to allow the legacy app while that is arranged.
- You work for more than one company. The message means at least one of them requires the latest version. Updating once covers all of them.
A different message, Wrong Credentials, means the email or password is wrong, not the app version. See Downloading the SCREENish App for every download option.
Open as its own page TopApprovals: Applying Your Rule to Past Screenshots
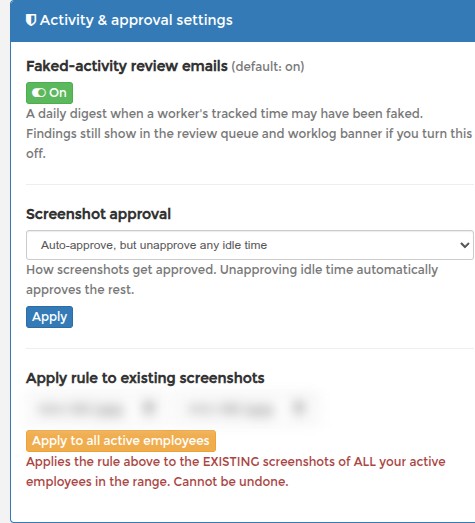
Your approval rule only affects screenshots that arrive after you save it. To apply it to screenshots you already have, go to EDIT PROFILE > Activity & approval settings > Apply rule to existing screenshots.
Choose a start and end date, then press Apply to all active employees. SCREENish walks the existing screenshots of every active employee in that range and applies the rule you saved above. With an idle option, windows with no keyboard or mouse activity are unapproved too. Manual time entries are left as they are.
This cannot be undone. Try a single day first and check the result in WORK LOGS before you run a longer range. To redo one person only, with a different idle choice, use Approvals: Bulk Approving One Worker instead.
Approvals: Automatic Screenshot Approval
You do not have to approve every screenshot by hand. Go to EDIT PROFILE > Activity & approval settings > Screenshot approval and pick one:
- Manual — I approve screenshots myself (default)
- Auto-approve all screenshots
- Auto-approve, but unapprove heavy idle (> 7 min) and no activity
- Auto-approve, but unapprove any idle time and no activity
Press Apply to save. Unapproving idle time automatically approves the rest, so you only review what actually needs a look.
Both idle options also unapprove every window with no keyboard or mouse activity at all, whatever its idle time. Auto-approve all screenshots still approves everything. Manual time entries are never changed by the rule.
If every window of a worker shows no activity, their app is not counting it. On a Mac this means a missing permission, see Mac: Fixing Activity Tracking Issues. On other systems, update the app.
The rule applies to screenshots that arrive from now on. To cover screenshots you already have, see Approvals: Applying Your Rule to Past Screenshots.
Approvals: Bulk Approving One Worker
To approve a single worker's existing screenshots, open their WORK LOGS and press Bulk approve. Pick a From and To date and choose how idle time is handled:
- Approve all screenshots — including idle time.
- Approve, but reject idle over 7 minutes and no activity
- Reject any idle time and no activity — approve active time only.
Both reject options also reject windows with no keyboard or mouse activity at all. Manual time entries are not affected.
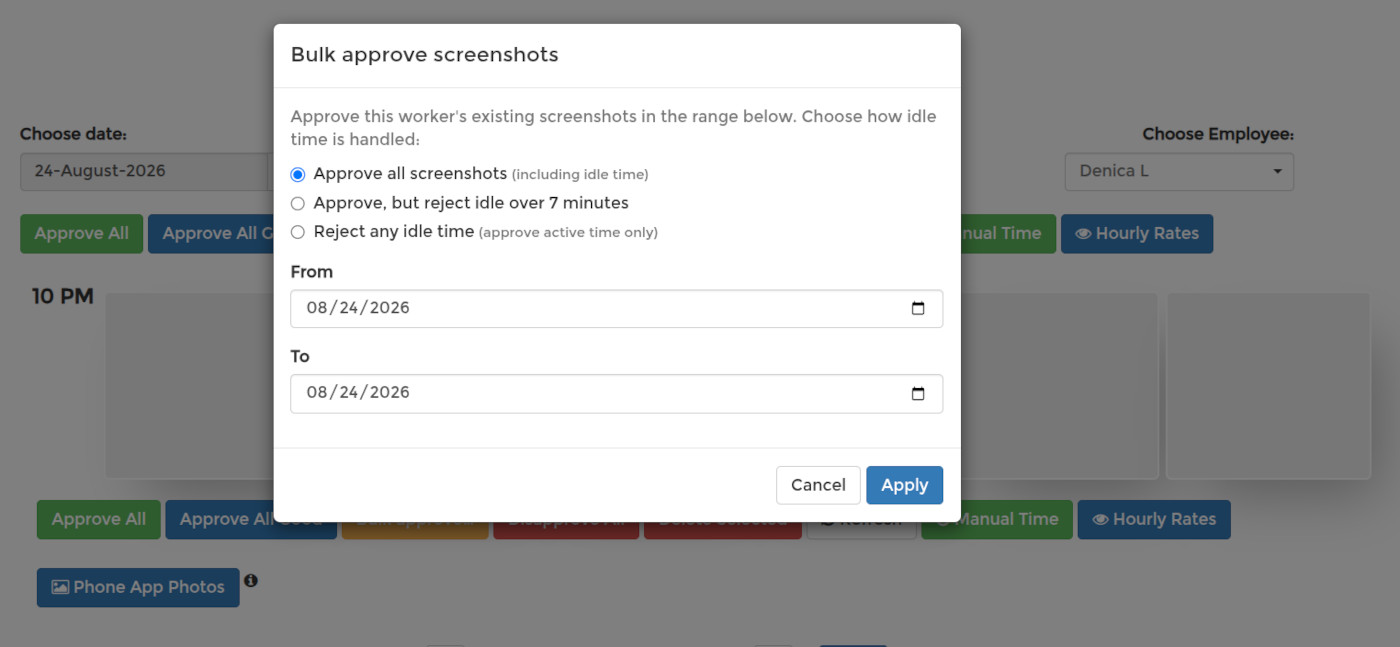
The choice you make here applies to this run only — it does not change, and is not taken from, the rule saved in your profile. Press Apply to finish. It cannot be undone.
For a quick pass instead, Approve All Good approves only the windows that recorded activity and no idle time.
Open as its own page TopApproving or Rejecting Work
In WORK LOGS, review screenshots and activity data, then approve or reject time entries using the checkboxes. Use Approve All or Disapprove All to handle multiple entries at once.
Assigning a Project to an Employee
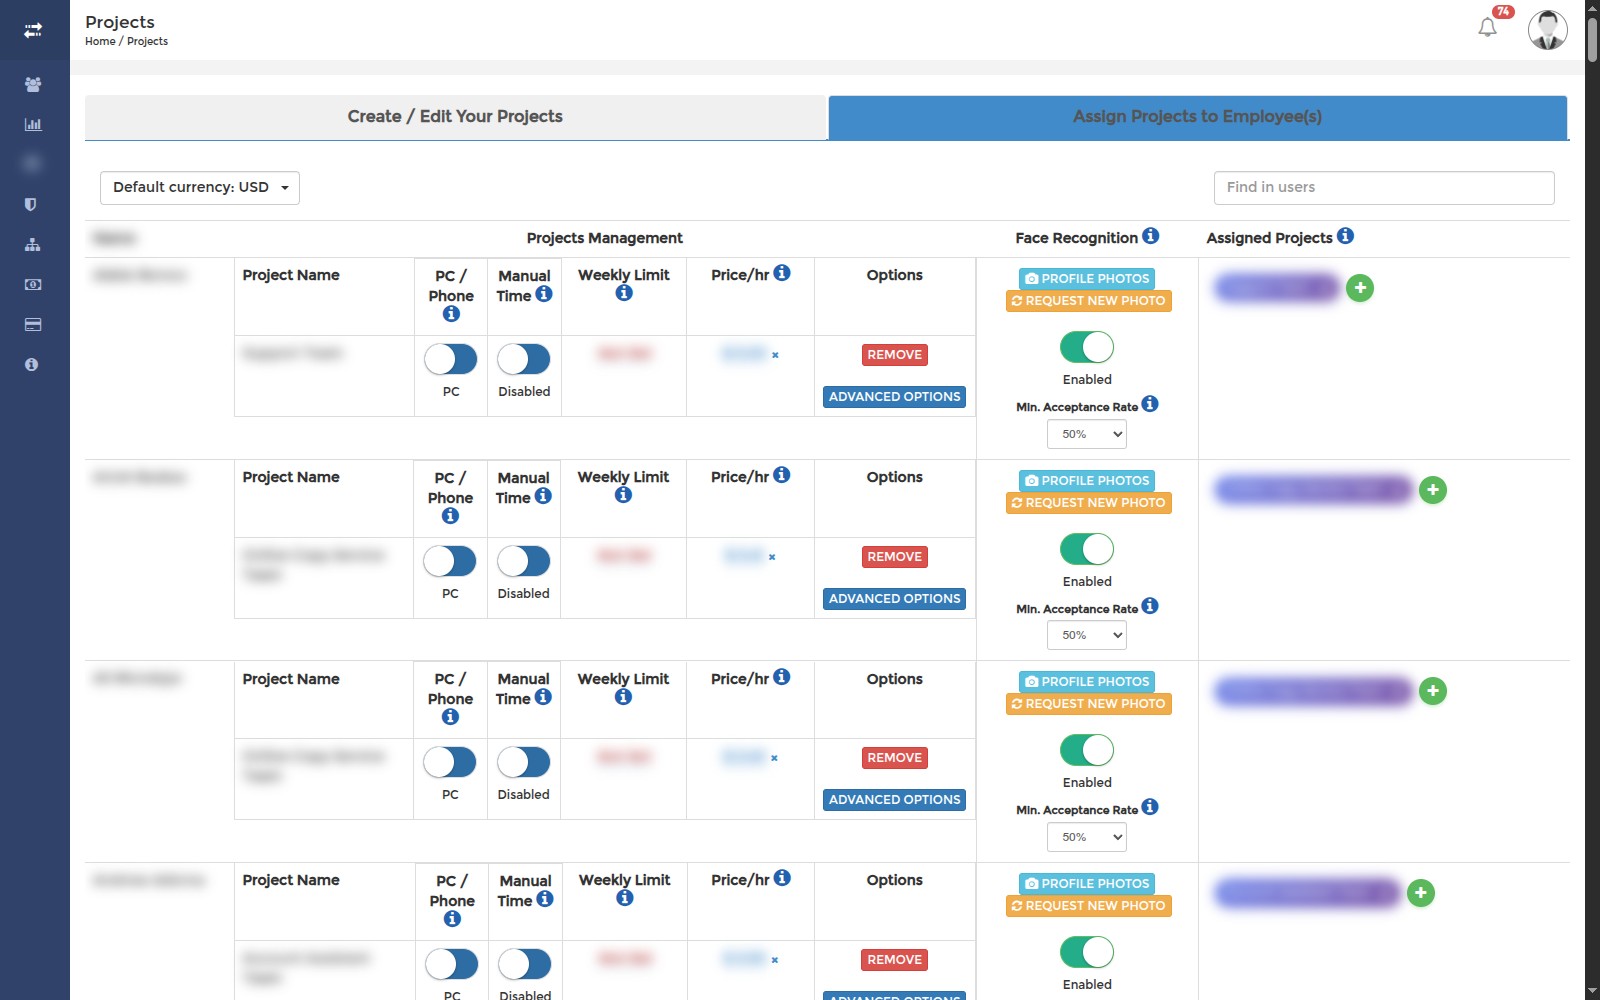
In the PROJECT menu, open the Assign Projects to Employee(s) tab. Find the employee and, in the Assigned Projects column, click the green + button. Pick the project from the list — a search box appears when you have more than ten projects, and projects the employee already has are grayed out.
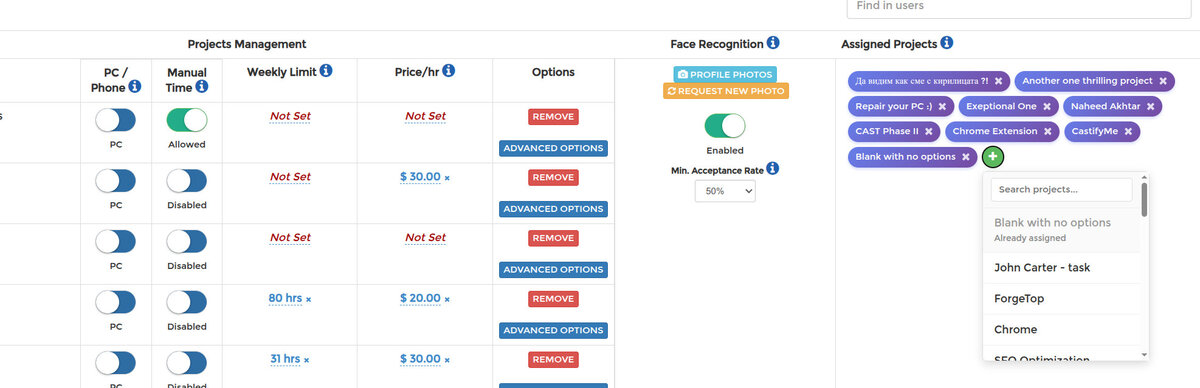
The project appears as a pill next to the employee's name, and the employee is notified by email. Ask them to log out of the time tracking application and back in so the new project shows up there.
Billing: Company Details on Your Invoices
The details printed on your invoices come from your profile, so fill them in before your first payment. Go to EDIT PROFILE > Company & Personal Info.
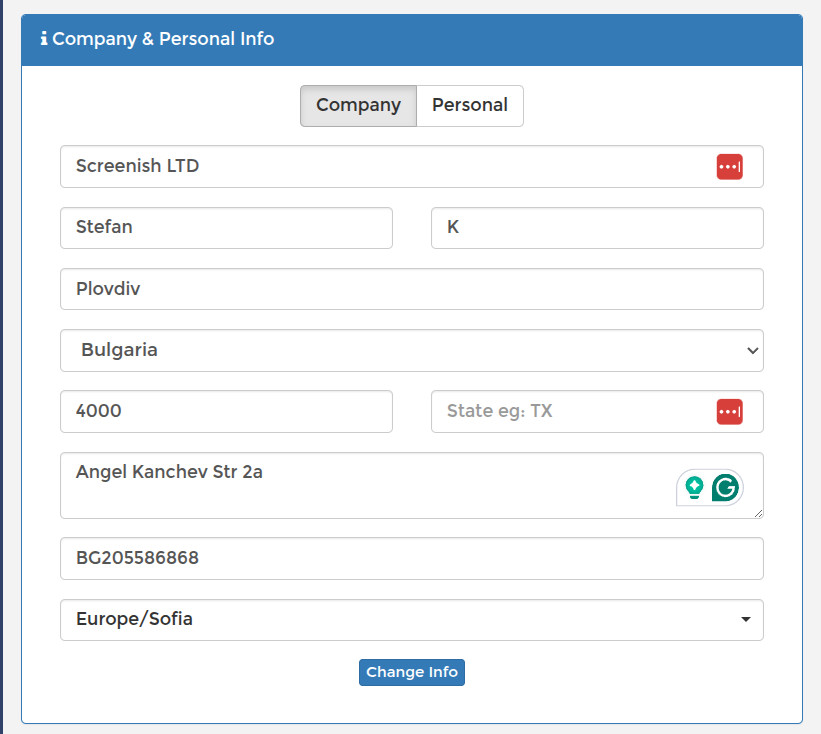
- Choose Company or Personal.
- Fill in the name, Address, City, State and Postal.
- Businesses in the EU should add a VAT ID — for example BG205586868.
Save when you are done. Anything you change here appears on invoices issued from that point on, so it is worth getting right early. Check your Time Zone in the same panel too — it affects how invoices, payrolls and graphs are dated.
Open as its own page TopBilling: Finding Your Invoices
Open INVOICES to see your Monthly and proration invoices. Each line shows the date and the amount charged; click Invoice on the right to open a printable copy in a new tab.

An invoice number is issued only when a payment actually goes through. If you are still on trial, or a card has been declined, the charge has no invoice yet — that is normal and nothing is missing.
If you have just been charged and the list still says No Invoices just yet, give it a little time: it can take a while before the latest invoices show up here.
Open as its own page TopChanging Hourly Rates Retroactively
Need to update rates for past work? Use the Change Hourly Rates Tool.
Select an employee, set the date range, choose which projects to update, and enter the new rate. Check Adjust Project prices accordingly to update future rates too.
You'll see a summary before confirming. An email notification logs all changes for security.

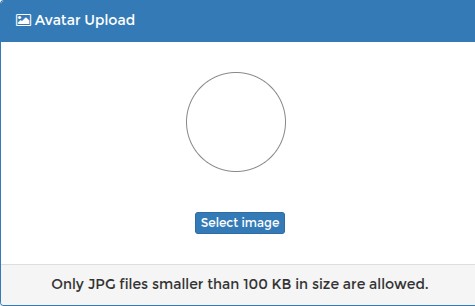
Changing Your Avatar
Click the profile icon in the top right corner and select Edit profile. Click Select Image to upload a new avatar.
Changing Your Email Address
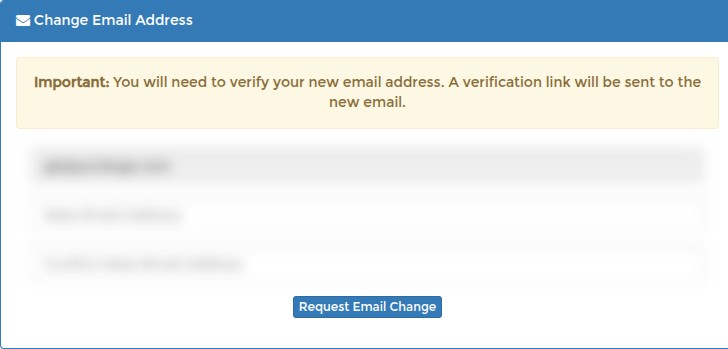
Your email address is your login and where SCREENish sends reports and alerts. To change it, go to EDIT PROFILE > Change Email Address.
- Type your New Email Address, then repeat it in Confirm New Email Address.
- Save the change.
You must verify the new address. SCREENish sends a verification link to it — open that email and click the link to finish. Until you do, your old address stays active, so nothing breaks if you mistype.
Changing Your Name
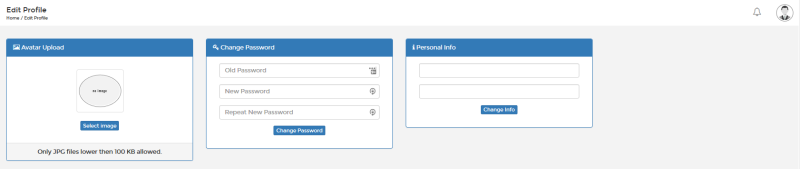
Click the profile icon in the top right corner and select Edit profile. Update your name in the Personal Info section and click Change Info.
Changing Your Password
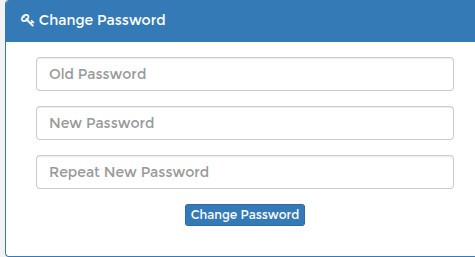
Click the profile icon in the top right corner and select Edit profile. Enter your old password and new password, then click Change Password.
Checking Employee Activity and Productivity
In WORK LOGS, select an employee and date to see their recorded activity. Screenshots are captured randomly (5-10 per interval) every 10 minutes and stored for 45 days.
Click on any screenshot to see keyboard/mouse activity, idle time, and employee notes. Hover for a quick preview, or click for the full-size image. You can also view Active Programs used during that time.
Checking Employee Working Hours
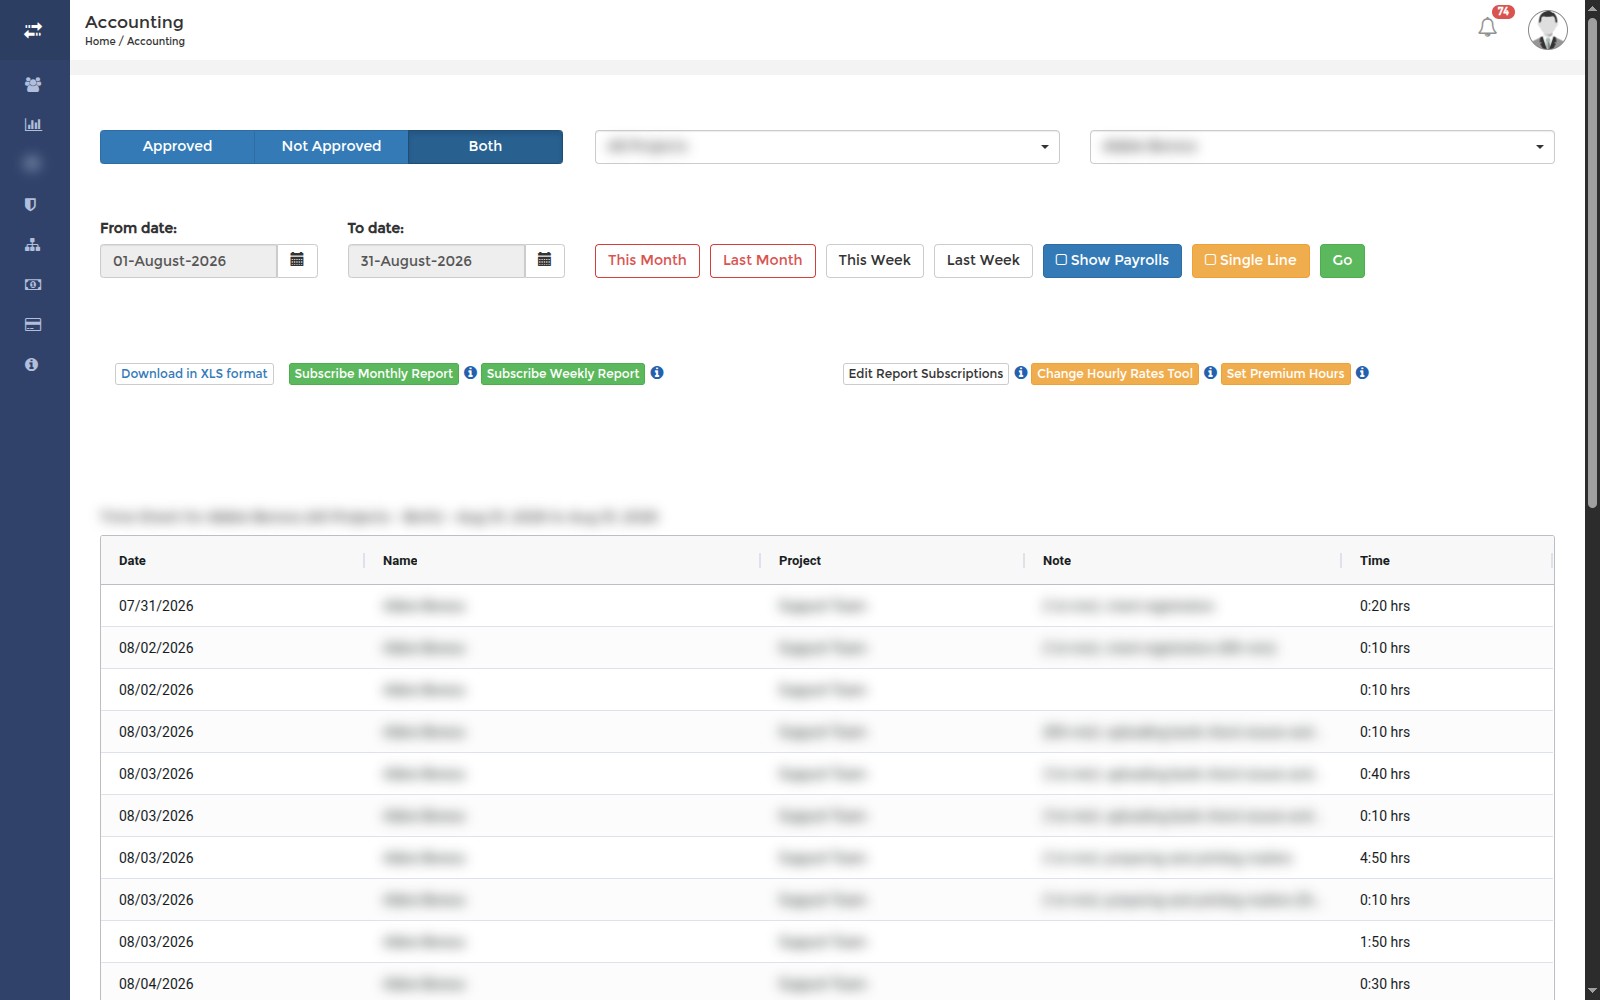
Go to ACCOUNTING and select an employee from the dropdown. Set a date range using From date and To date, or click This week or This month for quick selection. Choose Approved, Disapproved, or Both to filter results.
Choosing PC or Phone Tracking for a Project
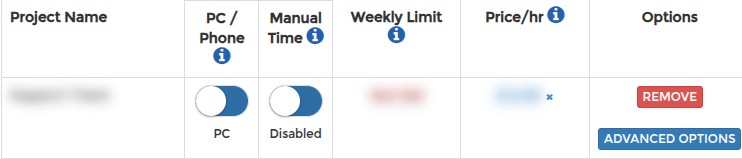
Each project you assign to an employee is tracked either from the desktop time tracking application (PC) or from the phone — never both at once. Go to PROJECT > Assign Projects to Employee(s), find the project in the employee's Projects Management table and flip the PC / Phone switch.
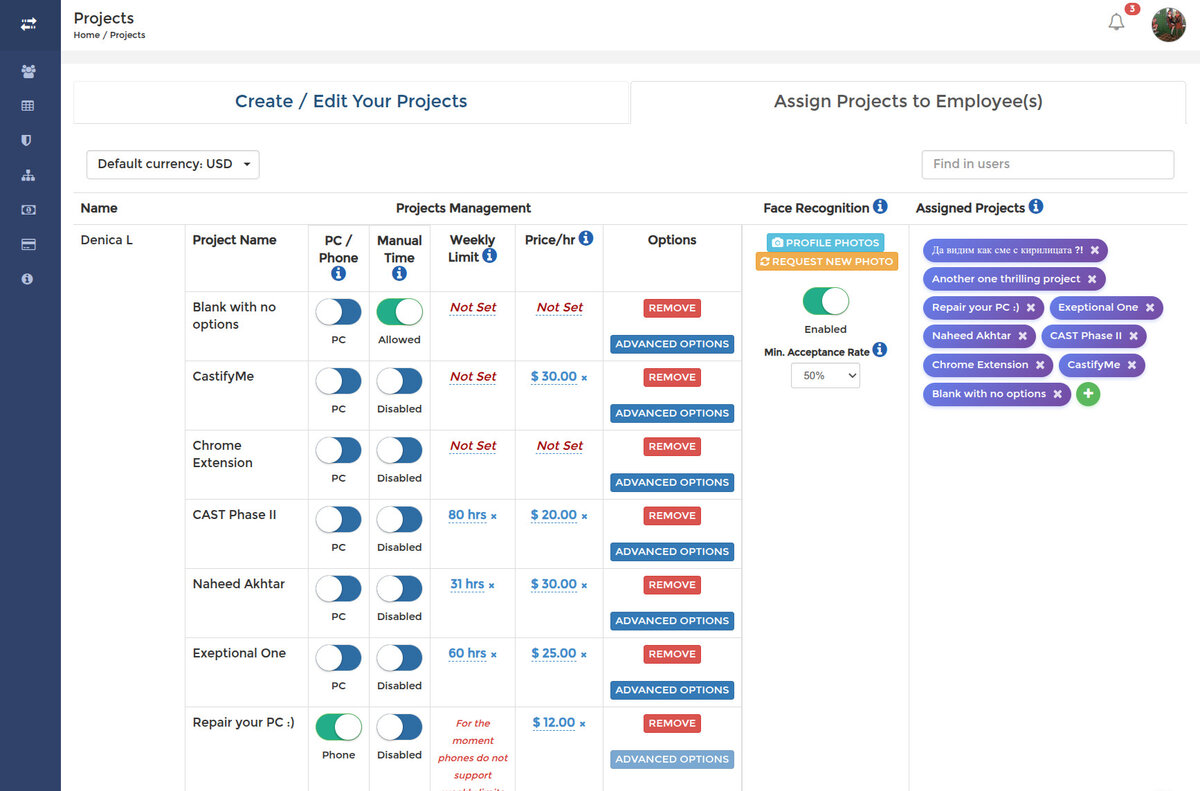
Phone tracking is meant for mobile teams and records GPS location instead of screenshots — see Android GPS Tracking. Two things to keep in mind about phone projects:
- Weekly time limits are not supported for phone tracking at the moment.
- The Advanced Options panel (screenshots, program reports, idle time, distraction reporting) applies to PC tracking only.
After switching, ask the employee to log out of the tracking application and back in so the change takes effect.
Open as its own page TopChoosing Your Subscription Plan
After registering, you'll choose your subscription plan.
Your first 10 days are free. If SCREENish isn't right for you, just leave before day 11—no payment info required. If you don't add a payment method by then, we'll close your trial account automatically.
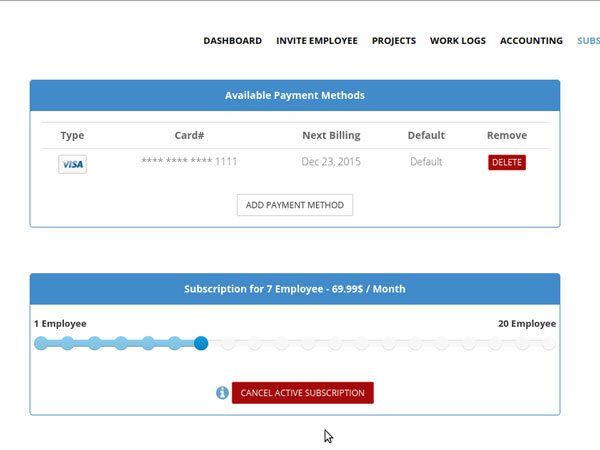
When you first log in, you'll see the SUBSCRIPTION page with a slider. Use it to select how many team members you want to track, then click Subscribe.
Done!
Chrome Extension: Choosing the Project Manager and Project
Before it can track time, the SCREENish Chrome extension asks the employee to choose a Project Manager and a project. Both lists are filled from the employer's dashboard — the employee sets nothing up on their side, and there is nothing to assign for the Project Manager.
Project Manager is the employer — the company whose team the employee belongs to. Once the employee has joined that team through the employer's invitation, the employer is offered as the Project Manager automatically. There is no setting that appoints a person as Project Manager, and an employee cannot be their own. If the list is empty, the employee has not joined the team through the invitation yet, or they were deactivated: restore them under USERS > Deactivated Employees.
Project is any project the employer has assigned to that employee in PROJECT > Assign Projects to Employee(s) — see Assigning a Project to an Employee. The extension is offered the same projects as the desktop time tracking app. Two things keep a project off the list:
- It is not assigned to this employee yet. Only assigned projects are shown.
- It is set to Phone tracking. A phone project is offered to neither the extension nor the desktop app — see Choosing PC or Phone Tracking for a Project.
There is no separate Chrome extension setting per project any more. Older advice to switch a project to Chrome, or to designate it as an extension project, refers to a switch that was removed in July 2026; assigning the project is all it takes.
After you assign or change a project, ask the employee to sign out of the extension and sign in again — the lists are refreshed at sign-in, so the new project appears from the next one. They can then pick the Project Manager and the project and press START TRACKING TIME, as described in Chrome Extension: Getting Started.
Open as its own page TopChrome Extension: Fixing Clock Errors
If the extension reports “Your device clock is N minutes ahead” (or behind), time tracking stops until the clock is fixed — correct timestamps are what make your tracked hours trustworthy.
The fix is to re-sync the system clock:
- Windows: Settings > Time & Language > Date & Time > toggle Set time automatically off and back on (or click Sync now).
- macOS: System Preferences > Date & Time > check Set date and time automatically.
- Linux / ChromeOS: enable automatic date & time in the system settings; on Linux sudo timedatectl set-ntp true does it from the terminal.
Everything recorded before the stop is safe and uploads automatically once the clock is correct and you press Start again. The desktop application shows the same alert — see Fixing System Time Errors.
Open as its own page TopChrome Extension: Getting Started
The SCREENish Chrome extension tracks time on any computer that runs Chrome — including Chromebooks — with nothing to install beyond the browser.
- Install the extension from the link your employer sent.
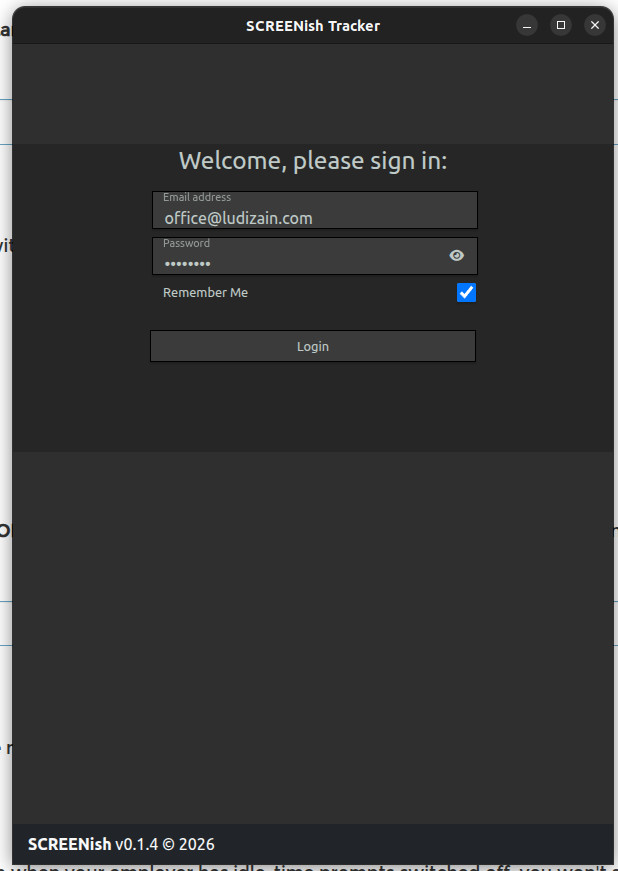
- Click the SCREENish icon in Chrome and log in with your employee account.
- Choose your Project Manager (your employer) and project, then press START TRACKING TIME. Missing a project? See Chrome Extension: Choosing the Project Manager and Project.
- Chrome asks which screen to share — select your screen and confirm.
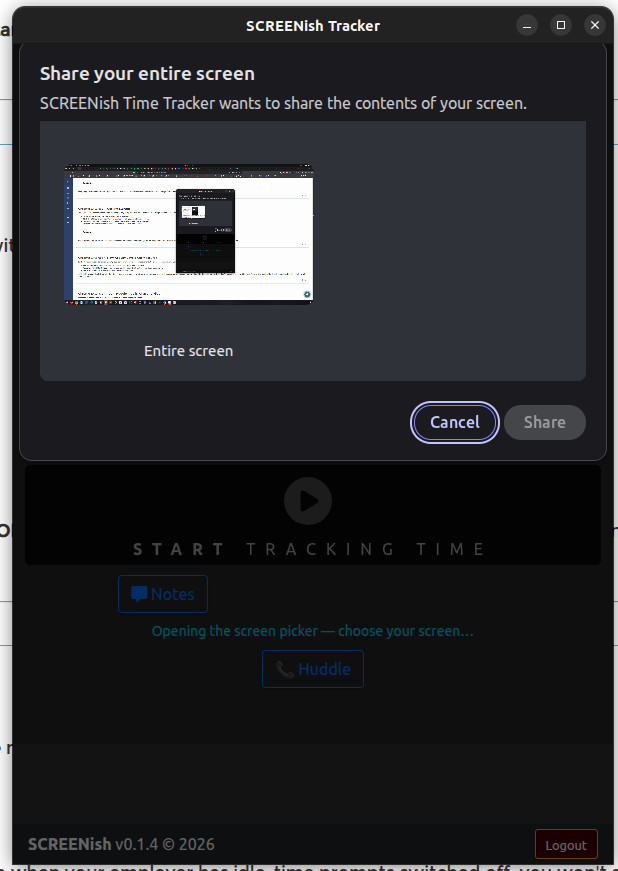
While tracking, the extension takes one screenshot per minute and reports your time every 10 minutes. Press STOP TRACKING TIME (or end the screen share) and tracking stops instantly.
Open as its own page TopChrome Extension: How Activity Levels Are Measured
Each 10-minute report carries an activity level so your employer sees engagement at a glance — without invasive monitoring.
- Active (400 activities) — the computer was in use for the whole window.
- Partially active (50 activities) — part of the window passed without keyboard or mouse input.
- Idle (0 activities) — the whole window passed without input.
Activity is measured only from whether the computer is in use — never from what you type or click. It works even when your employer has idle-time prompts switched off: you won't see any "Still there?" reminders and no idle time is deducted, but the activity level stays accurate.
Open as its own page TopChrome Extension: Team Huddle — Calls, Chat and Files
Press the Huddle button in the tracker to see which teammates are online.
- Chat 1:1 — messages are stored only on your own devices, encrypted.
- Start an audio or video call with one click. Calls are never recorded.
- Send files to teammates directly, device to device — they never touch SCREENish servers.
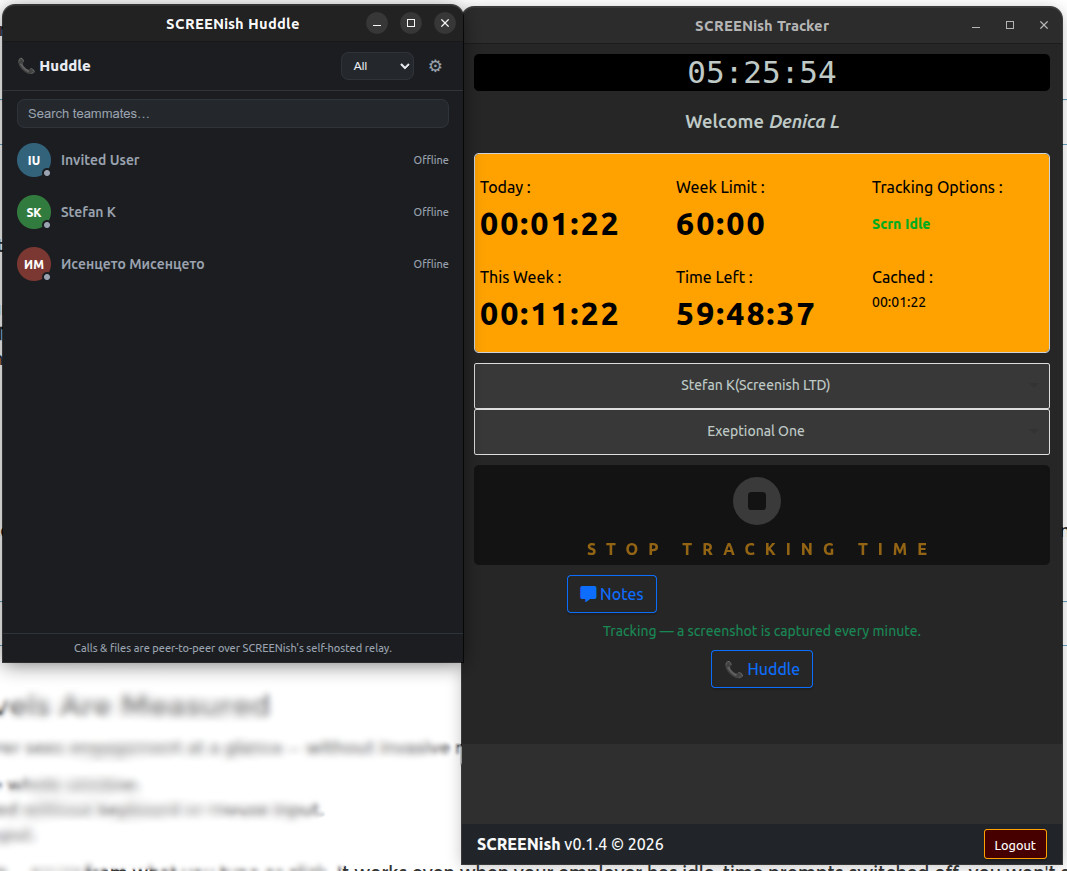
Incoming calls ring even while the huddle window is closed, as long as a project is selected.
Open as its own page TopChrome Extension: What It Records (and What It Doesn't)
While you track, the extension records screenshots of the one screen you chose, your work time, idle time and an activity level.
It does not record keystrokes, mouse clicks, browsing history, or the list of programs you use. Activity levels are derived only from whether your computer is in use. Screenshots and not-yet-reported time are stored encrypted on your computer until they upload to your employer's account, and screenshots are deleted automatically 3 months after capture.
Open as its own page TopChrome Extension: Working Offline
Lost your connection mid-work? Keep working. The extension keeps recording time and screenshots, stores everything encrypted on your computer, and uploads automatically when the connection returns — hours or even days later. Nothing is lost: your reports appear in WORK LOGS complete, exactly as if you had been online the whole time.
Open as its own page TopClickUp: Pushing Tracked Time to Tasks
Connect ClickUp under API & Integrations and SCREENish adds a time entry to a ClickUp task with each member's approved time on that project for the day. When a day changes because more entries are approved, the same time entry is updated, so a task never collects duplicates. Optionally an activity review opens a task of its own.
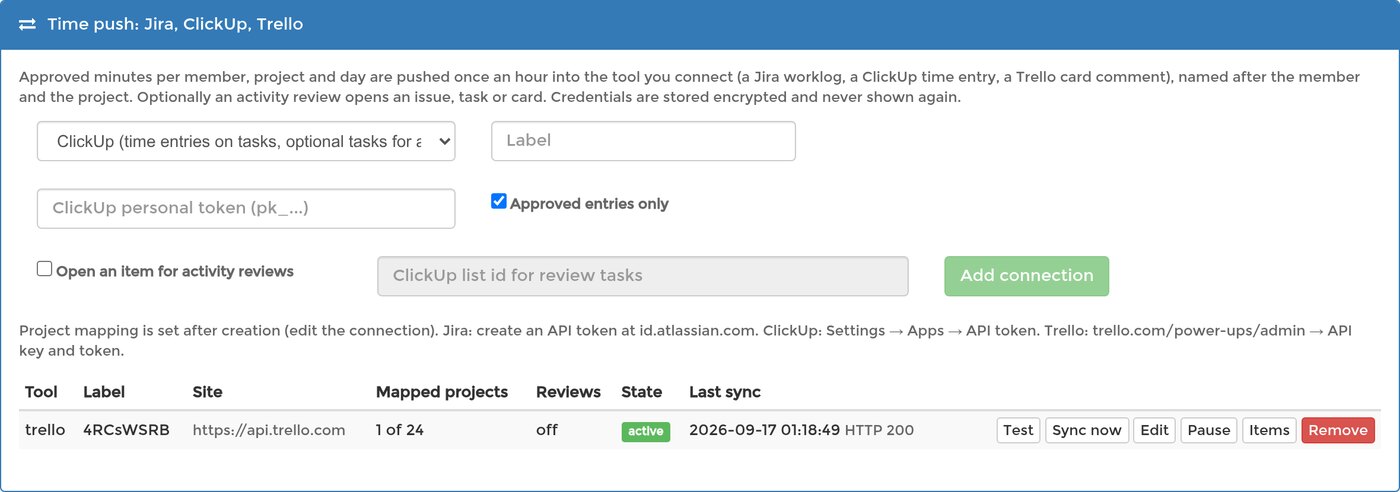
What you need from ClickUp
- A personal API token. In ClickUp open your avatar > Settings > Apps and generate a token — it starts with
pk_. The token acts as you in ClickUp, the time entries appear under your user, and you can regenerate it there at any time. SCREENish stores it encrypted and never shows it again. - The task id for each project. Open the task, use Copy ID from its menu (or take the part after
/t/in its address). One SCREENish project maps to one task.
Connecting
- Open API & Integrations in the left menu. If it is your first connection, accept the API access terms shown at the top.
- In Time push: Jira, ClickUp, Trello choose ClickUp, give the connection a label, paste the token, and press Add connection.
- Press Test before anything else: it reads Connected as your ClickUp username and, while doing so, finds your workspace. A sync attempted before the first successful test has no workspace to write to and says so.
- Press Edit, type the task id next to each project that should reach ClickUp, and press Save. Projects left empty are skipped. Then press Sync now.
What appears in ClickUp
Each mapped task receives one tracked-time entry per member and day, starting at that day and lasting the tracked duration, described with the member's name and the project — for example Screenish: Ann Lee, Support Team, 2026-09-17. It carries the member's name, the project and the duration and nothing else: no screenshots, application names, window titles or pay rates ever leave SCREENish through a connection.
How often, and what is pushed
- SCREENish pushes automatically once an hour and looks at the last three days, so time approved later still reaches the task. Sync now runs the same push immediately.
- With Approved entries only (the default) only approved time is pushed; a day with no approved entries produces no entry. Turn it off in Edit to push every entry.
- Items lists what was pushed: the member, project and day, the ClickUp time entry it became, and the minutes it carries.
Activity reviews as tasks
Turn on Open an item for activity reviews in Edit and enter the id of the ClickUp list that should receive them (a number; open the list and take it from its address). Each new activity review then creates a task named after the member, the severity and the day, with the time window in its description. It is a flag for human review, not a finding; nothing about how the review was detected is sent.
Pausing, replacing the token, removing
- Pause stops pushing without losing the mapping; Resume continues.
- If ClickUp keeps refusing the connection (for example after you regenerate the token) SCREENish pauses it after repeated failures and shows the reason on the row. Paste a new token under Edit → Replace credentials and resume.
- Remove erases the stored credentials and the list of pushed items; time entries already written stay in ClickUp.
The same panel connects Jira Cloud (worklogs on issues) and Trello (comments on cards) in the same way, with an issue key or a card instead of a task id.
Open as its own page TopClient Sharing: What Your Client Can See
When you share a project from PROJECTS > Share with client, your client gets a link and a time-limited password. No SCREENish account is needed.
They see a read-only view of that one project and nothing else: no other project, no payroll, no rates, and none of your other employees. The view has one toolbar (the person, the day, the hours tracked that day), the screenshots of the day with their activity and idle time, the photos from the phone app, and the programs used. They cannot approve, reject or change anything: the Approved and Not approved marks on the screenshots are yours, set from your dashboard, and the client only sees them.
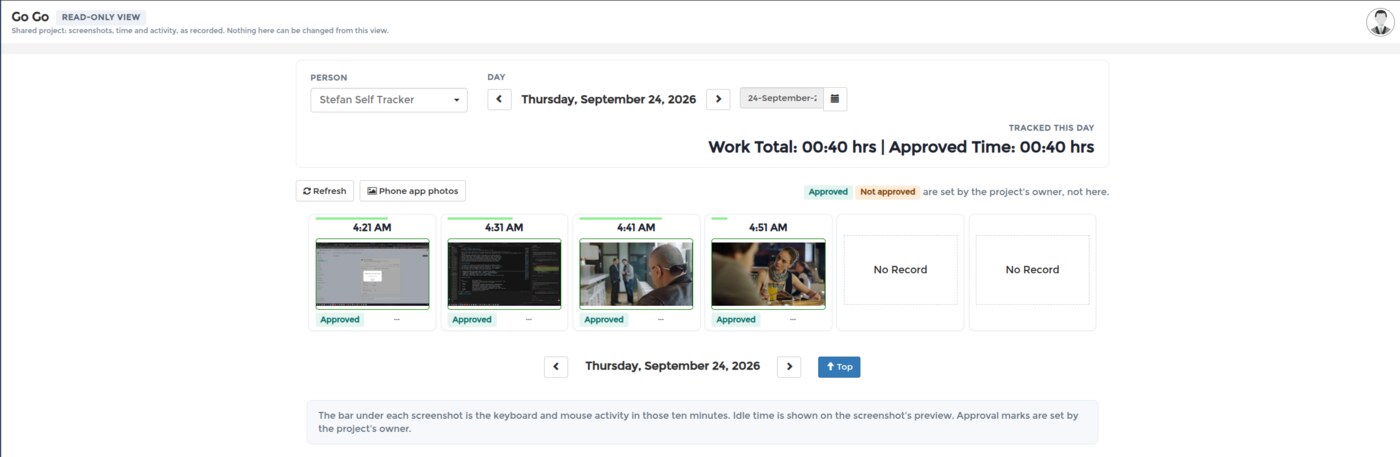
You stay in control: Resend Invitation sends the link again, and Make Private revokes access immediately. To set a share up in the first place, see Sharing Project Progress with Clients.
Open as its own page TopConsent: Requesting Consent from Your Team
Some features cannot be switched on until the employee agrees to them. Face Recognition is the main one — the employee must grant consent before you can enable it for them.
Go to PROJECTS, find the employee, and use Request Consent in the Face Recognition column. They see your request the next time they open their dashboard, and can accept or decline it.
Their answer is recorded with a date and kept as proof for your records. Consent is theirs to give — if they decline, the feature stays off, and that is the end of it. You cannot enable it on their behalf.
Open as its own page TopConsent: Responding to a Consent Request
If your employer asks for your consent to a feature, a request appears when you open your dashboard and stays on screen until you answer it. It tells you which employer is asking and what they are asking for.
Read it and choose whether to agree. Your answer is recorded with the date. Nothing is switched on before you agree, and agreeing to one employer does not agree for any other.
Changed your mind? Face Recognition consent can be withdrawn at any time from EDIT PROFILE > Face Verification Profile Photos — see Face Recognition: Setting Up Your Photo.
Open as its own page TopCreating and Deleting Projects
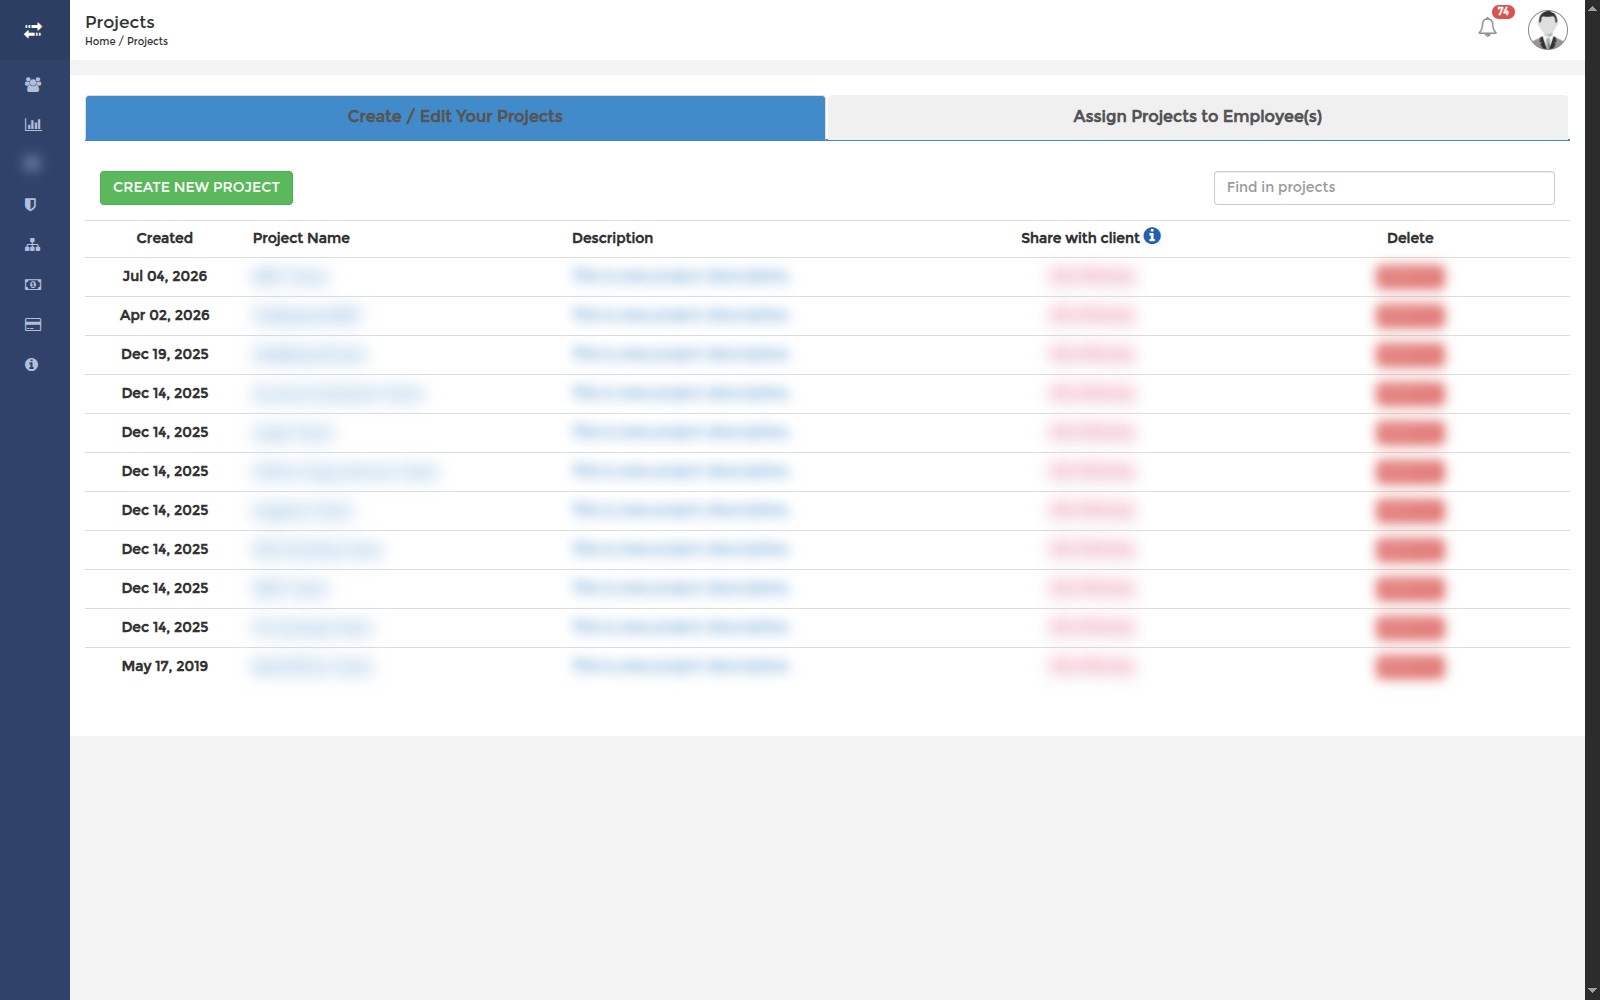
Go to the PROJECT menu and click Create New Project to add a project. To delete a project, click the Remove button next to it.
Deactivating and Reactivating Employees
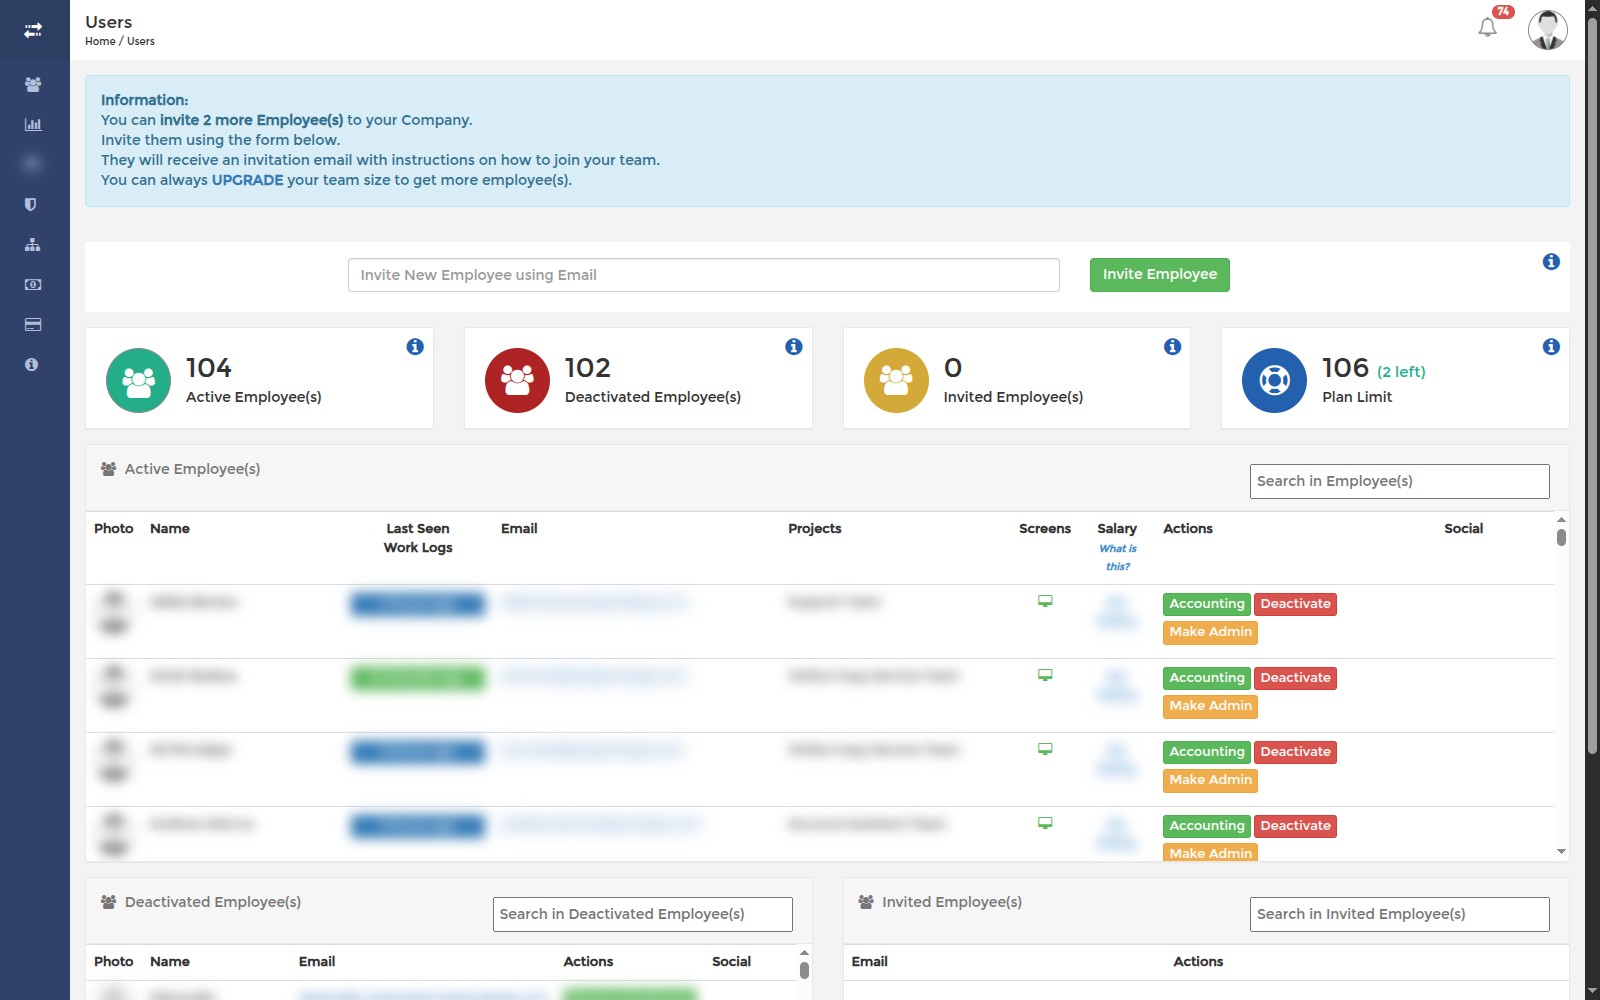
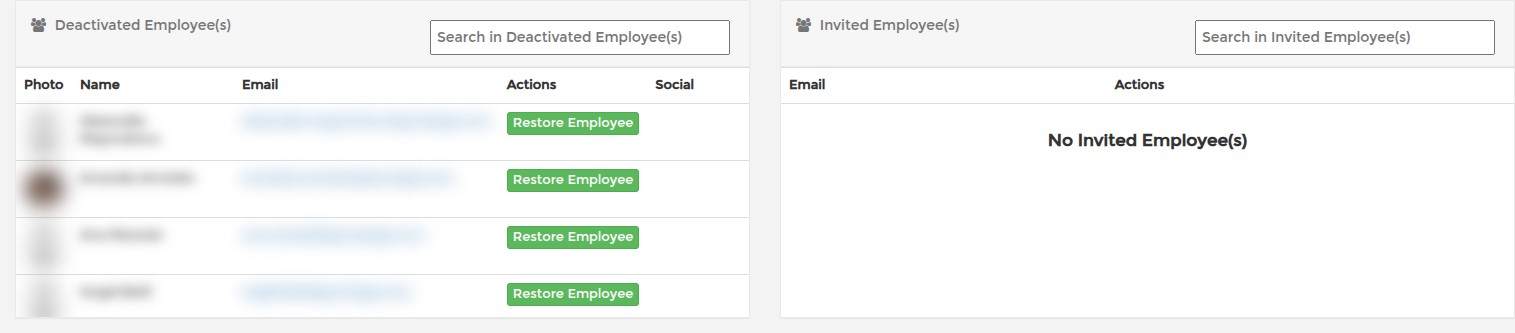
To deactivate an employee, open USERS and click the red Deactivate button on their row in Active Employee(s). They move to the Deactivated Employee(s) section below, and their tracked history stays.
To bring them back, click the green Restore Employee button on their row in Deactivated Employee(s). Restoring works only while your subscription has free slots — the Plan Limit tile at the top of the page shows how many are left.
Downloading Accounting Reports
Go to Accounting, select employees/projects, set your filters and date range, then click Download in XLS format.

Downloading the SCREENish App
Go to DOWNLOAD TEAM APP to get the time tracking software. SCREENish is available for:
Windows — the current application for Windows 10 and 11, and a legacy build for Windows 7 and 8:
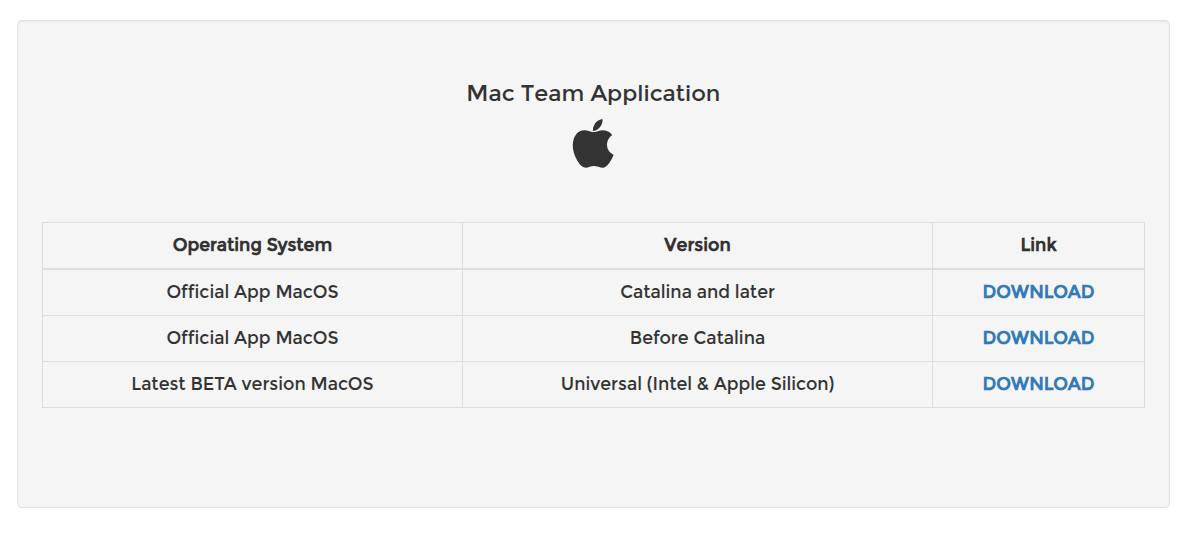
Mac — the official build is universal (Intel & Apple Silicon), with legacy builds for Catalina and later and for older macOS:
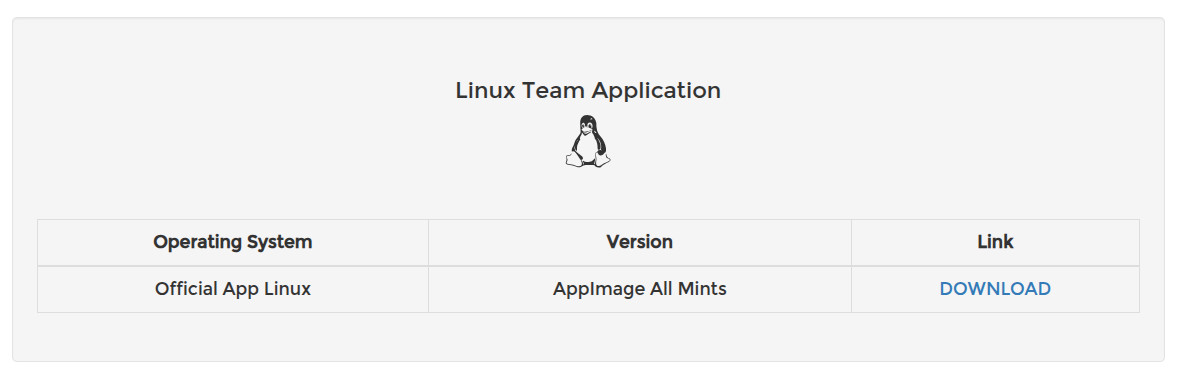
Linux — an AppImage that runs on all major distributions:
Mobile — the Android GPS tracking app installs from an APK on the same page; an iOS version is coming soon. See Android GPS Tracking.
Enabling Manual Time Entry
To allow employees to enter time manually:
- Create a project
- Assign it to your employee(s)
- Toggle the Manual Time switch for each employee
Face Recognition: Approving Employee Photos
Before you can use Face Recognition for someone, they must grant consent — see Consent: Requesting Consent from Your Team.
Once consent is given, ask the employee to set up a photo from the Face Recognition column in PROJECTS. When their photo arrives it waits for you to check it.
- Open the photo and make sure the face is clear, lit and unmistakably theirs.
- Press Approve to accept it, or Reject with a reason so they know what to fix.
- After approving, press Enable Face Recognition to switch checking on.
A rejected photo simply means they submit a better one — nothing else changes.
Open as its own page TopFace Recognition: Enabling It for an Employee
Face Recognition is set up per employee from the Face Recognition column in PROJECTS. The employee must be on the current version of the tracking app; if they still use the legacy app or the Chrome extension, the column says so and asks you to have them update from the Downloads section of their dashboard before you request consent.
- Request Consent — the employee must grant consent before anything else. They respond from their own dashboard.
- Request Photo — ask them to submit a face photo (use Request New Photo if you need a fresh one).
- Open the Face Recognition Setup window to Approve or Reject the photo.
- Press Enable Face Recognition to switch checking on.
Set the minimum match rate in the same column — see Face Recognition: Setting the Match Rate. If a webcam misbehaves, a notice appears in the work log; see Work Logs: Camera Notices During Face Verification.
Open as its own page TopFace Recognition: How It Works
Face Recognition confirms that the person tracking time is the employee you hired. It is optional and consent-first. It runs only in the current version of the tracking app: employees still on the legacy app or on the Chrome extension must install the current version from the Downloads section of their dashboard first, and the projects page tells you when that is the case.
The flow has four parts:
- Consent. The employee grants consent for your company — per employer, and withdrawable at any time. Nothing runs until they agree.
- Photo. The employee submits a face photo, which you approve or reject from the Face Recognition Setup window in PROJECTS.
- Verification. Once enabled, SCREENish checks the camera during tracked sessions against the approved photo.
- Match rate. You set the minimum acceptance rate; the per-hour match result appears in WORK LOGS.
A low match rate is a prompt to talk, not proof of anything — cameras and lighting fail far more often than people do.
Open as its own page TopFace Recognition: Setting the Match Rate
Each employee with Face Recognition enabled has a minimum acceptance rate, set in the Face Recognition column in PROJECTS. It is the confidence SCREENish needs before it counts a check as a match.
Higher is stricter. Set it too high and ordinary things — a dim room, a new pair of glasses, a hat — start failing honest checks. Most teams are best served leaving it at the default and only raising it if they have a reason to.
The match rate per hour shows in WORK LOGS. A low rate is worth a conversation, not a conclusion — cameras and lighting fail far more often than people do.
Open as its own page TopFace Recognition: Setting Up Your Photo
Face Recognition is optional. It only ever runs for an employer you have agreed to it for.
Open EDIT PROFILE > Face Verification Profile Photos. You get one entry per employer who has asked for it, each with its own Face Recognition Consent switch showing Granted or Not Granted. Turn the switch on to agree, off to withdraw at any time.
Once you consent, your employer requests a profile photo and then approves or rejects it. Your photo is used only to check that it is you during work sessions, and is never shared with other employers.
Open as its own page TopFace Recognition: What Employees See
If your employer turns on Face Recognition, it never starts without your agreement. You will get a consent request when you open your dashboard.
Open EDIT PROFILE > Face Verification Profile Photos to manage it. Each employer who asked for it has its own entry with a Face Recognition Consent switch showing Granted or Not Granted.
- Turn the switch on to agree, then upload a clear, well-lit face photo.
- Your photo shows a status: Pending, Approved or Rejected. A rejected photo just means you upload a better one.
- Turn the switch off at any time to withdraw consent — verification stops immediately.
Your photo is used only to confirm it is you during work sessions, and is never shared with any other employer.
Open as its own page TopFinding Pending Invitations
Employees who haven't responded to your invitation yet appear in the Invited Employee(s) section at the bottom of the USERS page, next to Deactivated Employee(s). When everyone has joined, the section simply says No Invited Employee(s).
Fixing System Time Errors
If the tracking application reports “Your device clock is N minutes ahead” (or behind), or “Unable to upload report because your system time is not correct”, tracking pauses until you sync your computer's clock — correct timestamps are what make tracked hours trustworthy.
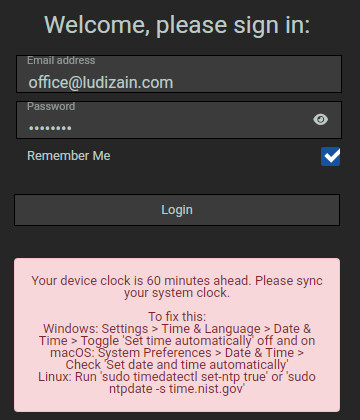
The fix is to re-sync the system clock:
- Windows: Settings > Time & Language > Date & Time > toggle Set time automatically off and back on (or click Sync now).
- macOS: System Preferences > Date & Time > check Set date and time automatically.
- Linux: run sudo timedatectl set-ntp true (or sudo ntpdate -s time.nist.gov).
Once the clock is correct, log in and start the timer again — anything recorded before the pause uploads automatically.
Open as its own page TopGetting the App Again
The tracking app is one download, and it keeps itself up to date after that. Where you get it again depends on which SCREENish account you are signed in with.
Employees
Open DOWNLOAD TEAM APP in the menu of your dashboard. Windows, Mac and Linux are on that page, and the Android app as an APK. The page is described in Downloading the SCREENish App. The links below work for you as well.
If you track your own time
You set SCREENish up with the startup wizard, chose a second e-mail address for the app, and saw the download button at the end of it. Your dashboard is an employer dashboard, so it has no DOWNLOAD TEAM APP menu; use the links below instead. Sign in to the app with the second address and the password you chose in the wizard, not with your dashboard login. If you have forgotten that password, use Forgot password on the app's sign-in screen with the second address; the letter goes there.
Downloads (always the newest version):
- Windows 10 and 11
- macOS, universal (Catalina and newer)
- Linux, AppImage
- Chrome extension (Chromebooks, or any computer with Chrome)
- Android app (APK)
The download links are shown when you read this article inside your SCREENish dashboard.
Older computers
Windows 7 and 8, and macOS versions before Catalina, cannot run the current app. Write to us in the chat at the bottom right of your dashboard and we will send you a build that does.
Employers
Your employees get the app from their own dashboard; there is no file for you to send. If someone never set a password, Users has Resend invitation, and the letter carries the download again.
Open as its own page TopGoogle Calendar: Showing Tracked Time as Calendar Events
A calendar feed turns tracked time into calendar events: each block a member worked becomes an entry named after the member and the project, with its duration. Google Calendar, Outlook and Apple Calendar all refresh it on their own, so the calendar keeps up without anyone exporting anything.
Creating the link
- Open API & Integrations in the left menu. If it is your first connection, accept the API access terms shown at the top.
- In Calendar and spreadsheet feeds choose Calendar (ICS), type a label such as Team calendar, and press Create feed link.
- The link appears once, in a yellow box, with a Copy button. Copy it now — it is not shown again. The table below keeps only its first characters, so you can tell your links apart.

Subscribing
- Google Calendar: in the left column, next to Other calendars, press + > From URL, paste the link and press Add calendar.
- Outlook: Add calendar > Subscribe from web, paste the link, name the calendar and press Import.
- Apple Calendar: File > New Calendar Subscription, paste the link, press Subscribe and pick how often it should refresh.
What is in the calendar
The feed covers the last 30 days and carries the member's name, the project and the duration of each tracked block — nothing else. No screenshots, application names, window titles or pay rates leave SCREENish through a feed.
How fresh it is
The refresh rhythm belongs to the calendar application, not to SCREENish. Google Calendar decides for itself and may take several hours to pick up new events; Apple Calendar lets you choose an interval as short as five minutes; Outlook sits somewhere between. A feed is right for keeping an eye on a team's shape over days, not for watching the current hour — for that, use chat alerts.
Treat the link as a password
Anyone holding the link can read the feed, with no sign-in. Share it only with people who are allowed to see the team's hours, and do not paste it into a public page or a shared document. The feeds table shows when each link was last read and how many times — a count climbing when nobody is using it is worth a look. Revoke ends a link immediately; subscribed calendars then stop updating and can be removed on their side.
For the same data as rows in a spreadsheet, see Google Sheets: A Live Timesheet That Updates Itself.
Open as its own page TopGoogle Sheets: A Live Timesheet That Updates Itself
A spreadsheet feed is a private link that returns minutes per member, project and day. Point Google Sheets or Excel at it once and the sheet refreshes itself — no exporting, no re-importing, and any formula, pivot or chart you build on top keeps working.
Creating the link
- Open API & Integrations in the left menu. If it is your first connection, accept the API access terms shown at the top.
- In Calendar and spreadsheet feeds choose Spreadsheet (CSV), type a label such as Monthly hours, and press Create feed link.
- The link appears once, in a yellow box, with a Copy button. Copy it now — it is not shown again.

Google Sheets
In an empty cell of a fresh sheet, enter:
=IMPORTDATA("https://www.screenish.com/feed/csv/<your link>")
The rows fill in below the formula and Sheets refreshes them on its own, roughly hourly. Build your pivot tables on a second sheet that reads from this one, so a refresh never overwrites your work.
Excel
Data > From Web, paste the link, press Load. The query lands as a table you can refresh with Data > Refresh All, or on a schedule through the query's properties.
The columns
One row per member, project and day: the date, the member (id, first and last name), the project (id and name), the minutes tracked, how many of them are approved, how many were entered manually and how many were idle. Hours are easy from there: minutes / 60.
Choosing the period
Without a period the feed returns the last 30 days. Add dates to the end of the link for a specific one:
...?from=2026-09-01&to=2026-09-30
A period may span at most 92 days. For a rolling month, leave the link plain; for a closed month that must not change, pin the dates.
Treat the link as a password
Anyone holding the link can read the feed, with no sign-in — and in Google Sheets the formula itself contains it, so everyone you share the spreadsheet with can read the link out of the cell. Share such a sheet only with people who may see the team's hours, or keep the importing sheet private and share a second one that references it. The feeds table shows when each link was last read and how many times; Revoke ends a link immediately, and the spreadsheet then shows an error instead of rows.
What a feed never carries
Hours, activity counts, member and project names. Never screenshots, application names, window titles, biometric data or pay rates.
For a file to hand to an accountant rather than a live sheet, see QuickBooks Time and Payroll: Exporting Timesheets. For the same rows in calendar form, see Google Calendar: Showing Tracked Time as Calendar Events.
Open as its own page TopHow to Invite Employees
Go to the INVITE EMPLOYEE menu, enter the employee's email address, and click Invite Employee.
Note: Each invitation counts toward your subscription limit, even if the employee hasn't accepted yet. To free up a slot, cancel any pending invitations you no longer need.
Installing SCREENish on Mac
Step 1: Log in to screenish.com and download the DMG file.
Step 2: Double-click the DMG file to open it.
Step 3: Drag the SCREENish icon to the Applications folder.
Step 4: Eject the DMG (right-click > Eject).
Step 5: Open SCREENish from Applications. Click Open if prompted about the download source.
Step 6: Grant permissions (Screen Recording, Input Monitoring) when requested. You can adjust these later in System Settings > Privacy & Security.
Installing the Official App (PKG file)
The Official App MacOS comes as a PKG installer instead of a DMG — one universal build for both Intel and Apple Silicon Macs — so the steps are different:
Step 1: Open Downloads in your dashboard and download the macOS Official App (a .pkg file).
Step 2: Double-click the .pkg file and follow the installer: click Continue, then Install, and enter your Mac password when asked. The installer places SCREENish in Applications by itself — nothing to drag, no DMG to eject — and replaces any SCREENish version you already have.
Step 3: If macOS warns about the download source, right-click (Control-click) the .pkg file and choose Open. On recent macOS versions, approve it under System Settings > Privacy & Security > Open Anyway instead.
Step 4: Open SCREENish from Applications, log in and grant the same permissions as above (Screen Recording, Input Monitoring).
Open as its own page TopInviting Your Team
Once you've registered and confirmed your email, you can invite team members.
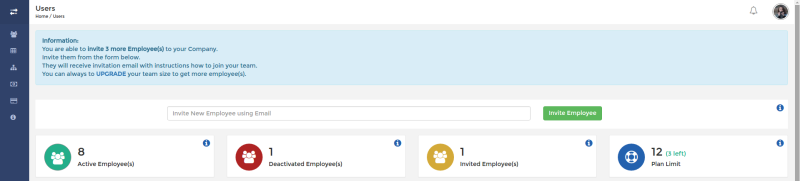
Open USERS in the menu, type the address into Invite New Employee using Email at the top of the page and click Invite Employee.
Invited employees appear in the Invited Employee(s) section at the bottom of the same page until they accept. They receive an email with instructions to set up their account and download the tracking app. See Finding Pending Invitations.
Open as its own page TopJira: Pushing Tracked Time to Issues
Connect Jira Cloud under API & Integrations and SCREENish adds a worklog to a Jira issue with each member's approved time on that project for the day. When a day changes because more entries are approved, the same worklog is updated, so an issue never collects duplicates. Optionally an activity review opens an issue of its own.
What you need from Jira
- Your site address — the
https://your-company.atlassian.netyou sign in to. Jira Cloud only: a Jira Server or Data Center behind your firewall is not reachable from SCREENish and the connection is refused. - The e-mail of your Atlassian account, the one that owns the worklogs.
- An API token. Open id.atlassian.com > Security > Create and manage API tokens, create one, and copy it. The token acts as you in Jira, so the account needs permission to log work on the issues involved. SCREENish stores it encrypted and never shows it again; you can revoke it from the same Atlassian page at any time.
- The issue key for each project, for example
OPS-12. One SCREENish project maps to one issue.
Connecting
- Open API & Integrations in the left menu. If it is your first connection, accept the API access terms shown at the top.
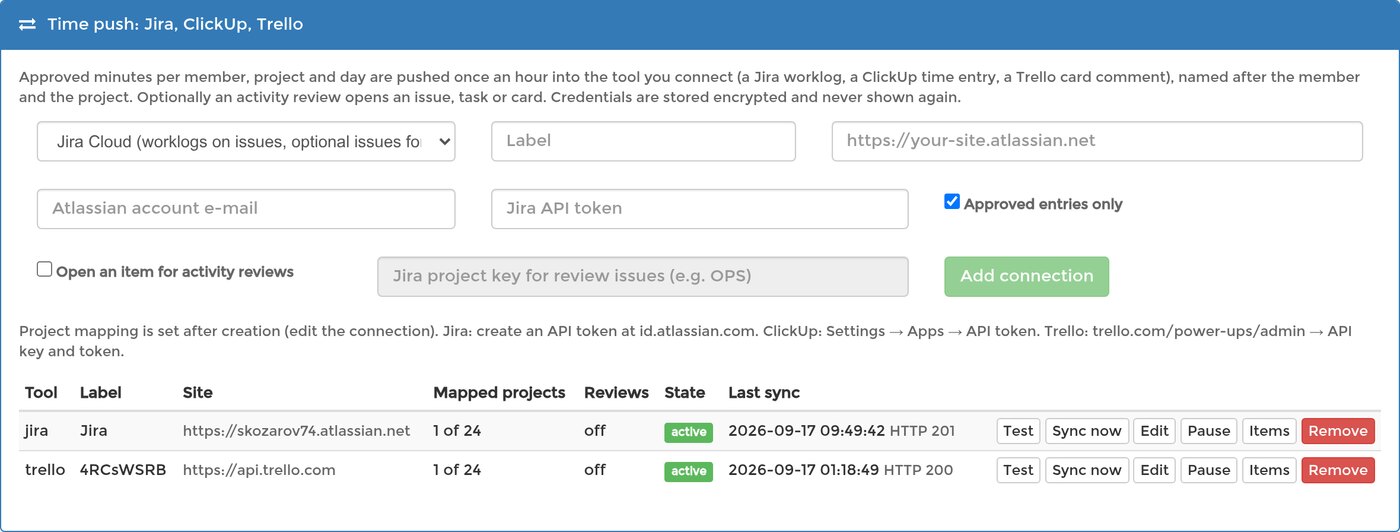
- In Time push: Jira, ClickUp, Trello choose Jira, give the connection a label, paste the site address, the account e-mail and the API token, and press Add connection.
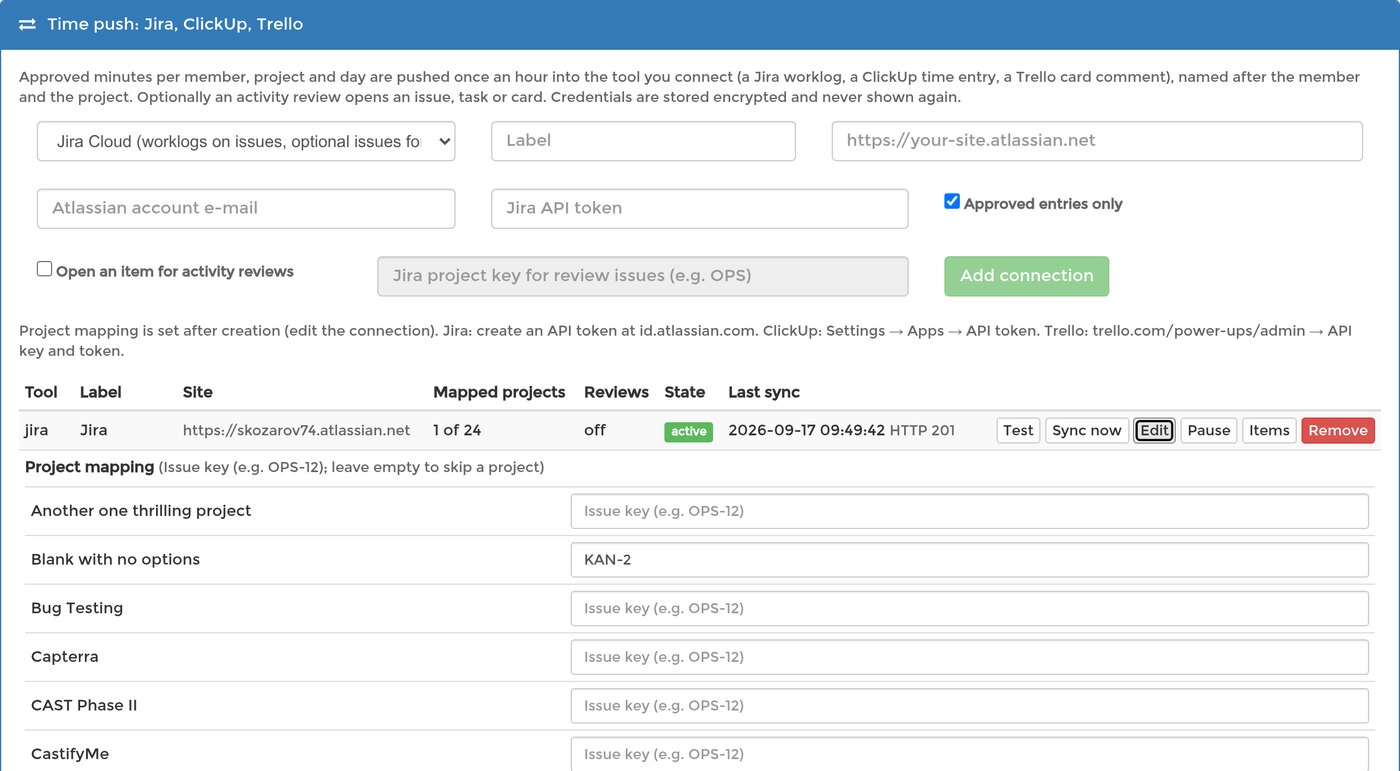
- Press Edit on the new row and, next to each project that should reach Jira, type the issue key. Projects left empty are skipped. Press Save.
- Press Test: it should read Connected as your Atlassian display name. Then press Sync now.
What appears in Jira
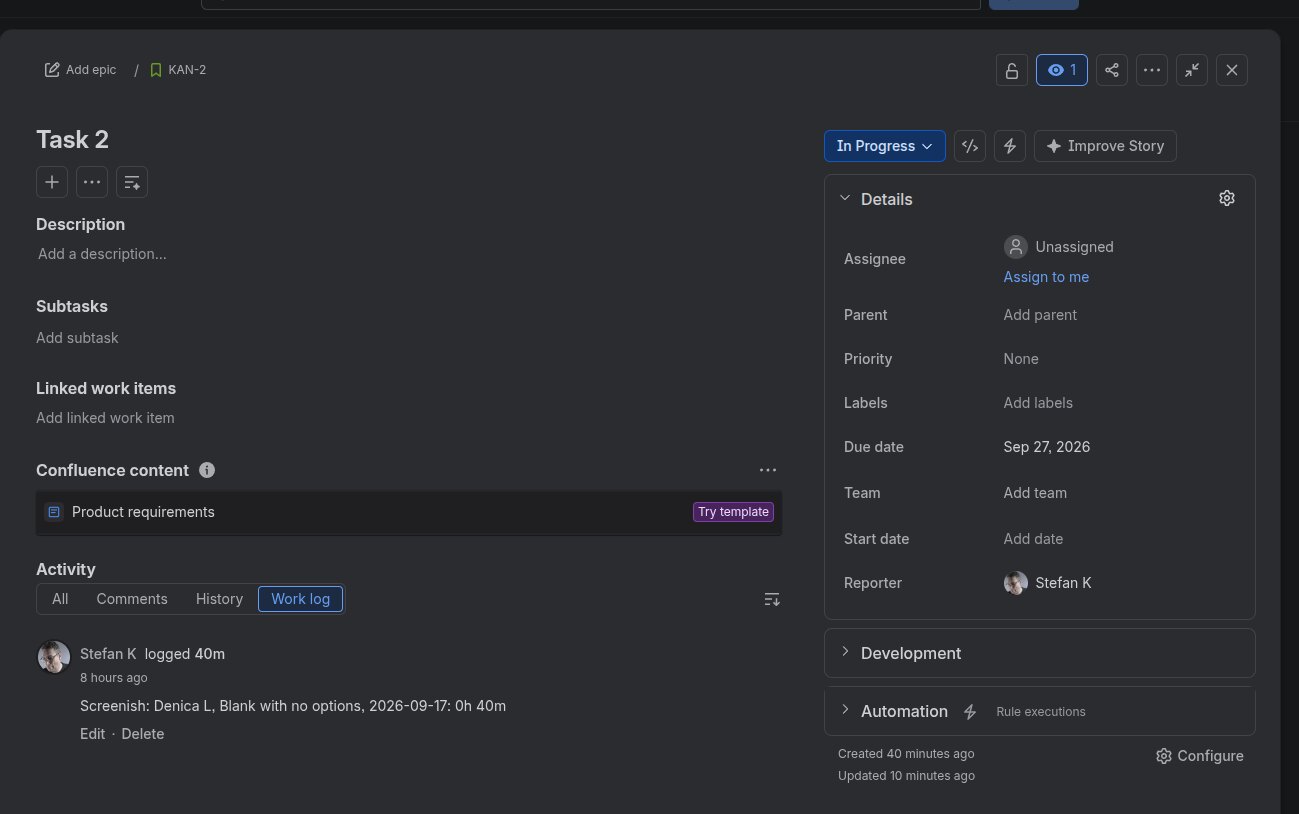
Each mapped issue receives one worklog per member and day, dated to that day, with the duration as time spent and a comment naming the member and the project — for example Screenish: Ann Lee, Support Team, 2026-09-17. The worklog carries the member's name, the project and the duration and nothing else: no screenshots, application names, window titles or pay rates ever leave SCREENish through a connection.
How often, and what is pushed
- SCREENish pushes automatically once an hour and looks at the last three days, so time approved later still reaches the issue. Sync now runs the same push immediately.
- With Approved entries only (the default) only approved time is pushed; a day with no approved entries produces no worklog. Turn it off in Edit to push every entry.
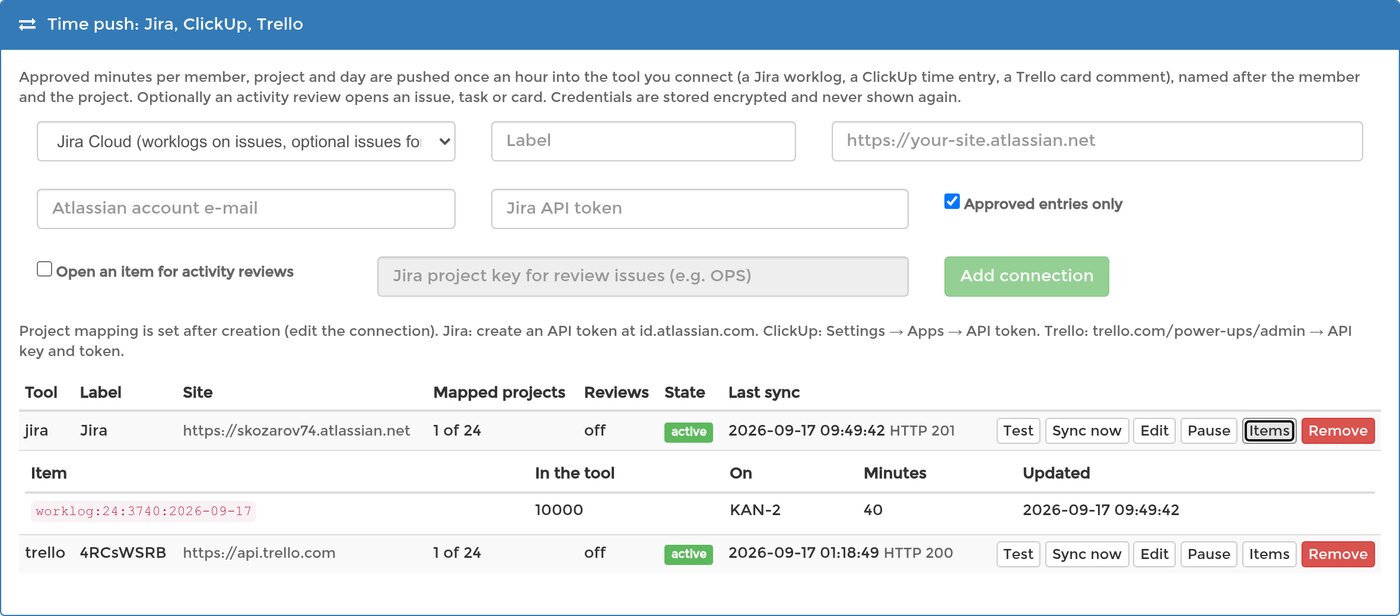
- Items lists what was pushed: the member, project and day, the Jira worklog it became, and the minutes it carries.
Activity reviews as issues
Turn on Open an item for activity reviews in Edit and enter the project key that should receive them — OPS, not an issue key. Each new activity review then creates a Task named after the member, the severity and the day, with the time window in its description. It is a flag for human review, not a finding; nothing about how the review was detected is sent.
Pausing, replacing the token, removing
- Pause stops pushing without losing the mapping; Resume continues.
- If Jira keeps refusing the connection — a revoked token, a changed password, an issue that was deleted or moved — SCREENish pauses it after repeated failures and shows the reason on the row. Paste a new token under Edit → Replace credentials and resume.
- Remove erases the stored credentials and the list of pushed items; worklogs already written stay in Jira.
The same panel connects ClickUp (time entries on tasks) and Trello (comments on cards) in the same way, with a task id or a card instead of an issue key.
Open as its own page TopLinux: Wayland Screenshot Support
Wayland's security design prevents screen capture by most apps. SCREENish requires X11 to capture screenshots.
Check your display server:
echo $XDG_SESSION_TYPE
If it shows wayland, switch to X11. See: How to switch from Wayland to Xorg
If it shows x11, screenshots should work normally.
Open as its own page TopLow Memory: Freeing Up Space on the Windows System Drive (C:)
Follow this guide if SCREENish told you that the system drive is almost full, so Windows cannot extend virtual memory — or if you simply want more free space. Aim for at least 5–10 GB free on drive C:.
Quick wins (5 minutes)
- Empty the Recycle Bin. Right-click the Recycle Bin on the desktop, then choose Empty Recycle Bin. Deleted files still take space until you do this.
- Clean the Downloads folder. Open File Explorer > Downloads, sort by size, and delete old installers, videos and archives you no longer need.
- Run Disk Cleanup. Press Windows, type disk cleanup, open it, select drive C:, tick everything offered (especially Temporary files and Recycle Bin), then click Clean up system files and tick Windows Update Cleanup too — this one alone often frees several GB.
Bigger wins
- Storage Sense (Windows 10/11): Settings > System > Storage. Turn Storage Sense On so temporary files get cleaned automatically, and open Temporary files to remove what is already there. The same screen shows what is taking your space (Apps, Videos, etc.).
- Uninstall unused programs: Settings > Apps > Installed apps, sort by size, remove what you don't use.
- Move personal files. Videos and photo folders can move to another drive (D:) or an external disk, or to cloud storage.
C:\Windows, C:\Program Files, or files you don't recognize — when in doubt, ask your IT support. The safe places to clean are the Recycle Bin, Downloads, and the tools listed above.Check the result
Open File Explorer > This PC and look at the bar under Local Disk (C:). Once it shows 5–10 GB free or more, restart the computer. The SCREENish warning will disappear on its own once the danger is gone.
Related: Low Memory: What the Warning Means and How to Fix It · Low Memory: Turning On Virtual Memory (Pagefile) in Windows
Open as its own page TopLow Memory: Turning On Virtual Memory (Pagefile) in Windows
Follow this guide if SCREENish told you that this computer's virtual memory (pagefile) is turned off, or that it is fixed at a size that is too small.
What is the pagefile, in one paragraph?
The pagefile is a hidden file on your disk that Windows uses as a safety cushion when your memory (RAM) fills up. With the cushion in place, a busy day just makes the computer a bit slower. Without it, the moment RAM runs out, programs start crashing — including the time tracker, which can cost you recorded work hours. Some “PC optimization” guides recommend disabling it; that advice is outdated and harmful.
Steps (Windows 10 and Windows 11)
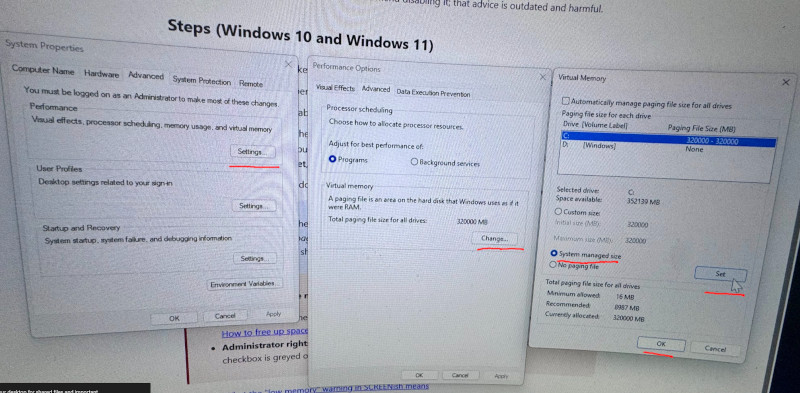
- Press the Windows key, type advanced system settings, and open View advanced system settings.
- In the window that opens, on the Advanced tab, under Performance, click Settings…
- Go to the Advanced tab again, and under Virtual memory, click Change…
- Tick the checkbox at the top: Automatically manage paging file size for all drives.
(If it is already ticked but SCREENish still warned you, untick it, select drive C:, choose System managed size, click Set, then tick the automatic checkbox again.) - Click OK on every window. Windows will ask to restart — restart the computer now.
Two things the pagefile needs to help you:
- Free disk space. The cushion lives on drive C:. If C: is almost full, Windows cannot grow it — see Low Memory: Freeing Up Space on the Windows System Drive (C:).
- Administrator rights. On a company-managed PC these settings may be locked. If the checkbox is greyed out, forward this article to your IT support.
Related: Low Memory: What the Warning Means and How to Fix It
Open as its own page TopLow Memory: What the Warning Means and How to Fix It
If SCREENish shows a red bar at the top of the app, or a popup that says something like:
Action needed: this computer can crash and lose work time…
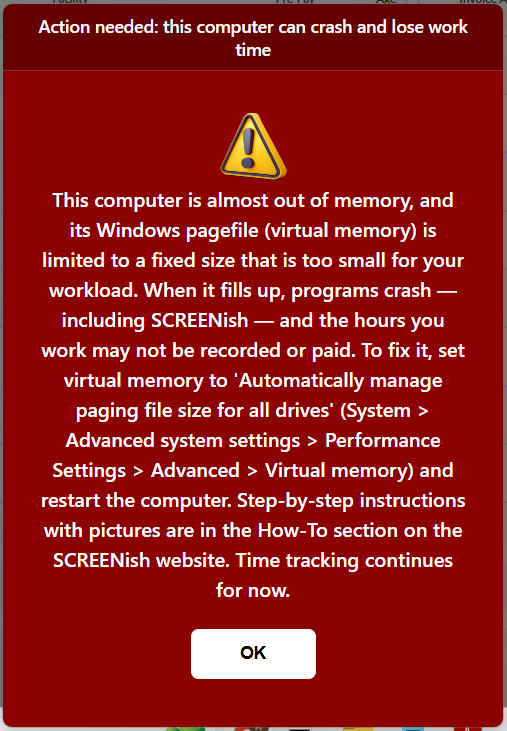
it means your computer is running out of memory, and — more importantly — Windows has no safety cushion left to absorb it. When a computer runs out of memory completely, programs crash without warning. If SCREENish crashes while you are working, the minutes until it comes back may not be recorded, and may not be paid. That is why the app warns you loudly.
Fix it now (takes 2 minutes)
- Close what you don't need. Extra Chrome windows and tabs are the most common memory eaters. Close the tabs you are not using right now.
- Restart the computer before your shift. A restart clears memory leaks that build up over days (Windows itself can slowly leak memory until you reboot).
Fix it permanently
The warning text tells you which situation applies to your computer:
- If it says the pagefile (virtual memory) is turned OFF or is fixed at a size that is too small, follow Low Memory: Turning On Virtual Memory (Pagefile) in Windows.
- If it says the system drive is almost full, follow Low Memory: Freeing Up Space on the Windows System Drive (C:).
- If the warnings keep coming back even after both fixes, your computer simply has too little memory for your daily workload. Ask about adding more RAM — going from 8 GB to 16 GB solves this for almost everyone.
Mac: Fixing Activity Tracking Issues
If mouse clicks and activity aren't being recorded on Mac:
- Delete SCREENish from all locations
- Download and reinstall the app
- Grant Input Monitoring permission when prompted (quit SCREENish first)
- Grant Accessibility permission when prompted
- Restart SCREENish
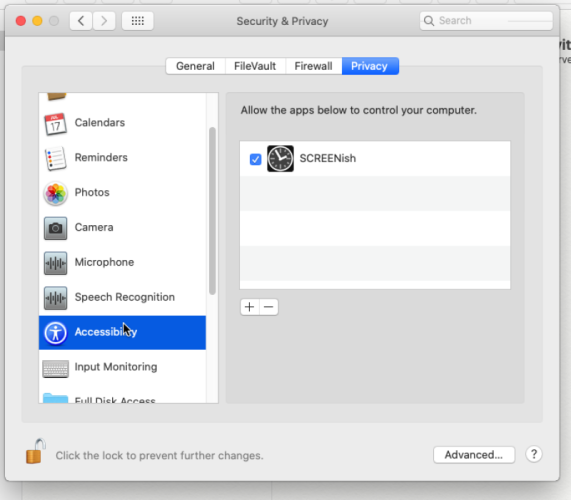
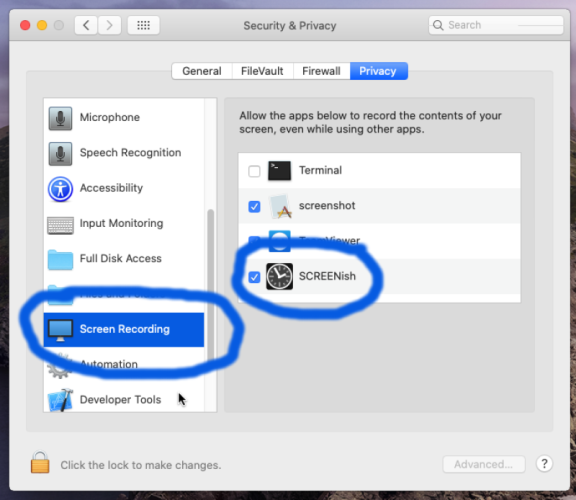
Mac: Fixing Screenshot Issues
If screenshots show a blank desktop, you need to enable Screen Recording permission:
- Open System Preferences > Security & Privacy
- Click Screen Recording in the left panel
- Click the padlock to unlock settings
- Check the box next to SCREENish
- Restart SCREENish
Making an Employee a Delegated Manager
You can let a trusted employee manage the team for you — useful for team leads or office managers — without sharing your owner account.
On your employees list, find the person and press Make Admin. They gain a manager dashboard (reached from their side via the admin session) where they can review work logs, approve time, manage projects and run reports for your team.
A delegated manager sees almost everything you do, with two limits: they cannot change the subscription, and they cannot make other employees managers. Press Remove Admin on the same row to take the access away at any time.
Open as its own page TopManaging Email Report Subscriptions
Go to Accounting and click Edit Report Subscriptions.
Deactivate/Activate: Toggle the button next to any report to pause or resume emails.
Delete: Click the red button next to a report and confirm deletion.
Microsoft Teams, Discord and Google Chat: Getting SCREENish Alerts
SCREENish posts the same alerts into Microsoft Teams, Discord and Google Chat as it does into Slack: someone started or stopped tracking, an activity review opened, a face check failed, the team changed, and a summary of yesterday every morning. In each case you fetch an incoming webhook URL from the chat tool and paste it into API & Integrations > Connections: webhooks and chat.
Microsoft Teams
- In Teams, open the channel's … menu and use the Workflows app with the template Post to a channel when a webhook request is received. Name it, pick the team and channel, and copy the URL the workflow gives you.
- Channels that still offer the older Incoming Webhook connector (Connectors > Incoming Webhook > Configure) work too; copy the URL it shows.
- In SCREENish choose Microsoft Teams (incoming webhook / workflow URL), label the connection, paste the URL, tick the events, press Add connection and then Test. The message arrives as a card in the channel.
Discord
- Open the channel's Edit Channel > Integrations > Webhooks > New Webhook, give it a name and an avatar if you like, and press Copy Webhook URL. It starts with
https://discord.com/api/webhooks/. - In SCREENish choose Discord (webhook URL), label it, paste the URL, tick the events, press Add connection and then Test.
Google Chat
- Open the space, use its name menu > Apps & integrations > Webhooks > Add webhook, name it and copy the URL. Incoming webhooks are a Google Workspace feature; a personal Google account does not offer them.
- In SCREENish choose Google Chat (incoming webhook URL), label it, paste the URL, tick the events, press Add connection and then Test.
The same rules in all three
- Only public
httpsdestinations are accepted, and the URL is a secret: anyone holding it can post into that channel. - Pick the events deliberately. The daily summary and activity reviews suit most teams; every 10-minute entry produces hundreds of messages a day on a team of ten.
- Deliveries shows every message SCREENish tried to send and the chat tool's answer. Failures are retried after 1, 5 and 30 minutes, then 2 and 6 hours, and abandoned after five attempts; a destination that keeps refusing is paused automatically with the reason on its row.
- Pause, Resume and Remove work as they do for any connection.
- The messages carry hours, activity counts, member and project names and verdicts — never screenshots, application names, window titles, biometric data or pay rates. Everyone who can read the channel can read all of it.
The step-by-step walkthrough with the full event list is in Slack: Getting SCREENish Alerts in a Channel; everything there applies here too.
Open as its own page TopMonitoring Employee Work
Go to WORK LOGS to view employee activity. Select an employee from the dropdown on the right, then choose a date on the left to see their recorded work for that day.
Premium Hours: Paying a Higher Rate for Set Hours
Premium hours pay a bonus rate for work done inside a chosen time frame — night shifts, weekends or a crunch period. Open ACCOUNTING and choose Set Premium Hours.
- Select the project the premium applies to.
- Set the time frame. You can pick a period in the past.
- Switch on Let me set a new price for premium time and enter the Premium Price.
- Press APPLY PREMIUM TIME.
The bonus rate applies only to hours recorded on that project inside that frame, and every employee who tracked time there gets it. Premium records show with a green background in WORK LOGS, and premium time appears in your accounting reports.
Open as its own page TopProject Monitoring Options: Allow Diagnostic Collection
Follow this guide when SCREENish support asks you to allow diagnostic collection for an employee, or when you have reported a problem with the tracking app on one computer — missing screenshots, hours not recorded, the app closing on its own — and support needs the app's own log files to find the cause. The switch is Off by default and is set per employee and per project.
Turning it on
- Go to PROJECTS > Assign Projects to Employee(s).
- Find the employee, then click Advanced Options in the project's row of their Projects Management table.
- In Employee Monitoring Options, switch Allow Diagnostic Collection to On.
- Press Save Changes.
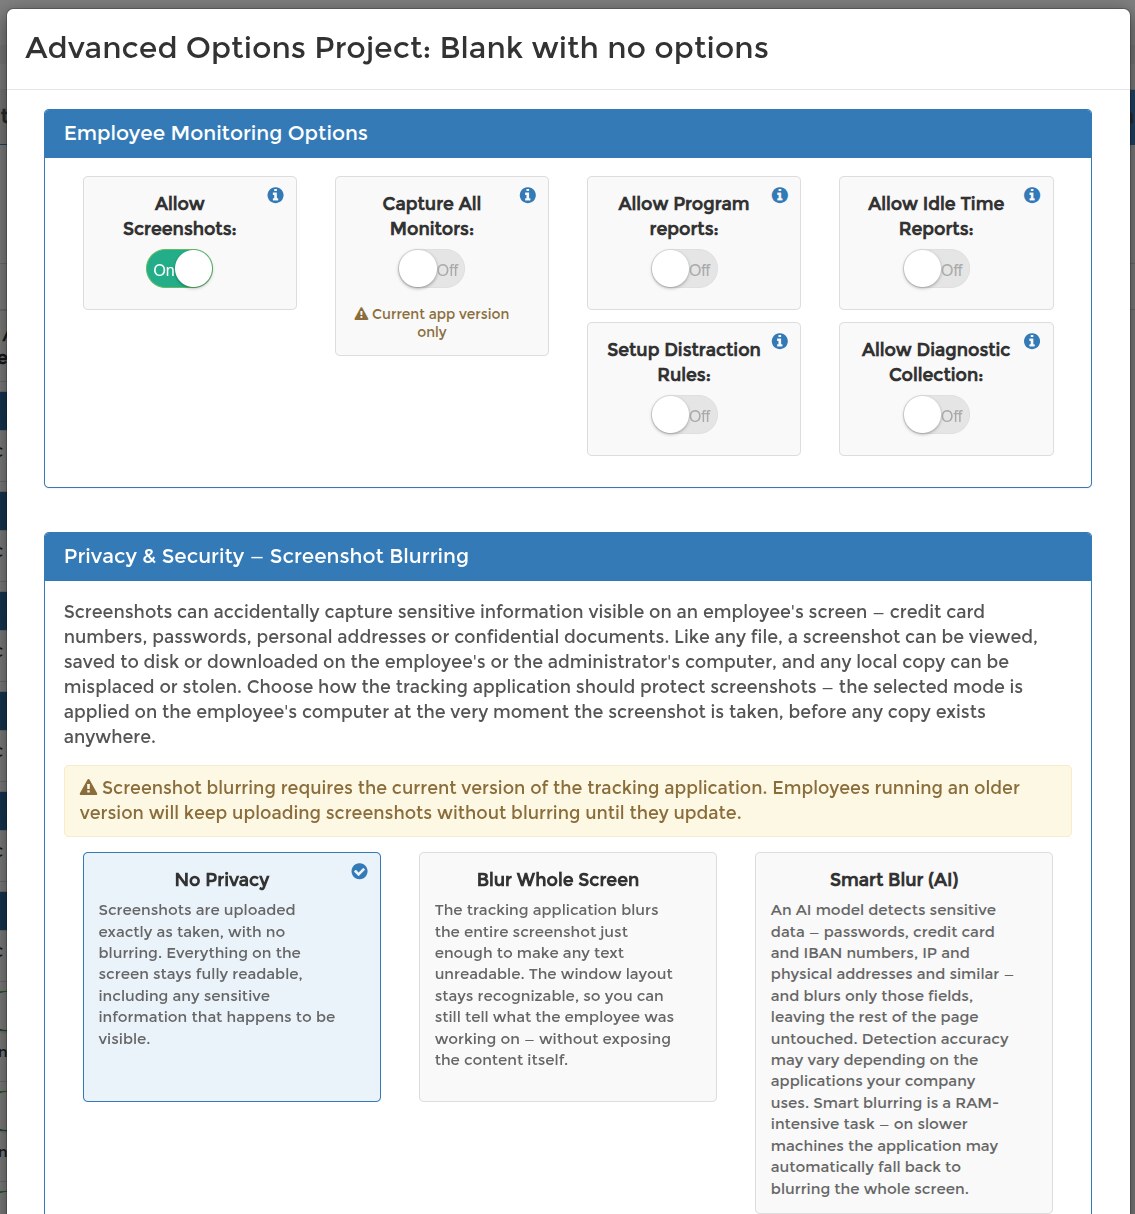
The permission reaches SCREENish within a few minutes; the employee does not need to restart the app for that part. Like every other monitoring setting, the change is written to the settings journal with who changed it and when.
What the switch does — and what it does not
Turning it On collects nothing by itself. Log files leave the employee's computer only while both of these are true:
- Allow Diagnostic Collection is On for that employee on a current project, and
- SCREENish support has opened a documented request for that employee in its request register — who asked, when, why, and until when. A request expires on its own after 7 days.
The app checks for an open request once a day, when the employee signs in. If both conditions hold, it packs its log files into one archive, uploads it, and deletes the local copies. While the request stays open it may check again the next day; once support marks the request fulfilled, or it expires, or you switch the permission Off, the uploads stop.
What is in the archive
- No screenshots and no images. The archive holds the app's technical logs only.
- The employee's user ID and work e-mail, the names of applications, windows and files that were open, device and operating-system information, error messages and the app's own measurements.
- At most the last 10 days — the app keeps no older logs, so an archive never covers more.
- Stored in the employee's own storage area, readable by the support role only, and deleted automatically after 45 days.
What your employee sees
Each time an archive is sent, the app shows a notice on the employee's screen and as a system notification, for example: “Diagnostic record sent — 14 September 2026, 10:12. Covering 2–14 September (3 files, 1.2 MB). Sent to SCREENish support at your employer's request. Will be deleted on 29 October 2026.” The same records are listed in the app under Settings > Diagnostic records. Nothing is collected silently, and the monitoring notice your employees acknowledge at sign-in describes this collection.
Turning it off
Open the same Advanced Options dialog, switch Allow Diagnostic Collection to Off and press Save Changes. From that moment no archive is sent for that employee, even if a support request is still open. Support marks the request fulfilled once the logs arrive, and requests expire after 7 days in any case — but the switch is yours, and turning it Off when the case is closed is the tidy thing to do.
Check the result
Reopen Advanced Options for that project: Allow Diagnostic Collection should show On. Support will confirm when the archive has arrived, usually after the employee's next sign-in — ask the employee to restart the app if you want to speed that up. On the employee's side, the new entry appears under Settings > Diagnostic records.
Related: Project Monitoring Options: Screenshots, Programs and Idle Time · Project Monitoring Options: When Setting Changes Take Effect · Workforce Monitoring Notice: The Screen Workers See at Sign-In
Open as its own page TopProject Monitoring Options: Screenshots, Programs and Idle Time
What SCREENish records is set per project and per employee, so you can track different teams — and different people on the same project — differently. Go to PROJECTS > Assign Projects to Employee(s), click Advanced Options in the project's row in the employee's Projects Management table, and use the Employee Monitoring toggles:
- Allow Screenshots — capture screenshots for this project, or turn them off for time-only tracking.
- Allow Program reports — record which applications and websites were used.
- Allow Idle Time Reports — detect and report inactivity.
- Distraction Reporting — measure the time spent in categories and programs you mark as distracting; quiet, nothing pops up.
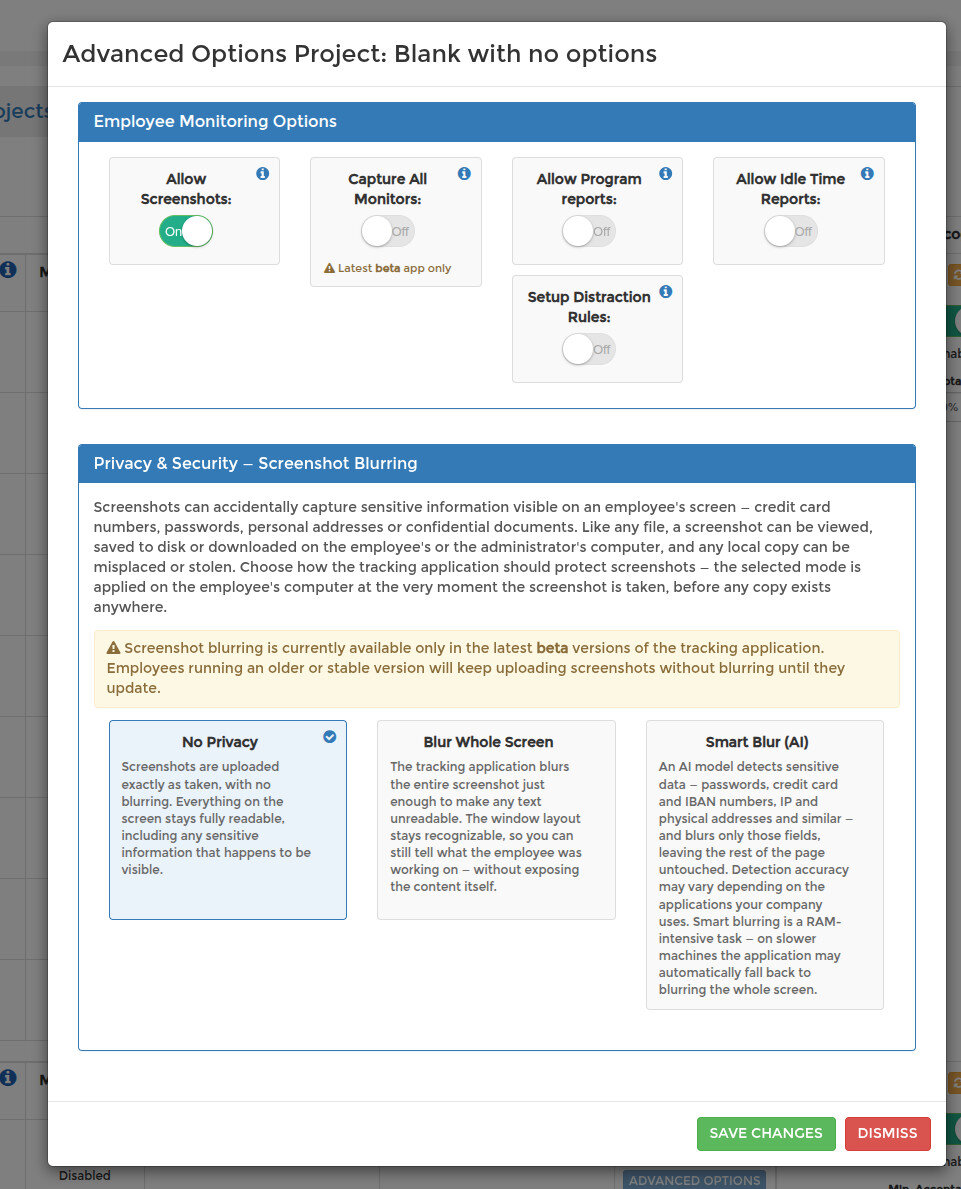
While Allow Screenshots is on, a Privacy & Security — Screenshot Blurring panel also appears — see Screenshots: Choosing a Privacy Blur Mode.
The settings apply to the employee whose row you opened, on that project only, so choose them to match the work — a field team and a design team rarely need the same monitoring.
Open as its own page TopProject Monitoring Options: When Setting Changes Take Effect
Changes you make in a project's Advanced Options — screenshots, program reports, idle reports, distraction reporting and screenshot blurring — do not reach a running tracker instantly. The tracking application receives the project's settings when it logs in.
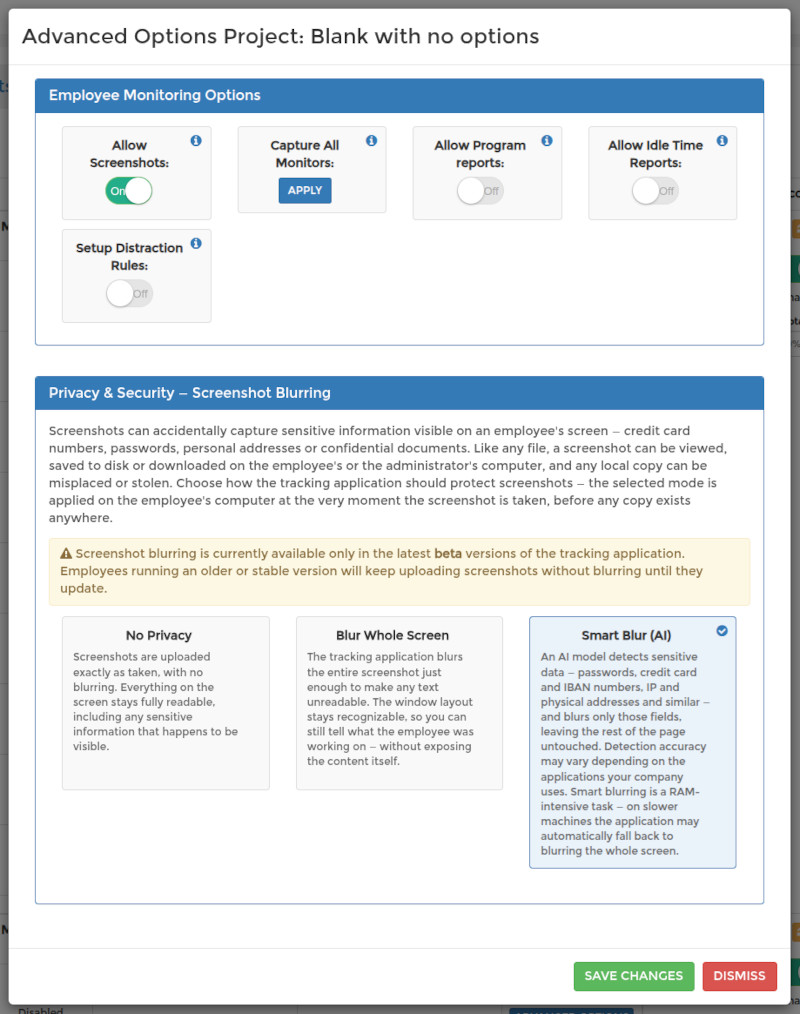
So after you press Save Changes, ask the affected employee to log out of the time tracking application and log back in, or simply restart it. Until they do, the app keeps working with the settings it fetched at its last login — this is why the dashboard reminds you to notify your employee after saving.
Settings are never applied retroactively: anything already tracked and uploaded stays as it was, and the new settings apply from the next login onward. For what each toggle does, see Project Monitoring Options: Screenshots, Programs and Idle Time.
Open as its own page TopProjects: Requiring the Latest App Version (Blocking the Legacy App)
To make an employee use the latest version of the SCREENish tracking app, open PROJECTS, switch to the Assign Projects to Employee(s) tab and press Require latest app in the Tracking App column next to their name. From that moment the old (legacy) app is refused when that employee signs in, and the app tells them where to download the current version. To require it from everyone at once, press Require latest app for the whole team above the table.
Current app and legacy app
There are two generations of the desktop time tracking app:
- Current — version 1.9 and newer. On Windows this is the Official version Windows download for Windows 10 and 11; on macOS it is the Official App MacOS universal build. It keeps itself up to date, and Face Verification, screenshot privacy blurring and Capture All Monitors need it.
- Legacy — versions before 1.9, the Legacy version Windows installer kept for Windows 7 and 8, and the older macOS builds. An outdated legacy app keeps working unless you require the latest app.
The Tracking App column
The column shows, for each employee, the app they last signed in with: the platform and version with a legacy or current label, or No app sign-in seen if they have never used the desktop app. Below it:
- Require latest app — refuses the legacy app for this employee. The column then reads Legacy app refused at sign-in.
- Allow legacy app — lets this employee sign in with the old version again.
- Require latest app for the whole team (above the table) — applies the requirement to every active employee at once. The link under it, Allow the legacy app for the whole team, lifts it for everyone.
What the employee sees
Nothing changes for employees already on the current app or on the Chrome extension. An employee on the legacy app is refused at their next sign-in with the message This app version is no longer allowed by your employer. Please install the latest SCREENish app: sign in at www.screenish.com and open Downloads. A session that is already running is not interrupted; the app signs in again about once an hour, so the requirement takes effect within the hour. Point them to App Sign-In: "This app version is no longer allowed by your employer" for the update steps.
Delegated managers with access to the Projects page have the same buttons. The requirement is per employee and per employer: it never affects the same person's work for another company.
Open as its own page TopProjects: The Complete Guide
Projects are how SCREENish organizes tracked time. You create a project, assign it to one or more employees, and then control exactly how each employee is tracked while working on it: which device they track from, whether manual time entries are allowed, weekly hour limits, hourly rates, and monitoring options such as screenshots, program reports, idle time and distraction reporting.
Everything happens in one place: the PROJECT menu of your employer dashboard, which has two tabs — Create / Edit Your Projects and Assign Projects to Employee(s). This guide walks through both tabs and every option on them. Along the way it links to a short, focused guide about each option; every link opens in a new tab, so you never lose your place here.
Creating and editing projects
In the Create / Edit Your Projects tab, click Create New Project. The project appears in the list right away, named "New Project" — click its name to type the real one, and click the description to replace the placeholder text. Both fields are edited inline: Save confirms, Cancel discards. Use the Find in projects box to filter a long list.
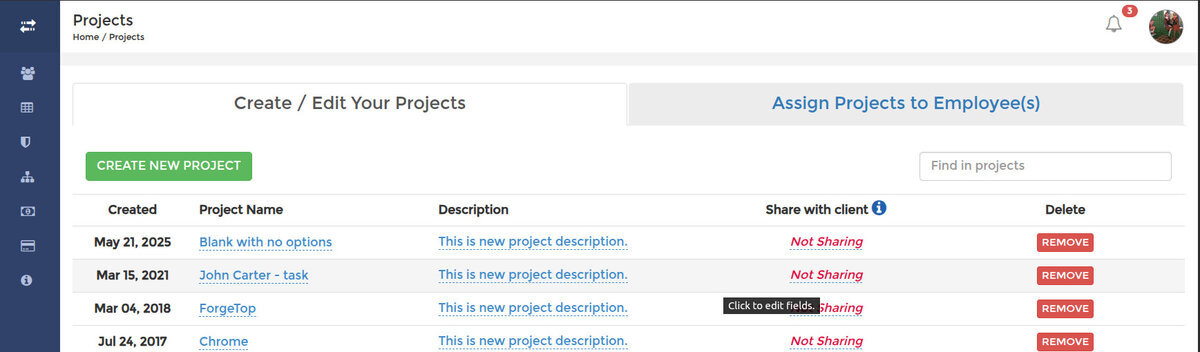
To delete a project, click Remove in its row and confirm. The project stops being available to every employee it was assigned to, and each of them is notified by email.
Read more: Creating and Deleting Projects, Renaming a Project, Adding a Project Description.
Sharing a project with a client
The Share with client column gives a client read-only access to the work logs of the employees working on that project — and on that project only. Click Not Sharing, enter the client's email and confirm: they receive a link and a time-limited password, no SCREENish account needed. You can resend the invitation at any time, or click Make Private to revoke the access again.
Read more: Sharing Project Progress with Clients, and for exactly what the client can and cannot see, Client Sharing: What Your Client Can See.
Assigning a project to an employee
Switch to the Assign Projects to Employee(s) tab. Every active employee has a row, and the Assigned Projects column shows their projects as colored pills. Click the green + button and pick a project from the list — a search box appears when you have more than ten projects, and projects the employee already has are grayed out. The assignment is instant: the employee is notified by email, and the project shows up in their time tracking application the next time they log in to it.
To unassign, click the × on the project's pill (or the Remove button in the project's row in the middle column) and confirm. The employee is notified by email.
Read more: Assigning a Project to an Employee, Removing a Project from an Employee.
Settings for each assignment
The middle column, Projects Management, lists each employee's assigned projects together with per-assignment settings. They apply to that employee on that project, so two employees on the same project can have completely different setups.
- PC / Phone — choose whether this project is tracked from the desktop application or from the phone. Each project uses one or the other, never both. Read more: Choosing PC or Phone Tracking for a Project.
- Manual Time — let the employee add time entries by hand, on top of tracked time. Manual entries are highlighted in red in Accounting so they are never mistaken for tracked hours. Read more: Enabling Manual Time Entry.
- Weekly Limit — cap how many hours the employee can track on this project per week (PC tracking only). Read more: Setting Weekly Time Limits.
- Price/hr — set an hourly rate so payroll is calculated automatically, shown in your default currency. Read more: Setting Employee Hourly Rates, Changing Hourly Rates Retroactively, Setting Your Default Currency.
Advanced Options: monitoring, privacy and distraction rules
Each assigned project row also has an Advanced Options button (PC tracking only). It opens a panel where you decide what the time tracking application records for that employee on that project:
- Allow Screenshots — take a screenshot every 10 minutes while the employee tracks time. On by default; turn it off for time-only tracking.
- Capture All Monitors — capture every connected monitor in one screenshot instead of the single monitor the employee picked. Read more: Screenshots: Capturing All Monitors.
- Screenshot Blurring — blur the whole screen, or let AI blur only sensitive data such as passwords and card numbers, before the screenshot ever leaves the employee's computer. Read more: Screenshots: Choosing a Privacy Blur Mode, Screenshots: When Smart Blur Blurs the Whole Screen.
- Allow Program Reports — record which programs and window titles were used while working. Read more: Using Active Programs Reports.
- Allow Idle Time Reports — report when the employee is inactive while the tracker runs. Read more: Using the Idle Time Feature.
- Setup Distraction Rules — alert the employee when they open sites or programs you have marked as distractions. Read more: Using the Prevent Distractions Feature, Setting Up Distraction Rules.
For an overview of the whole panel, see Project Monitoring Options: Screenshots, Programs and Idle Time. Capture All Monitors and Screenshot Blurring need the current version of the tracking application — see Downloading the SCREENish App.
Face recognition
The Face Recognition column on the same tab lets you verify that the person tracking time is really your employee. It is strictly consent-based and needs an approved profile photo before it can be switched on. Read more: Face Recognition: How It Works, Face Recognition: Enabling It for an Employee.
After you change anything
Changes to assignments and advanced options reach the time tracking application when it logs in, not while it is running — ask the employee to log out of the application and back in, or restart it. The dashboard reminds you of this after every change. Details: Project Monitoring Options: When Setting Changes Take Effect.
Open as its own page TopQuickBooks Time and Payroll: Exporting Timesheets
API & Integrations > Accounting exports produces a CSV timesheet for a period: minutes per member, project and day, ready for QuickBooks Time or for any payroll system that imports a spreadsheet. Pick a layout, a period and whether to include unapproved time, then press Download CSV.

The three layouts
- QuickBooks Time timesheet import — the columns QuickBooks Time expects: First Name, Last Name, Date, Hours, Customer, Service Item, Notes, Billable. The project becomes the customer, hours are decimal, and the notes column names the project and the day. Import it in QuickBooks Time under its timesheet import.
- Generic (hours as decimals) — date, first and last name, e-mail, project, hours, minutes, approved hours, manual hours and idle minutes. This is the one for a payroll system that lets you map columns yourself, and the one to open when a human will read it.
- Spreadsheet (ids and names) — the same rows with the member and project ids included, for matching against records in another system.
The period
Leave the dates empty for the last 30 days, or set From and To for a closed month. A period may span at most 92 days; for a longer stretch, download it in parts. The downloaded file is named after the layout and the dates, so a folder of them stays readable.
Approved entries only, or everything
The default is Approved entries only, which is what payroll should see. Switch to All entries when you are reconciling and want to see what is still waiting for approval — the generic layout carries both the tracked and the approved hours side by side, so the gap is visible in one column.
What the file never contains
No pay rates, no worklog notes written by members, no screenshots, application names or window titles. It is hours, names, projects and dates. Rates stay in SCREENish: multiply in your payroll system, where they belong.
Automating it
The same file is available to your own software over the API, so a monthly export can run on its own rather than being downloaded by hand. See API Keys and the developers page. For a spreadsheet that keeps itself up to date instead of a file per month, see Google Sheets: A Live Timesheet That Updates Itself.
Open as its own page TopRegistration
Signing up for SCREENish takes just a minute:
- Fill in the registration form — name, company, email and password
- Complete the captcha verification
- Tick I AGREE to accept the Terms and Conditions
- Click Start my 10-day Free Trial
That's it — the trial needs no credit card, and you can invite your team right away. See Inviting Your Team.
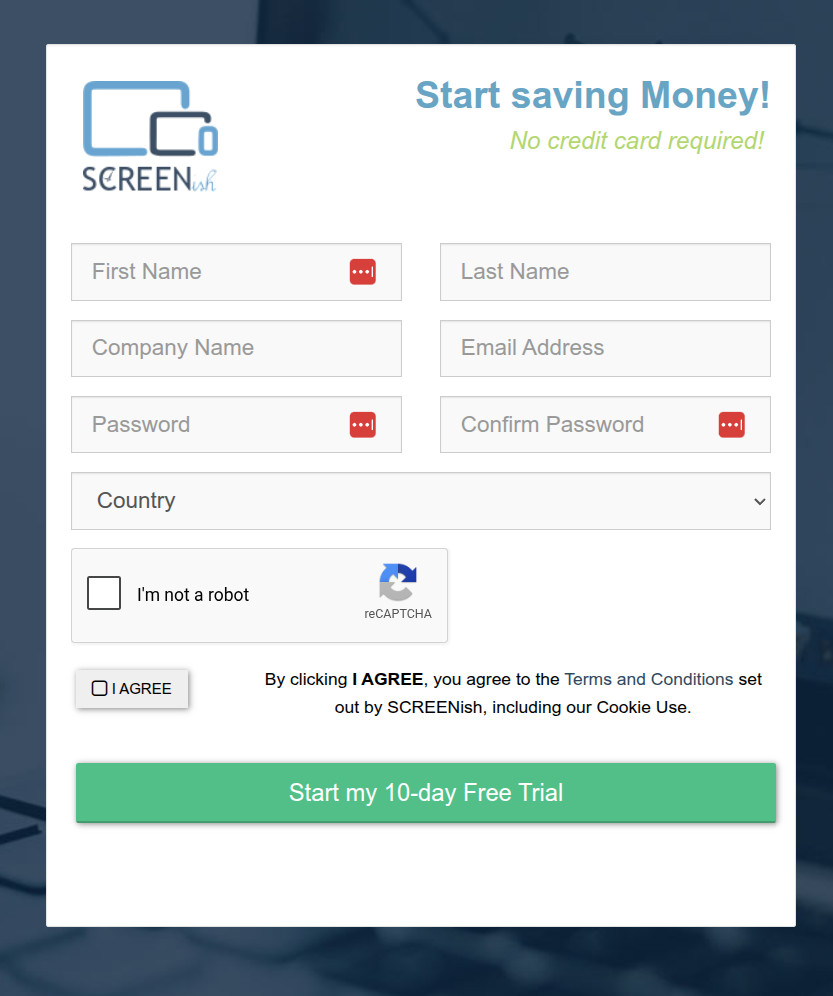
Removing a Project from an Employee
In the Assign Projects to Employee(s) tab, click the × on the project's pill in the Assigned Projects column — or the Remove button in the project's row in Projects Management — and confirm. The project will no longer be available to that employee, and they are notified by email.
Renaming a Project
In the PROJECT menu, click on the project name to edit it. Click Save when you're done, or Cancel to discard changes.
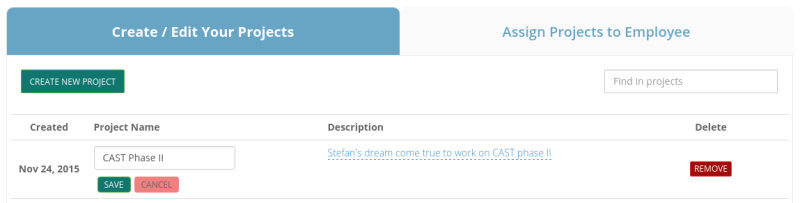
Reviewing Your Work Log (Employee View)
Go to WORK LOGS in your dashboard and pick your employer from the dropdown. Choose a date — days you actually worked are marked green in the calendar. Your total hours for the day and their approval status appear at the top, and below them every tracked slot with its screenshot, hour by hour.
Hover over any screenshot to see the details behind it: the project you were tracking on, your activity as mouse and keyboard counts, idle time, any notes you attached, and whether the slot has been approved yet. Click a screenshot for the full-size image.
Note: deleting a screenshot also removes the time it represents — the tracked minutes for that slot are gone with it. The deletion is not invisible either: the slot keeps a trash-can marker in the work log and the day shows how many screenshots were removed, so your employer can see that something was deleted — just not what was on it.
Open as its own page TopScreenshots: Capturing All Monitors
By default the tracking application captures a single display: the monitor the employee selects when tracking starts. If an employee works on two or three screens, the screenshots show only that one, while the Machine and System Info panel in the work log still tells you how many displays the machine actually has.
To capture everything, open Projects, go to the Assign Projects to Employee(s) tab, open Advanced Options for the assignment and switch on Capture All Monitors in the Employee Monitoring Options panel (the option is shown while screenshots are enabled). From then on, every monitor connected at the moment of the screenshot is combined into one composite image, so it stays a single screenshot in work logs, approvals and reports.
Two things to know before you enable it:
1. It works with the current version of the tracking application. If screenshots still show one monitor, an outdated app is the first thing to check; see Downloading the SCREENish App.
2. It is not compatible with Smart Blur. A project with Capture All Monitors uses whole-screen blur or no blur, and the dashboard will ask you to resolve the conflict when you switch it on. See Screenshots: Choosing a Privacy Blur Mode.
Like every monitoring option, the change reaches the tracker at its next login, so ask the employee to restart the tracking application after you save. See Project Monitoring Options: When Setting Changes Take Effect.
Open as its own page TopScreenshots: Choosing a Privacy Blur Mode
When screenshots are enabled for a project, you can choose how much of each screenshot stays readable. Go to PROJECTS, open the project's Advanced Options, and while Allow Screenshots is on you will see the Privacy & Security — Screenshot Blurring panel with three choices:
- No Privacy — screenshots are uploaded exactly as taken, with nothing blurred.
- Blur Whole Screen — the entire screenshot is blurred just enough that no text is readable, while the window layout, colours and general activity stay visible, so work is still verifiable.
- Smart Blur (AI) — the app reads the screen and blurs only the detected sensitive information (passwords, card and IBAN numbers, emails, phone numbers, addresses, names and similar), leaving the rest readable.
Blurring happens on the employee's own computer, before the screenshot is uploaded — with blur enabled, an un-blurred copy never leaves the machine. Smart Blur needs working memory and can automatically switch to whole-screen blur on some screens — see Screenshots: When Smart Blur Blurs the Whole Screen.
Screenshot blurring requires the current version of the tracking application. Employees on an older version keep uploading screenshots without blurring until they update.
Open as its own page TopScreenshots: Deleted and Idle Markers in Work Logs
WORK LOGS marks screenshots that need context so you can read a day at a glance.
- Trash-can marker — the employee deleted that screenshot. The image is gone, but the slot and the day note tell you how many were removed.
- Dashed border — idle time was recorded on that screenshot. Red means not approved, green means approved.
- Green background — the time was recorded inside a premium time frame.
A day with idle time also shows This log contains N minutes of idle time at the top. None of these markers are accusations — people step away from their desk, and deleting a private screenshot is allowed.
Open as its own page TopScreenshots: Deleting Your Own Screenshots
You can delete a screenshot from your own work log if it caught something private. Open WORK LOGS, pick the day, select the screenshot and delete it. The image is removed for good and cannot be recovered.
Your manager still sees that it happened. A trash-can marker stays in the slot where the picture was, and the day carries a note reading N screenshots deleted by the employee on this day. The picture is gone — the fact you deleted it is not hidden.
Deleting a screenshot does not remove the time it covered. Your tracked hours stay on the timesheet exactly as they were.
Open as its own page TopScreenshots: When Smart Blur Blurs the Whole Screen
Even on a project set to Smart Blur (AI), SCREENish sometimes blurs the whole screenshot instead of just the sensitive parts. This is automatic, you do not need to do anything, and it always errs on the safe side: whole-screen blur can never reveal more than smart blur would.
- The screen looks like a configuration or source-code file. When many credential-style labels appear on one screen (passwords, API keys, tokens, database connection strings — seven or more), these are the hardest screens to redact precisely, so the whole screen is blurred to be certain nothing leaks.
- The screen is very text-dense. A packed code editor or a long document (more than about 3,000 recognised words) holds more text than can be reliably checked, so the whole screenshot is blurred rather than risk leaving a name visible.
- The computer is low on memory. Smart Blur needs working memory to read the screen. Under memory pressure the app skips the heavier smart pass and blurs everything instead.
- Redaction is taking too long. On slower machines, if analysing a screenshot would take longer than about two minutes, a whole-screen blur ships instead so uploads never fall behind.
- The on-screen text cannot be read. If text recognition is not ready yet or fails for any reason, the app falls back to whole-screen blur so a screenshot is never uploaded without redaction.
In every case your activity stays visible — layout, colours and the general shape of the work — but no readable text is exposed. With blur enabled, SCREENish never uploads an un-blurred screenshot. To pick a mode in the first place, see Screenshots: Choosing a Privacy Blur Mode.
Open as its own page TopSecuring Your Account with Two-Factor Authentication
Two-Factor Authentication (2FA) adds a second step at login: a code from an app on your phone, so a password alone is not enough to get in.
Go to EDIT PROFILE > Two-Factor Authentication (2FA) and press Enable Two-Factor Authentication.
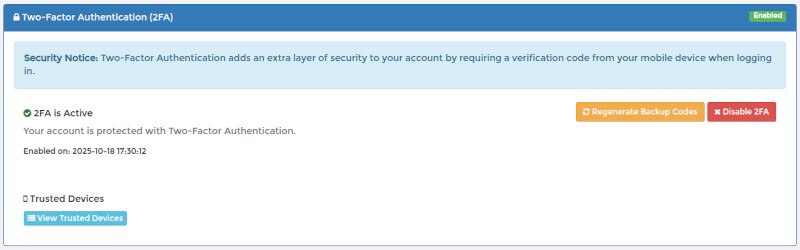
- Step 1: Scan the QR code with an authenticator app (Google Authenticator, Authy, and similar).
- Step 2: Enter the 6-digit code the app shows and press Verify & Enable 2FA.
From then on you enter a fresh code from the app each time you log in. Tick Trust this device for 30 days to skip the code on a computer you use regularly, or press Use Backup Code Instead if your phone is not to hand — each backup code works once.
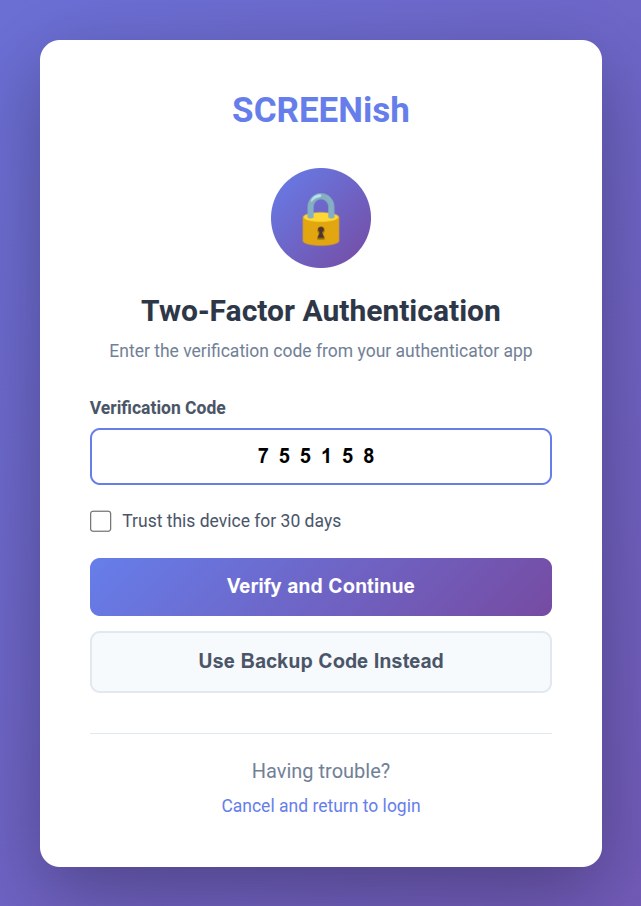
The panel shows an Enabled badge, and you can disable 2FA from the same place if you ever need to.
Open as its own page TopSetting Employee Hourly Rates
Go to PROJECT > Assign Projects to Employee. In the Price/hr column, enter the hourly rate for each employee. Click Save to confirm. To remove a rate, click the X button.
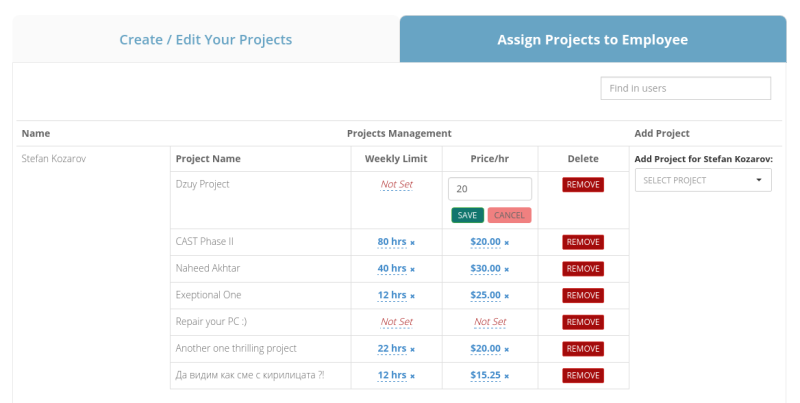
Setting Up Distraction Rules
With Distraction Reporting switched on in Advanced Options, the panel shows ready-made categories: Social media, Video & streaming, Games, Shopping, News, Music & audio.
Categories: tick a category and every member appears below it, all counted — Facebook, Instagram, TikTok and so on. Untick a member to exclude it for this employee on this project (LinkedIn is a common exception). When we add a new network to a category later, it starts counting automatically for everyone who has the category on; reopening the panel always shows the current list.
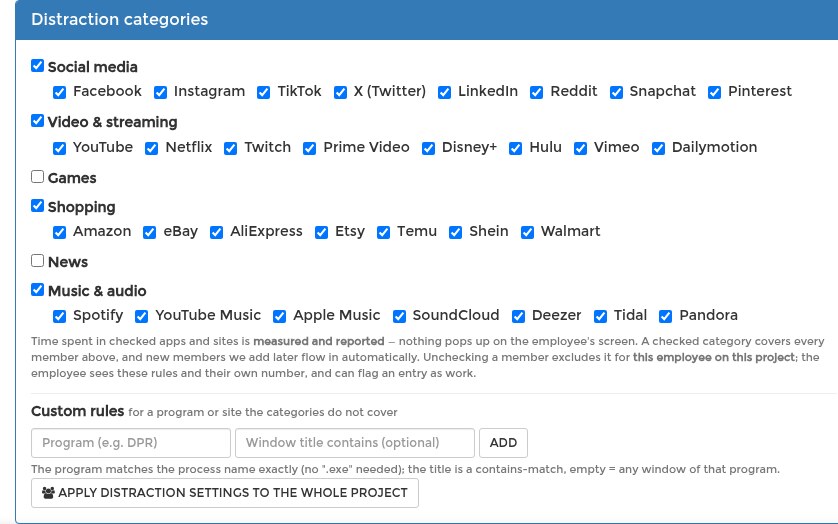
Custom rules: for a program or site the categories do not cover, use the row under the categories: type the program name, optionally a window-title text, and press Add. The program matches the process name exactly (no ".exe" needed); the title is a contains-match; leave it empty to count every window of that program.
One employee or the whole project: the panel edits one employee's assignment. Apply distraction settings to the whole project copies the distraction settings to every worker on the project, including people you assign later.
Press Save Changes. Settings reach the tracking application when the employee next logs in — see When Setting Changes Take Effect.
Open as its own page TopSetting Up Email Payroll Reports
Step 1: Go to Accounting.
Step 2: Select employees/projects, choose Approved/Disapproved/Both, set date range (This Week or This Month), and check Payrolls.
Step 3: Click Subscribe for Weekly Reports or Subscribe for Monthly Reports, name your report, and click OK.
Reports are sent to your registered email address.
Setting Weekly Time Limits
Go to PROJECT > Assign Projects to Employee. In the Weekly Limit column, enter the maximum hours for each employee. Click Save to confirm. To remove a limit, click the X button.
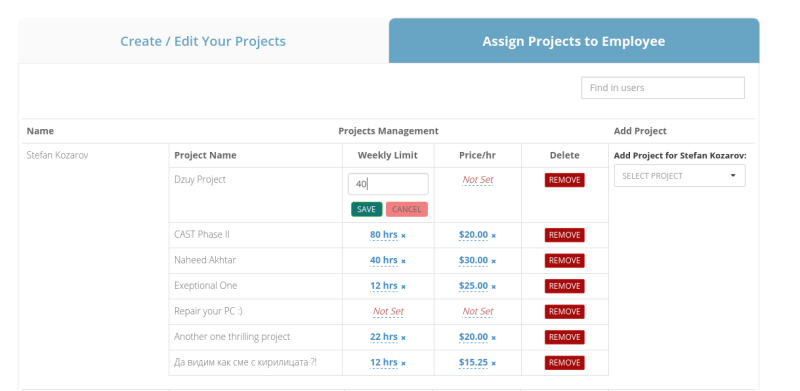
Setting Your Default Currency
Go to Projects > Assign Projects to Employee and find the currency dropdown. Search by country name or currency code (USD, EUR, etc.). Confirm your selection—the currency symbol will then appear in Accounting and Projects sections.
Note: This only changes the currency symbol displayed in reports.
Setting Your Time Zone
Your time zone controls how SCREENish dates everything you see: your Today and This Week totals, weekly limits, graphs, and — for account owners — invoices and payroll reports.
Go to EDIT PROFILE > Personal Info > Time Zone and pick your zone from the Choose Time Zone list.
Get this right before you rely on reports: if the time zone is wrong, a day's work can land on the wrong date and weekly limits can reset at the wrong hour. Automated email reports are also sent based on this setting.
Open as its own page TopSharing Project Progress with Clients
Go to Projects and, in the Share with client column, click Not Sharing next to a project. Enter your client's e-mail and save. Your client gets a letter with a link and a password to a read-only view of that project only: its work logs, screenshots and activity, nothing else.
Resend Invitation sends the letter again; Make Private stops the sharing at once.
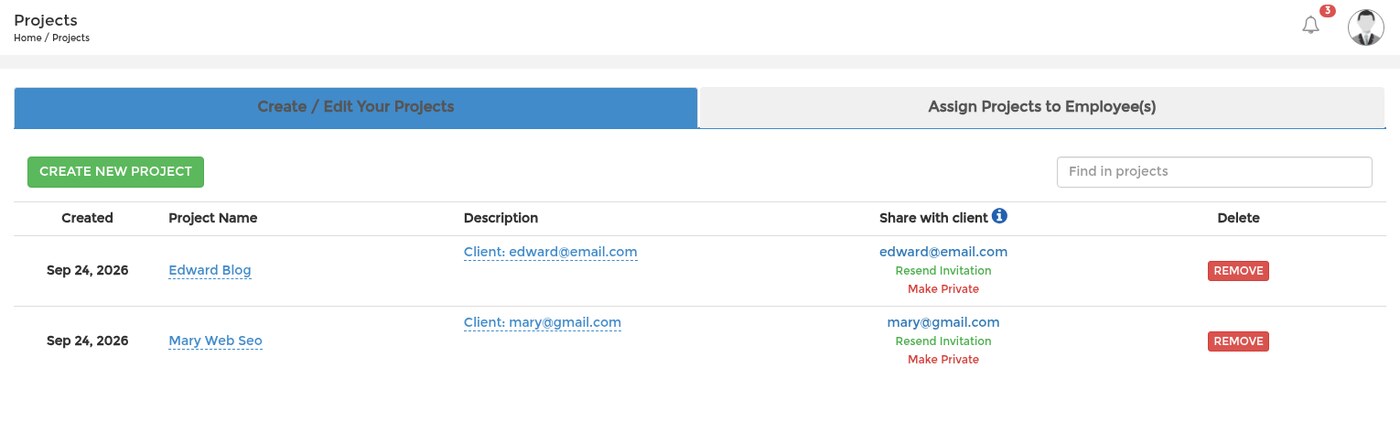
What the client sees is described in Client Sharing: What Your Client Can See.
Open as its own page TopSlack: Getting SCREENish Alerts in a Channel
SCREENish can post into a Slack channel when someone starts or stops tracking, when an activity review opens, when a face check fails, when the team changes — and a summary of yesterday every morning. You choose the channel and the events; no Slack app has to be installed from a marketplace.
Step 1: get an incoming webhook URL from Slack
- Open api.slack.com/apps and press Create New App > From scratch. Name it (SCREENish, for example) and pick your workspace.
- Open Incoming Webhooks and switch Activate Incoming Webhooks on.
- Press Add New Webhook to Workspace, choose the channel, and allow it.
- Copy the Webhook URL that appears. It starts with
https://hooks.slack.com/services/and is a secret: anyone holding it can post into that channel.
Step 2: add the connection in SCREENish
- Open API & Integrations in the left menu. If it is your first connection, accept the API access terms shown at the top.
- In Connections: webhooks and chat choose Slack (incoming webhook URL) from the first list.
- Give it a label (the channel name is a good one), paste the webhook URL, and tick the events you want.
- Press Add connection, then Test. A line saying Screenish: connection test successful. should appear in the channel within a second or two.
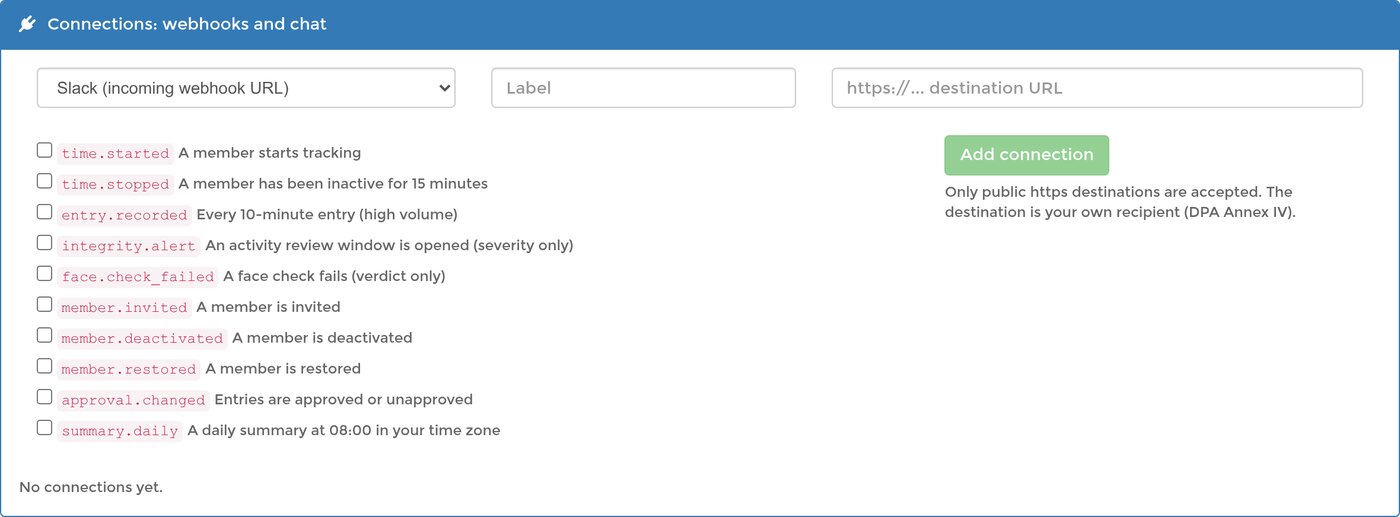
Which events to tick
- A member starts tracking — Ann Lee started tracking (09:14).
- A member has been inactive for 15 minutes — Ann Lee stopped tracking after 96 min (10:50).
- An activity review window is opened — Activity review: Ann Lee, severity high, 14:20 to 14:40 (2026-09-17). Open the worklog to review.
- A face check fails — Face check failed: Ann Lee at 2026-09-17 11:02.
- A member is invited, deactivated or restored — one line naming the member and the change.
- Entries are approved or unapproved — Approved 42 entries for Ann Lee.
- A daily summary at 08:00 in your time zone — yesterday's hours per member, with idle and manual minutes and any reviews, and the team total.
- Every 10-minute entry — one line per entry per member. On a team of ten this is hundreds of messages a day; tick it only for a quiet test channel.
For most teams the useful set is the daily summary plus activity reviews. Start there and add more later; the tick boxes can be changed by removing the connection and adding it again.
When messages stop arriving
- Deliveries on the connection's row lists every message SCREENish tried to send: the event, how many attempts, whether it was delivered, when the next attempt is due, and Slack's answer.
- A message that fails is retried after 1, 5 and 30 minutes, then 2 and 6 hours, and abandoned after five attempts.
- If Slack keeps refusing — usually because the webhook was deleted in Slack or the app was removed from the workspace — the connection is paused automatically and the row says why. Create a new webhook URL in Slack, add the connection again, and remove the old row.
- Pause stops the messages while you are, say, running a migration; Resume starts them again. Remove deletes the connection entirely.
What is never posted
The messages carry hours, activity counts, member and project names, and verdicts. They never carry screenshots, application names, window titles, biometric data or pay rates, and an activity review is reported as a severity and a time window only — never how it was detected. Remember that whoever can read the channel can read all of this: pick the channel with that in mind.
Microsoft Teams, Discord and Google Chat work the same way — see Microsoft Teams, Discord and Google Chat: Getting SCREENish Alerts. To send the same events to your own software instead, see Zapier, Make and n8n and the developers page.
Open as its own page TopStarting Time Tracking (Employee View)
Open the SCREENish app and select an employer from the Project dropdown. If you have assigned projects, choose one from the Sub-project dropdown. Click Start tracking time to begin.
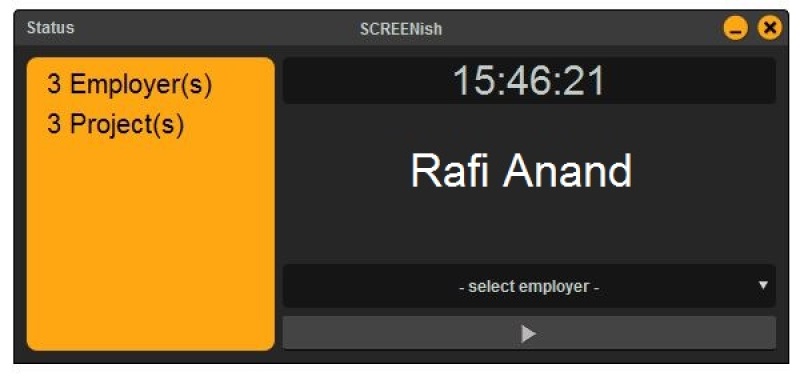
Startup Wizard: Setting Up Your Team on First Sign-In
Follow this guide the first time you sign in to a new employer account and SCREENish offers you the Startup wizard. It takes you through inviting your team, sizing your trial, creating projects, assigning people and choosing what the tracking app records — in one pass, instead of finding each of those screens yourself. Nothing is sent and nothing is applied to your account until you press DONE at the end.
Who sees the wizard
The offer appears once, at the first sign-in of a new employer account. Accounts created before the wizard existed never see it, and nothing is missing from them — every screen the wizard fills in is reachable from the menus at any time.
You get two choices, and you have to pick one; clicking outside the window does not close it:
- Startup wizard — go through the steps below.
- I'm fine, thanks — closes it and does not show it again.
Step 1 — Your team
Type an e-mail address and press Add, or press Upload a CSV and pick an export from your HR tool or a spreadsheet — every e-mail address anywhere in the file is picked up, and duplicates are ignored. Each address is then checked and labelled:
- New or Has an account — will be invited.
- Invalid, Your own address, Already on your team, Employer account — will be skipped. Remove them or leave them; they are not counted.
A trial covers a limited number of employees. If you add more than it holds, the wizard tells you how many to remove — you can invite the rest later from Users.
Step 2 — Trial
The wizard shows how many employees your free trial will cover: the people already on your team plus the ones you just added. The trial is sized when you press DONE — no card, no trip to the Subscription page. If your account already has a paid subscription, it is left exactly as it is and this step only tells you so.
Step 3 — Projects
Two options. Yes, create projects lets you add as many as you need, each with a title (required) and an optional description; with projects, every report breaks down per project and each worker can have a rate and a weekly limit per project. No, not now creates a single project named General and puts everyone in it — you can split it up later.
Step 4 — Assign
Tick who works on what. Use Everyone on every project, or add everyone to one named project, then adjust individual rows with All and None. The wizard will not let you past this step while somebody has no project: a worker without a project cannot track time.
Step 5 — Monitoring options
Twelve questions, one screen at a time — eleven if you turn screenshots off, because the blur question is then skipped. Each answer applies to everyone you are inviting, and all of it can be changed per worker and per project later under Projects.
- Allow Screenshots, and whether to capture every connected monitor instead of the one the employee chooses.
- Screenshot blurring — No Privacy, Blur Whole Screen, or Smart Blur (AI). The blur is applied on the employee's computer before any copy exists.
- Allow Program reports — programs and window titles, in the worklog and the weekly e-mail.
- Allow Idle Time Reports.
- Distraction Reporting — quiet measurement of the time spent in websites and programs you mark as distracting; nothing pops up for the employee. Switch it on and tick the categories to count (it needs Program Reports). Per-member exceptions and custom rules come later under Projects > Advanced Options.
- Manual Time — lets employees add time by hand for work away from the computer. Manual entries are marked as such and can be approved or rejected like everything else.
- PC or Phone — phone tracking records GPS instead of screenshots, and the options above do not apply to it.
- Weekly Limit — hours per week, per project. Between 1 and 168, or leave it empty for no limit.
- Labour cost per worker — an hourly rate each, so every report shows cost beside hours. Rates stay private to you: they never appear to the worker or in any connection.
- Exceptions — if a few people need something different, mark them here. Each gets their own set, pre-filled with the team's, applied to all of their projects.
- Screenshot approval — approve manually yourself (the default), auto-approve everything, or auto-approve but unapprove heavy idle (over 7 minutes) or any idle at all.
- Faked-activity review e-mails — a daily digest when a worker's tracked time may have been faked. The findings still reach the review queue and the worklog if you turn this off.
Step 6 — Review, then DONE
The Review page lists everything in one place: the addresses to be invited, the trial size, the projects and who is on them, the monitoring options, the exceptions and the approval rule. Read it — this is the last screen before anything happens. Everything on it happens when you press DONE.
The wizard then sizes the trial, creates the projects and assignments, applies the options, and sends the invitations a few at a time, showing each address as it goes: Invited, Already on your team, Failed, or Not sent — retry when the server did not answer. Press Retry for those; nobody is invited twice.
If you have to stop
Between the first and the last step there is an Exit link in the corner. Nothing is applied to your account, but your answers are kept: the next time you sign in the wizard says where you stopped and offers Continue where I left off. Your progress is also saved as you move between steps, so a closed tab or a lost connection does not cost you the work.
Check the result
After the final screen, press Go to my dashboard and confirm three things:
- Users lists the pending invitations. Each invitee has a link to set a password and download the tracking app, and appears in your lists once they accept; from here you can re-send or remove an invitation.
- Projects shows the projects you created and the people assigned to them — this is also where rates, weekly limits and monitoring options are changed per worker from now on.
- Subscription shows the trial sized to your team.
The approval rule you chose lives under your profile, not under Projects. Everything else is exactly where the wizard said it would be.
Related: How to Invite Employees · Projects: The Complete Guide · Project Monitoring Options: Screenshots, Programs and Idle Time · Screenshots: Choosing a Privacy Blur Mode · Approvals: Automatic Screenshot Approval
Open as its own page TopTeam Huddle: Calls, Chat and Files
The desktop app and the browser extension both include team communication. While you track time for a team, your online and in-call status and your display photo are visible to that team, so people can see who is around.
- Calls — multi-party audio and video, end-to-end encrypted. They run peer-to-peer where the network allows; where a relay is needed it forwards encrypted packets only, so SCREENish cannot read the stream and never stores it. Nobody outside the call can reach it. A participant can record the conversation locally, to their own device, if they choose to.
- Screen sharing — inside a call, share your whole screen or just a single program, so you can walk the room through one app without exposing everything else.
- SCREENish in-call whiteboard — the presenter draws and the rest of the room follows along live.
- Chat — messages pass through the servers only for the moment of delivery and are kept, encrypted, on the participants' own devices. No copy is kept.
- Files — sent device to device and never touch SCREENish servers at all.
For the extension, see Chrome Extension: Team Huddle — Calls, Chat and Files.
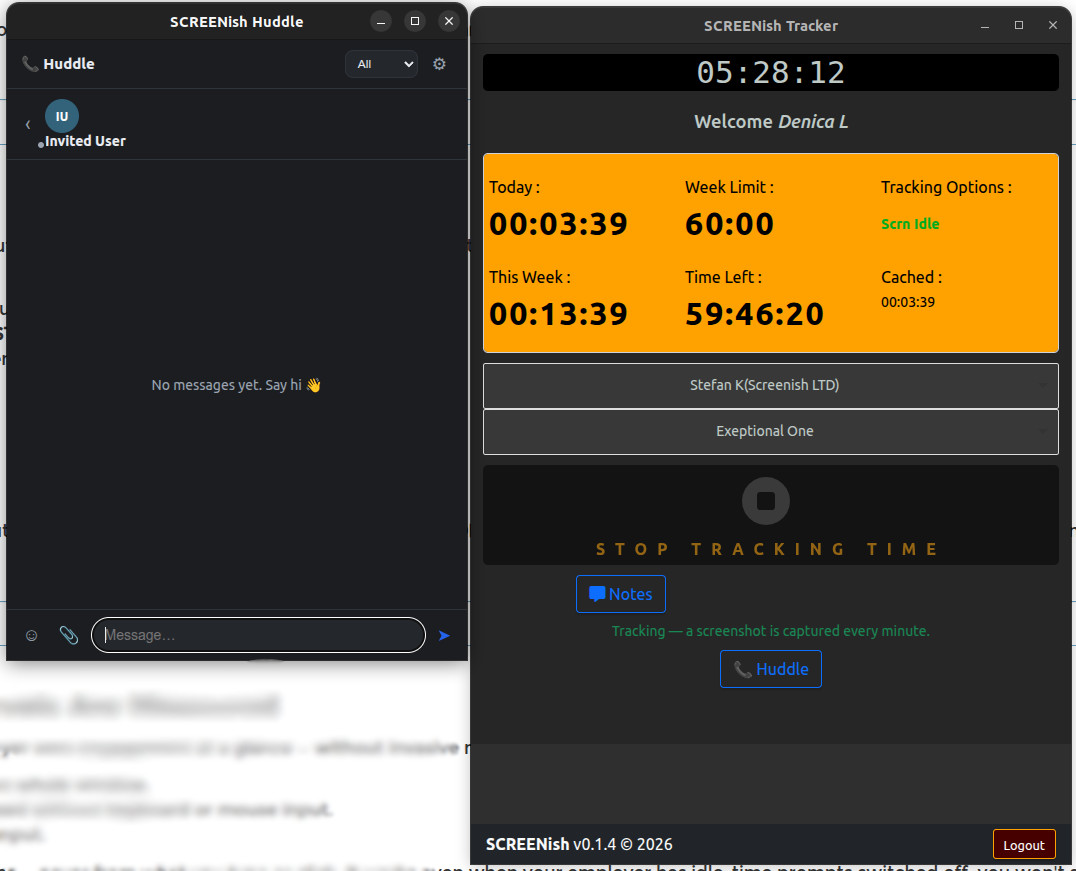
Team Overview: Choosing Which Widgets You See
Every table, chart and strip on the Team Overview page is a widget you can switch off — the page adapts to how you manage, whether that is a daily attendance check, a weekly productivity review, or a monthly overtime report.
There are two ways to customize. The quick way: every widget has a small gear icon in its corner — click it and the widget disappears immediately. The full picture: the Settings tab lists all widgets grouped by tab, each with a switch, so you can re-enable anything you hid or set up the page in one pass.
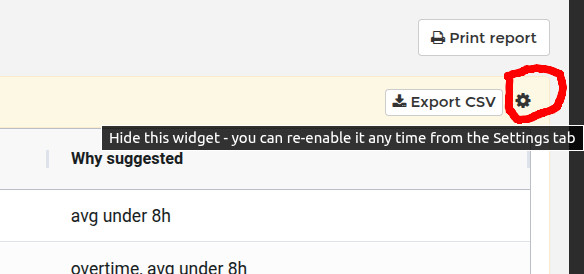
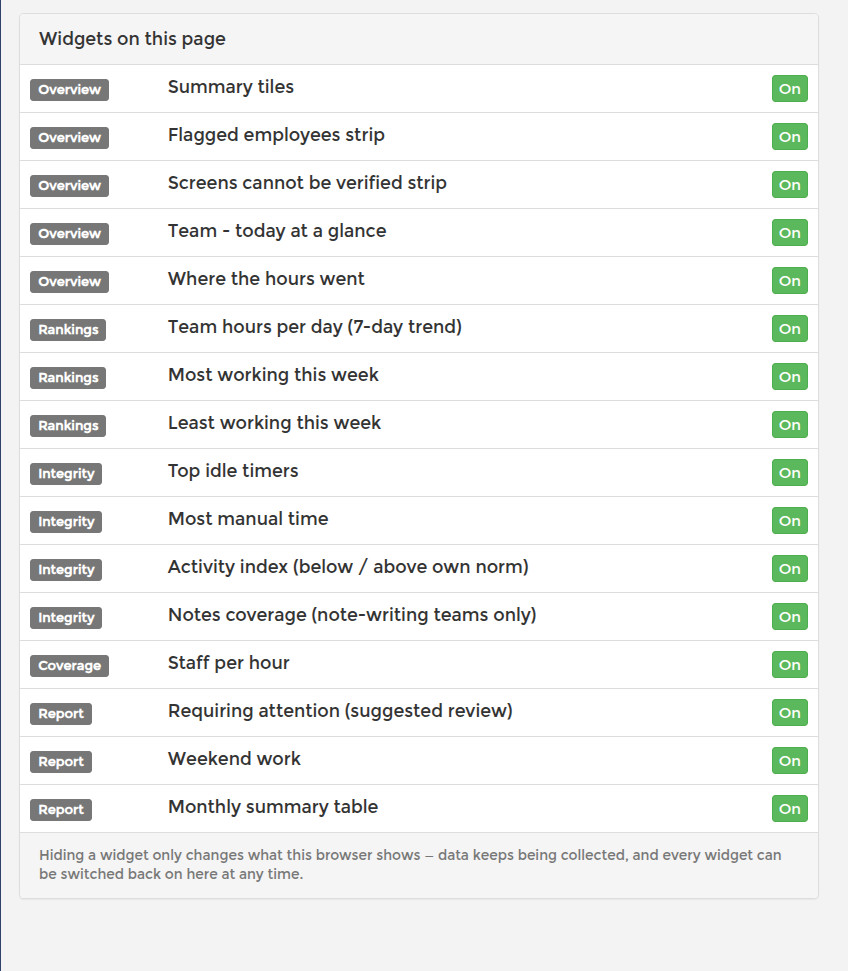
Your choices are saved per browser, so your setup on the office computer and your setup at home are independent, and each manager with dashboard access keeps their own arrangement without affecting anyone else.
Hidden widgets are genuinely off, not just invisible: the dashboard does not even request their data from the server, so a trimmed-down page also loads faster. Switching a widget back on fetches its data on the spot — nothing is lost by experimenting.
Open as its own page TopTeam Overview: Integrity Signals (Idle, Manual Time, Activity Index)
The Integrity tab of the Team Overview page gathers the signals that help you judge how real the tracked hours are: idle time, manually added time, each employee's activity level against their own norm, and how consistently people write work notes. Everything covers the last 7 complete days, and everything here is a suggestion to look closer — never an automatic accusation. The work log is always the source of truth.
Top idle timers ranks employees by idle time — periods when the tracker was running but keyboard and mouse were untouched. Each row shows the idle hours and, more importantly, the share of their tracked time that was idle: 100 idle minutes mean something very different in a 40-hour week and a 5-hour week.
Most manual time ranks employees by manually added time entries — hours typed in rather than tracked live. Manual time is a normal feature (offline meetings, field work), but an unusually high share is worth a conversation. See Setting Weekly Time Limits for how to restrict manual entries per project.

Activity index — each employee against their own norm
The activity index measures keyboard and mouse inputs per tracked hour and compares each employee against their own previous 28-day pace — never against colleagues, because a designer and a developer have naturally different input patterns. Two panels show the outliers: Activity below own norm (a possible sign of disengagement, or simply a week of meetings — ask, don't assume) and Activity above own norm (a strong sprint — or automated input; above 150% the value turns amber: verify in the work log before praising). The index requires tracking app v1.9.39 or newer; employees on older versions are simply not listed, which is honest — they are never shown as "zero activity".

Notes coverage appears only for teams that actually use work notes (when at least a quarter of tracked slots carry one) and lists the employees who write them least — useful where notes are part of the reporting routine. See Using Notes and Reminders.
Open as its own page TopTeam Overview: Rankings and the 7-Day Trend
The Rankings & trend tab of the Team Overview page answers a simple management question: how much did the team actually work in the last 7 days, and who worked the most and the least? To keep the comparison fair, every number on this tab covers the last 7 complete days — today is deliberately excluded, because a day still in progress would distort averages and rankings.
Team hours per day is a bar chart of total tracked time for each of those 7 days. It makes weekly rhythm visible at a glance: normal working days, weekends, and any day where team output suddenly dropped.
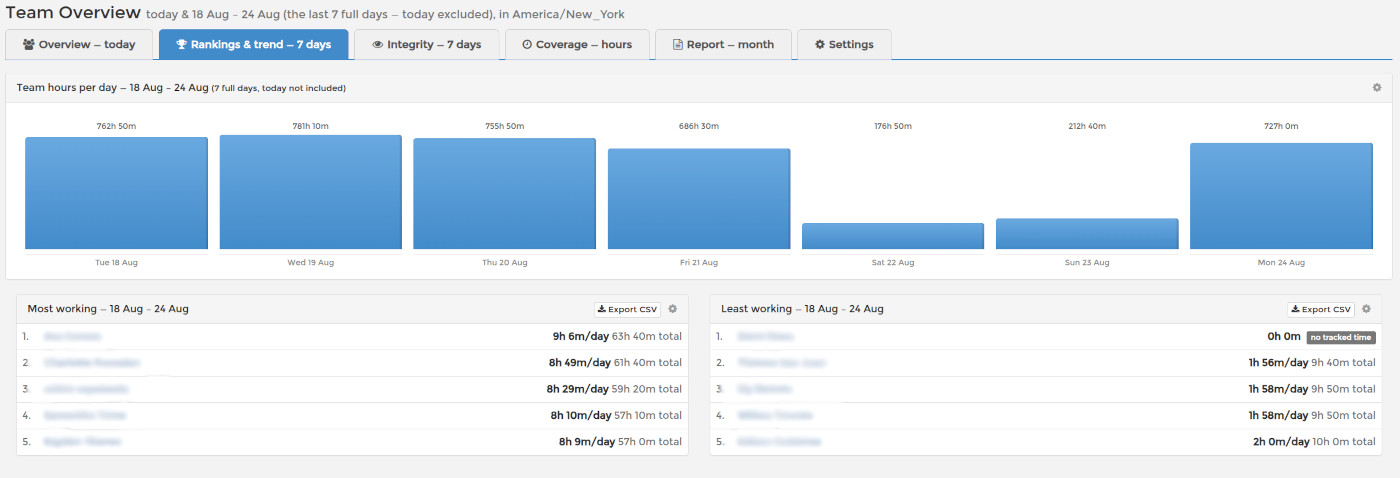
Most working and Least working rank your employees by tracked time over the same window. The headline number for each person is their average per active day — a fairer measure than the raw total, because someone who worked three intense days is not ranked below someone who spread the same hours over seven. The raw weekly total is shown alongside.
The Least working list intentionally includes employees with zero tracked hours. If someone silently stopped tracking — or stopped working — this is where you notice, making the list a practical early-warning tool for attendance problems in remote teams. Both lists export to CSV.
A low number is a reason to look, not a verdict: open the person's work log, check their projects and notes, and talk to them. Meetings, calls and offline work do not appear in tracked time.
Open as its own page TopTeam Overview: Staff Coverage by Hour
The Coverage tab of the Team Overview page shows your staffing level for every hour of the day: how many employees are typically working at 9:00, at 14:00, at 22:00. If you run customer support, a help desk, or a team spread across time zones, this is the fastest way to see coverage gaps and plan shifts.
The Staff per hour chart has one bar per hour of the day, in your timezone. The bar height is the average number of employees tracking during that hour per day, computed over the last 7 complete days — today, still in progress, is not part of this tab at all. Hover any bar to see the peak day (the most people ever simultaneously in that hour), the total hours tracked in that slot, and which projects cover this hour — a per-project split of who is actually working then.
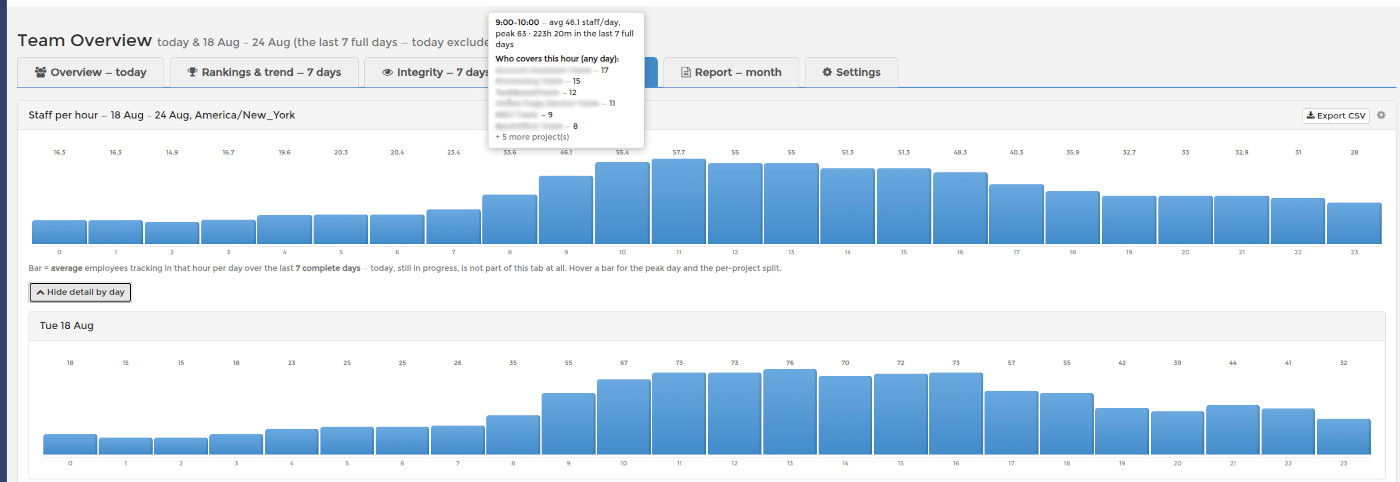
Below the overall chart, a per-day detail view breaks the same picture into seven mini-charts, one per calendar day, all on a shared scale so days stay visually comparable. That is where you distinguish "we always have two people at 8:00" from "we had four on Monday and nobody the rest of the week".
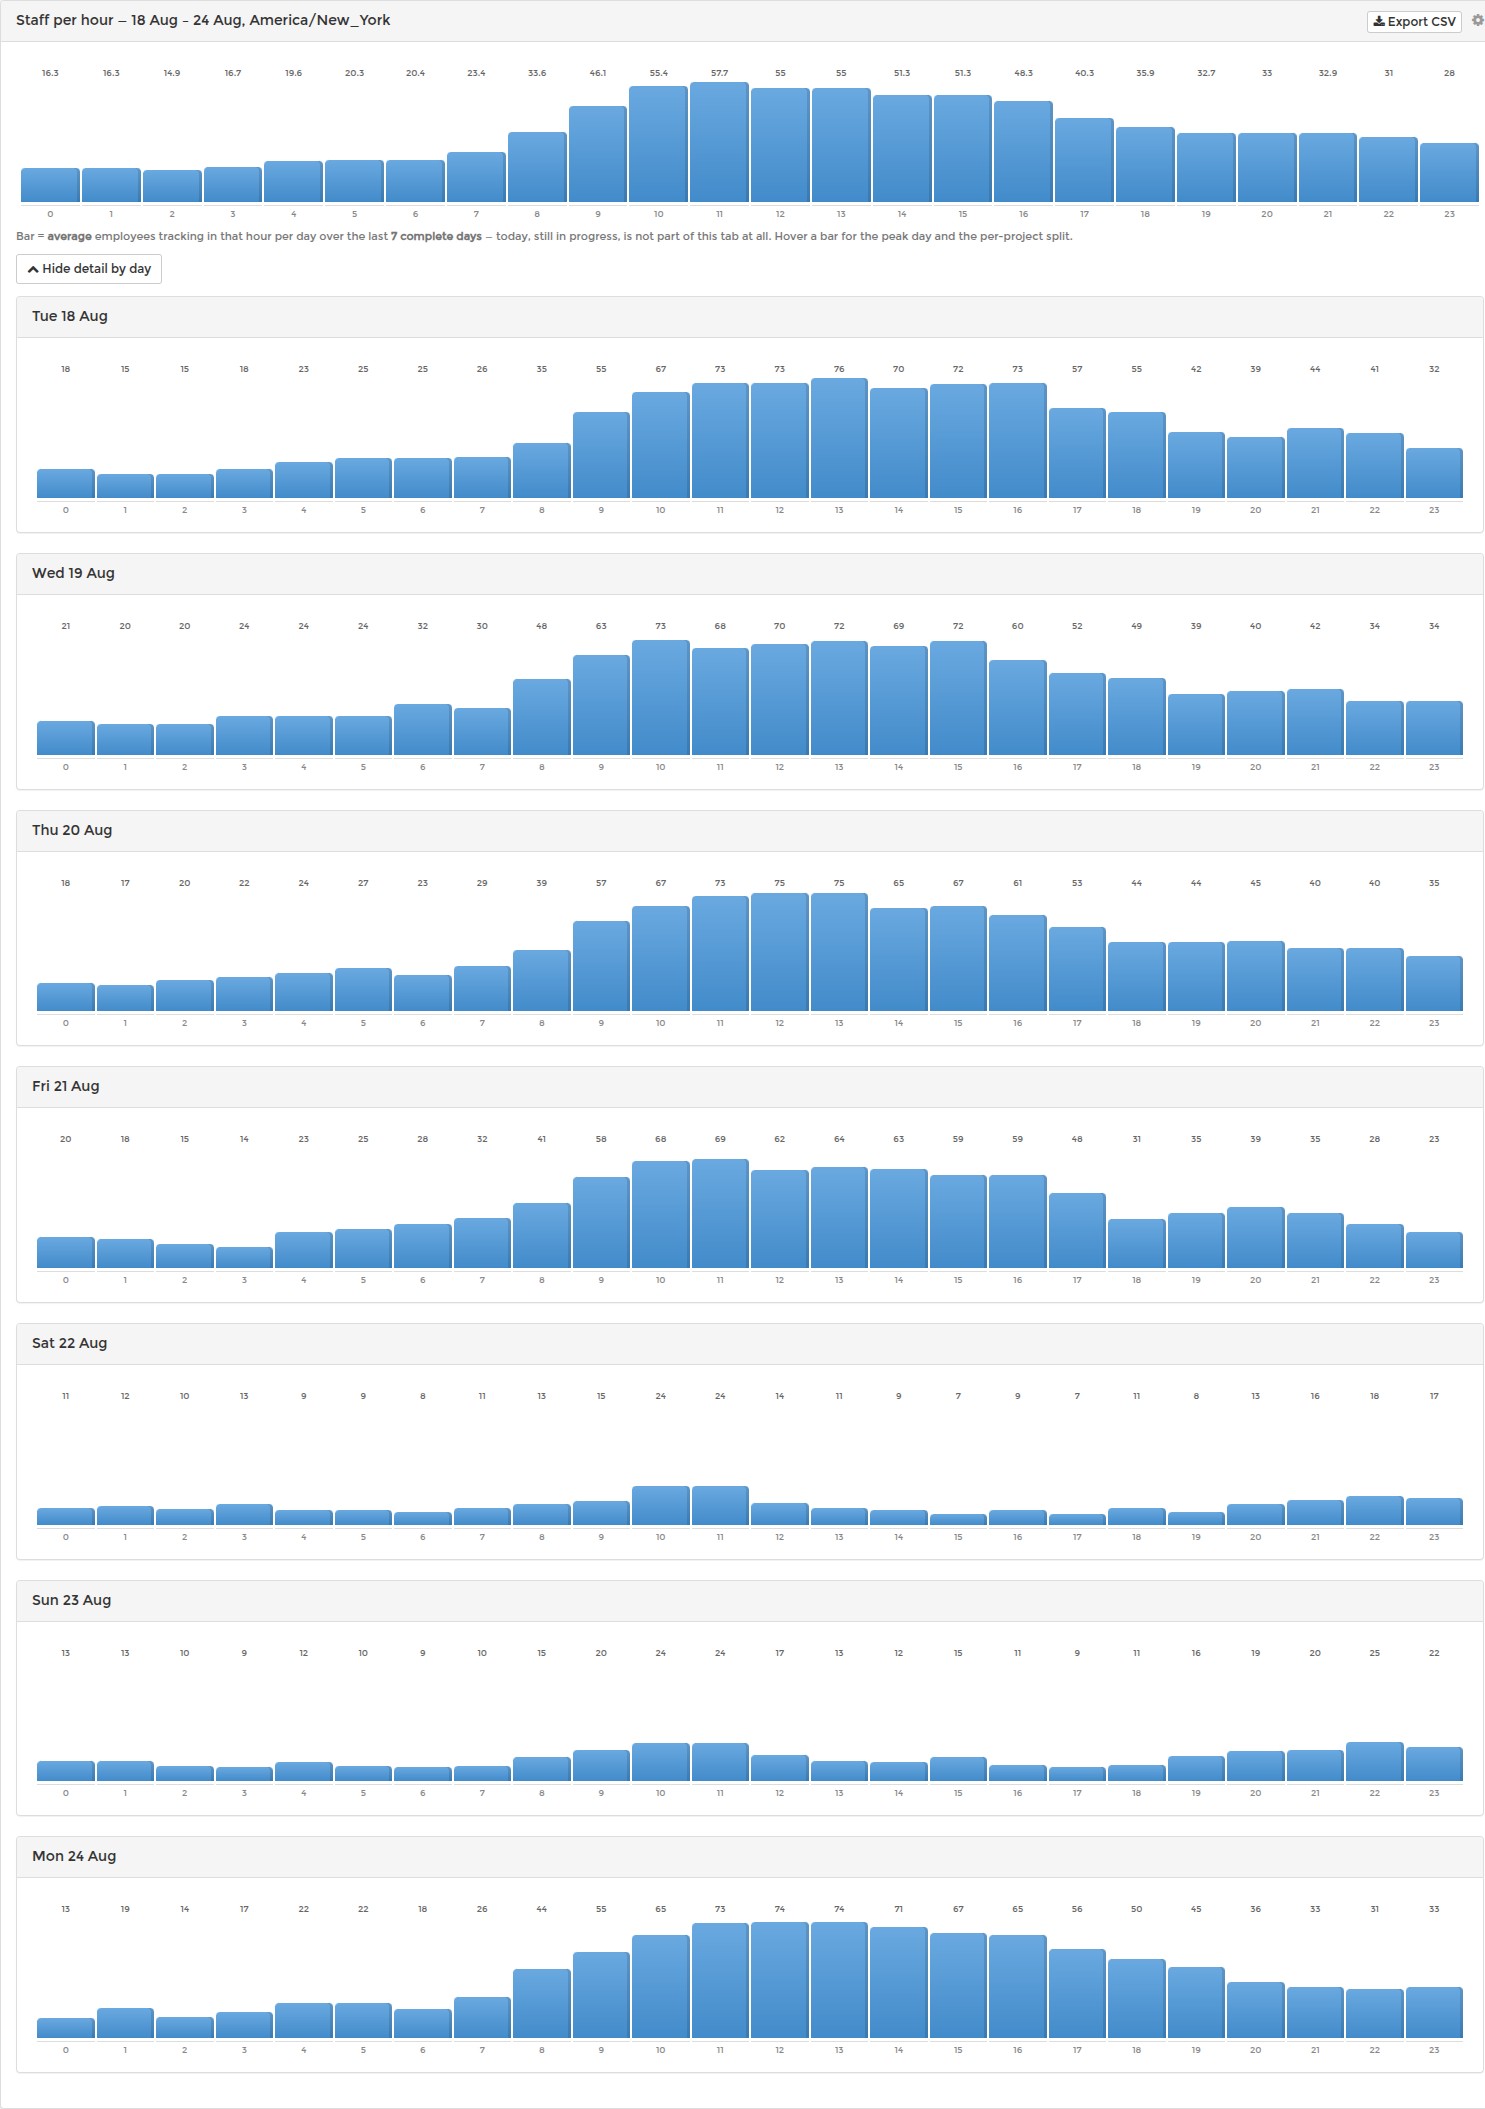
Typical uses: finding hours where nobody covers support, checking the overlap window of a distributed team, verifying that agreed shift patterns actually happen, and spotting employees consistently working late nights. The chart exports to CSV for further analysis.
Open as its own page TopTeam Overview: The Monthly Attendance and Overtime Report
The Report — month tab of the Team Overview page is an automated monthly attendance and overtime report for your whole team: worked and missed days, attendance percentage, regular hours, weekday and weekend overtime — the sheet many managers build by hand every month, generated for you. It always covers the current month through yesterday (today, still in progress, is excluded), and it consists of three tables.
Requiring attention
The first table lists only employees the built-in heuristics suggest reviewing, with the reason spelled out in the Why suggested column: attendance below 90%, total overtime of 20 hours or more, or an average under 8h per worked day (judged only once someone has 5+ worked days). Columns: Attendance, Avg / weekday, Missed (weekdays with no tracked time), Total OT and Days < 8h. These are threshold suggestions, not verdicts — someone can be legitimately on vacation, part-time, or doing agreed overtime. Verify in the work log before acting.
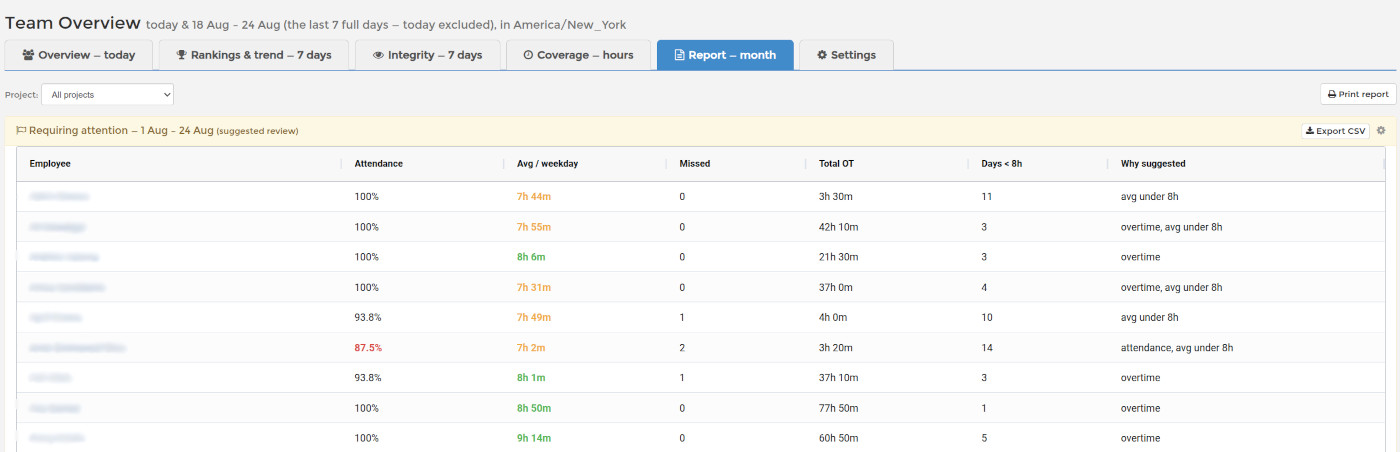
Weekend work
The second table lists everyone who worked on weekends this month: Weekend days, Weekend hours, and the share of their total monthly time that weekend work represents. It is informational — weekend work is often agreed overtime — but it makes unpaid or unnoticed weekend load visible.
Summary — the full monthly sheet
The third table has one row per employee: Worked / Missed weekdays, Attendance %, Regular weekday hours, Weekday OT, Weekend OT, Total, Avg / weekday, Days < 8h, and a Status dot (green = nothing unusual, amber = some overtime, red = suggested review). The overtime model is simple and predictable: weekday time beyond 8 hours per day counts as weekday overtime, and all weekend time counts as weekend overtime. The average is honest too — weekday hours divided by weekdays actually worked, so weekend overtime never inflates it.
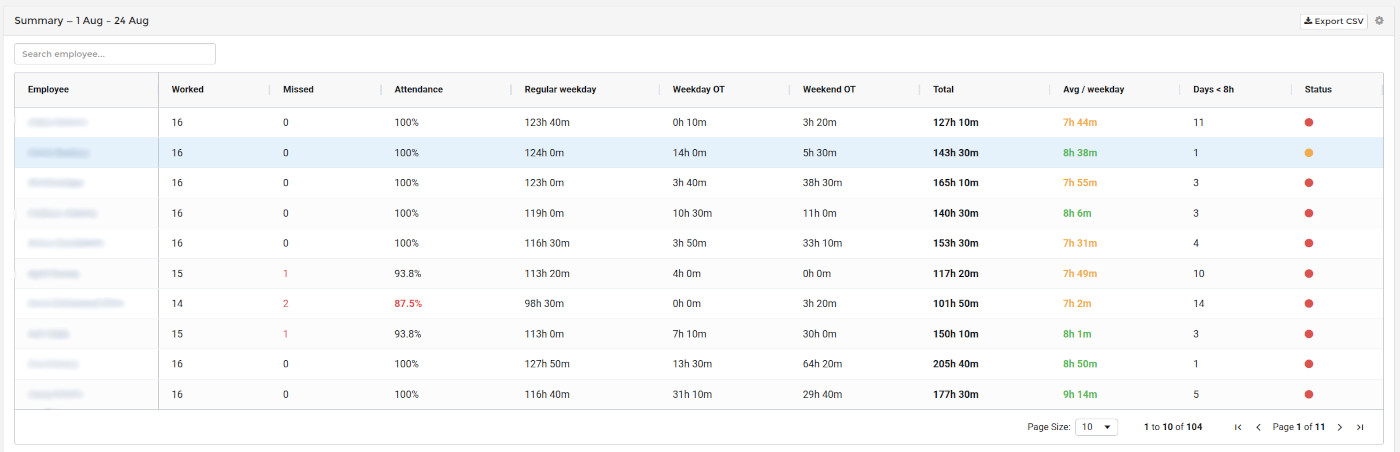
Filtering by project, printing and exporting
Use the Project selector at the top to scope the whole report to a single project: the tables then show only the employees assigned to that project, with only their hours on it — per-project attendance and overtime at a glance. An employee assigned to the project who did not work on it still appears with zeros, which is exactly what makes absences visible. Print report opens a clean printable sheet of the full report, and every table has its own Export CSV button for payroll or HR.
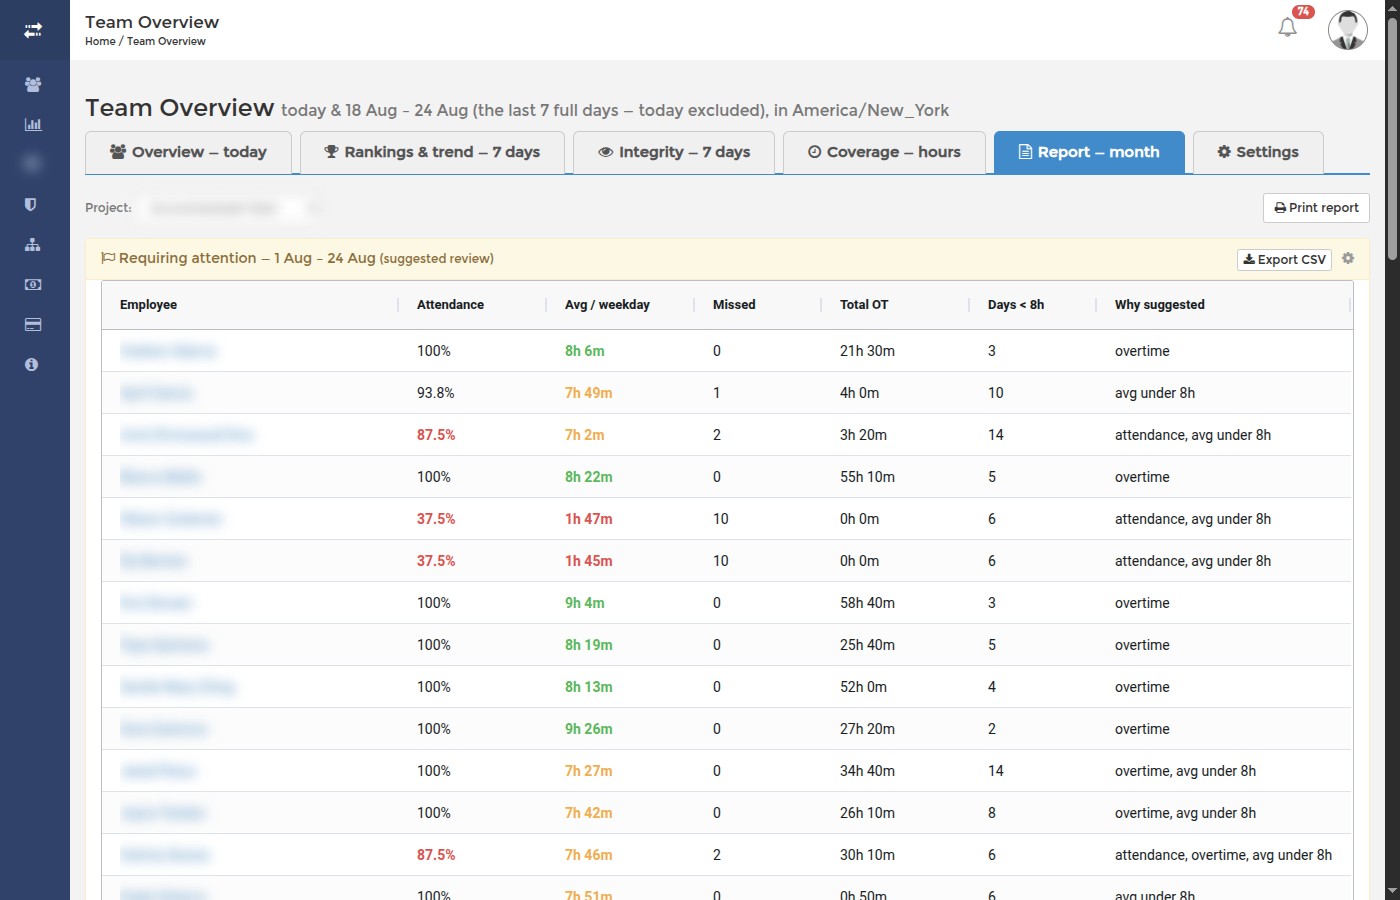
Team Overview: Your Whole Team on One Page
The Team Overview page is the employee time tracking dashboard for your whole team at once: who is online right now, when each person started working today, how many hours they tracked, and where those hours went — without opening employees one by one. You will find it in your dashboard menu as TEAM; everything on it uses your (the employer's) timezone, and the numbers refresh automatically every few minutes.
The page opens on the Overview — today tab. Four stat tiles summarize the day: Tracked today (total hours the team has tracked so far), Online now (how many of your active employees are currently tracking), Tracked over the last 7 full days, and a Flagged tile that turns red when the automatic activity checks found something in the last 7 days — clicking it opens the review page.
Two strips appear only when they have something to say. Flagged employees lists people with possible faked or injected input — these are review requests, not determinations: always verify in the work log before drawing conclusions. Screens cannot be verified lists employees whose tracking app is too old to report how many monitors it sees — ask them to update.
Team — today at a glance
The main roster table shows every active employee with: Employee (click the name to open their work log), Status (online now, or when they were last seen and on which platform), Tracked today, First activity (when their workday actually started — useful as a daily attendance check), their total for the last 7 full days, Flags (activity-check results), Screens (how many monitors their tracking app currently sees), and App (the tracking app version, with an outdated badge when a newer desktop version exists). The table is searchable, sortable, and exports to CSV.
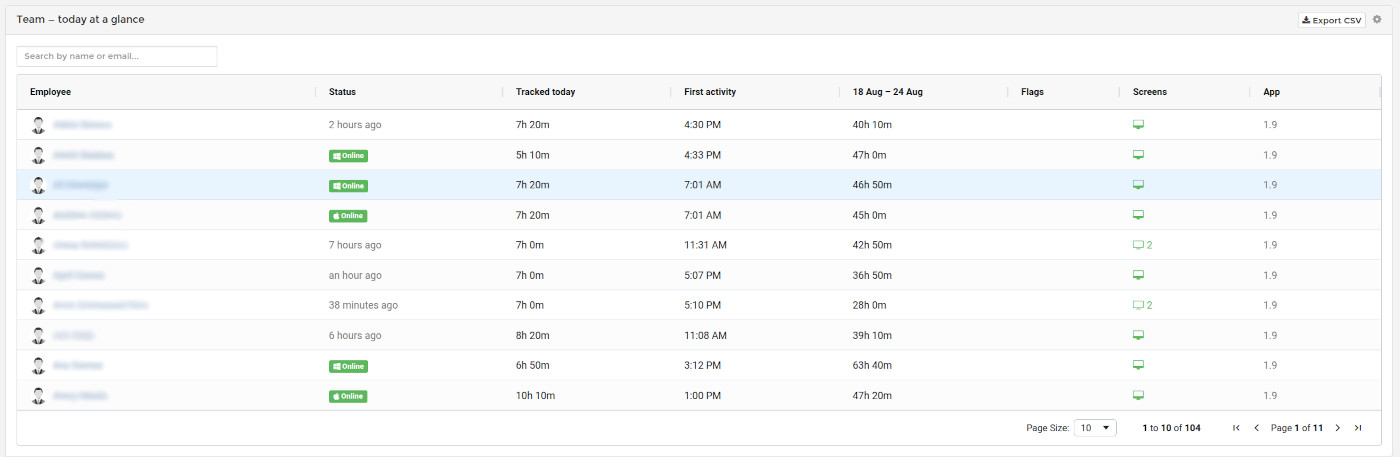
Where the hours went
The projects table breaks the same period down by project: hours in the last 7 full days plus a today column, with a per-employee split for each project — hover or expand a row to see exactly who contributed the time. Projects nobody touched this week stay listed but greyed out, so forgotten projects remain visible. For per-project attendance and overtime, see Team Overview: The Monthly Attendance and Overtime Report.
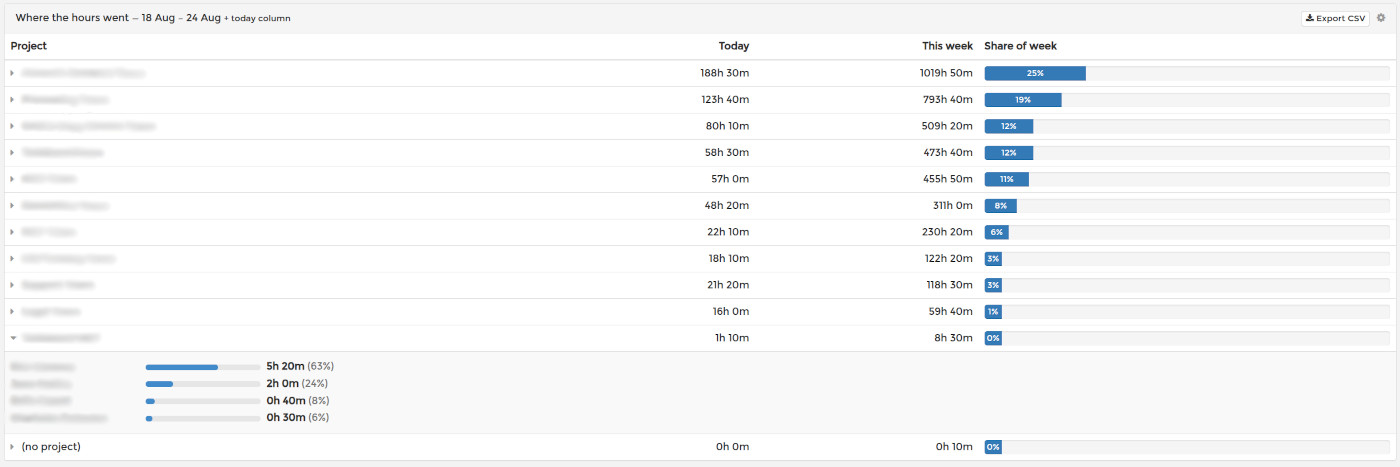
Every widget on the page can be hidden or re-enabled — see Team Overview: Choosing Which Widgets You See.
Open as its own page TopTracking Salaried Employees
For employees with a fixed monthly salary, you can still use hourly tracking to ensure they work the required hours.
How it works:
- Calculate hourly rate: Monthly Salary / 160 (for 40 hours/week)
- Set up a monthly email report in Accounting
- In USERS, use the Salary column to set the employee's monthly salary amount
Monthly reports will show the fixed salary amount. The Accounting page still shows hourly calculations for comparison.
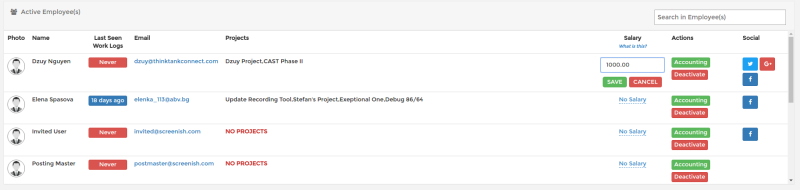
Tracking Your Own Time: Setting Up as a Freelancer
This is for anyone who works alone and wants a record of their own hours that a client can look at: freelancers, contractors, virtual assistants. You need one SCREENish account, and the startup wizard turns it into a working setup in a few minutes. Two things to keep apart from the start: your dashboard login is the address you sign up with, and your tracking login is a second address that only the tracking app uses.
1. Sign up as an employer
Sign up on screenish.com as an employer with your usual e-mail address, confirm it from the letter we send, and sign in. The wizard opens by itself on your first visit.
2. Pick "I'm not here to manage a team"
The welcome screen offers three cards. The middle one is yours.
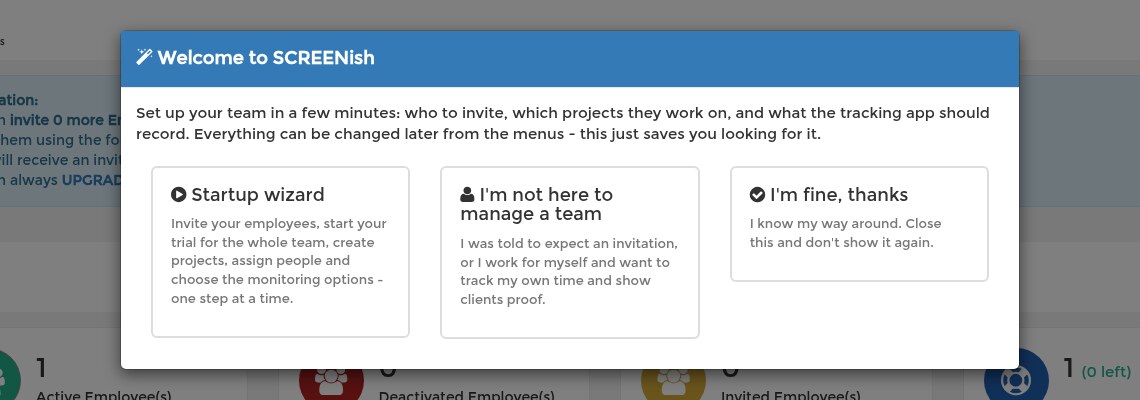
3. One quick question
The wizard first asks whether an employer or a client told you they would invite you to SCREENish.
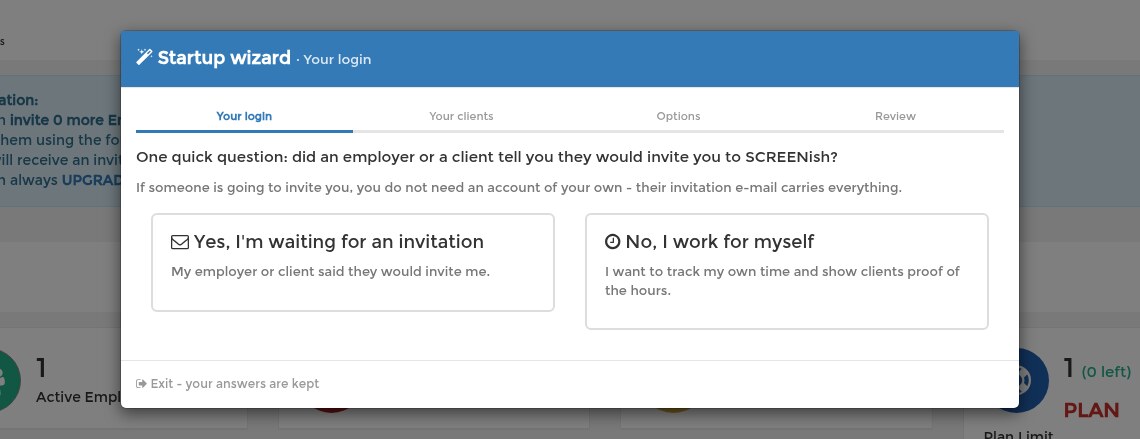
If somebody is going to invite you, answer Yes. You do not need an account of your own: their invitation e-mail carries everything. The wizard explains that the account you just made is an employer account, which would block that invitation, and offers to turn it into a worker account. Press the button, you are signed out, and when the invitation arrives you sign in with the same password and accept it.
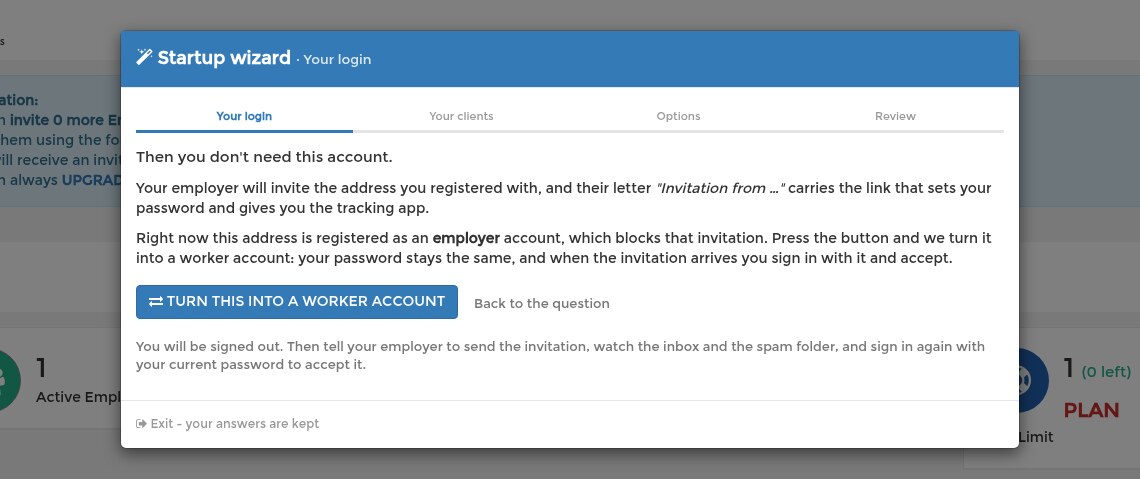
If you work for yourself, answer No and carry on.
4. A second e-mail address for the app
The tracking app signs in with a second address of yours. Any address you can read works: a work address, an old one, a second account. Type it and press Send the link.
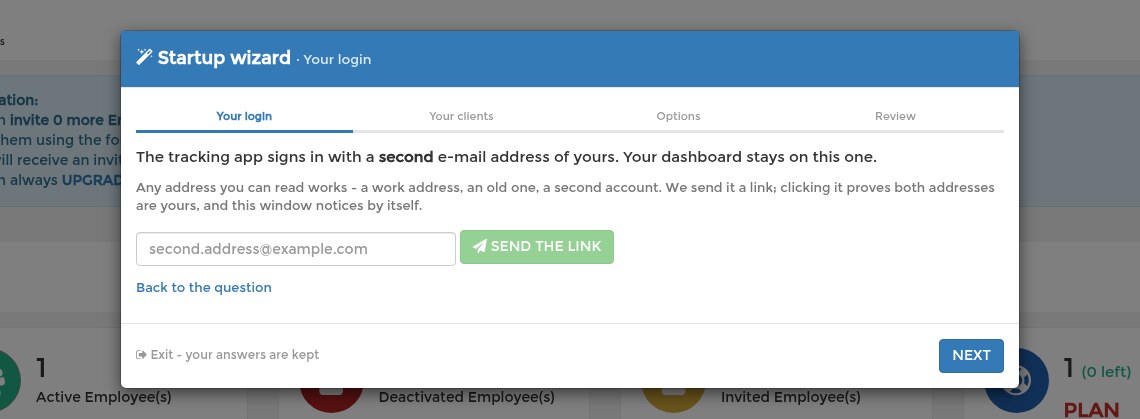
We send that address a letter with one link. Clicking it proves that both addresses are yours; nothing else happens. The wizard window notices the click by itself, so you can open the letter on your phone and just come back. The link works for 24 hours, and there is a button to send a fresh one.
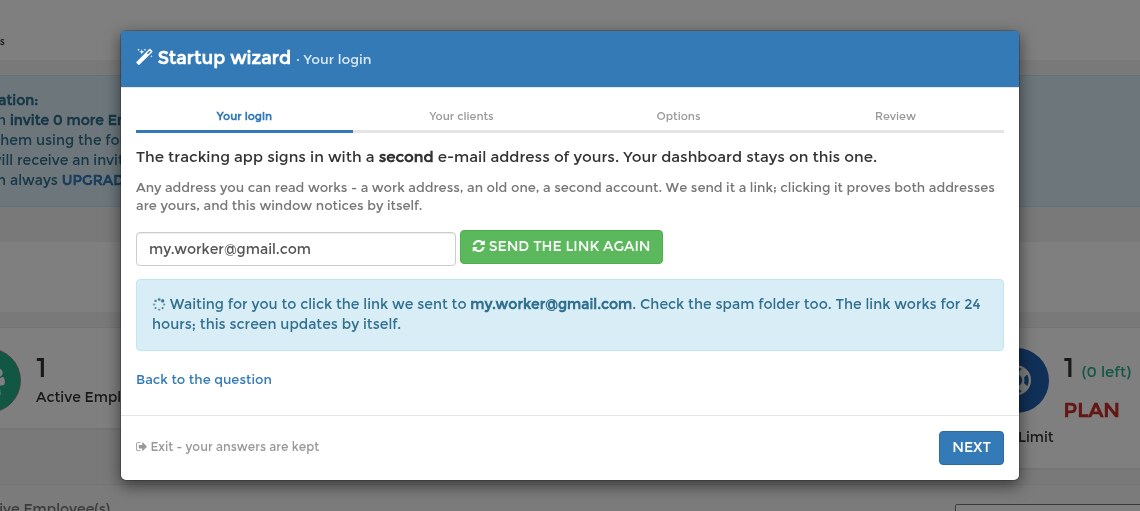
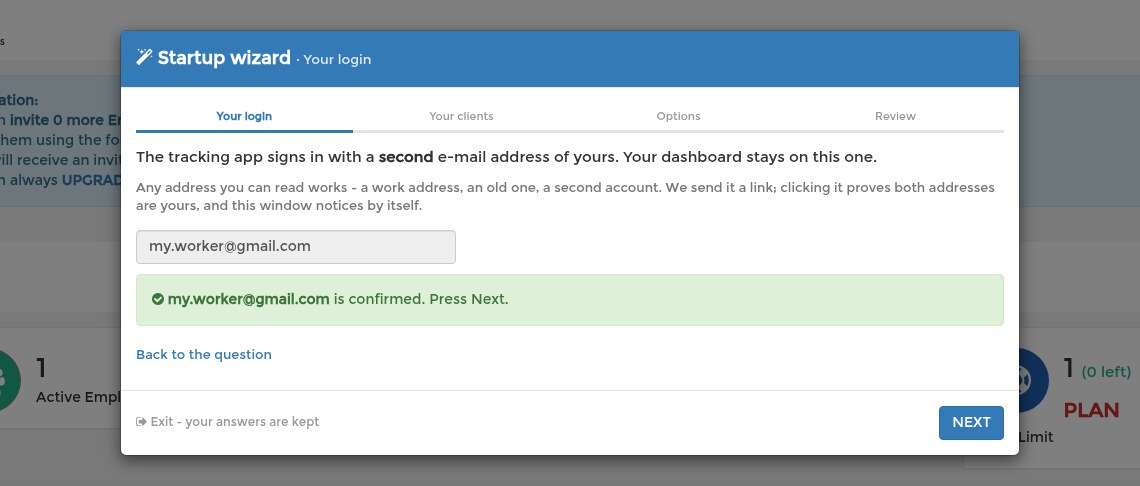
5. Your clients
SCREENish shows your time per project, and each project can be shared with one client as read-only proof. So make one project per client. The client's address is optional; when you press Send, the project is created at once and the client gets an e-mail with a link and a password to a view of that project and nothing else.
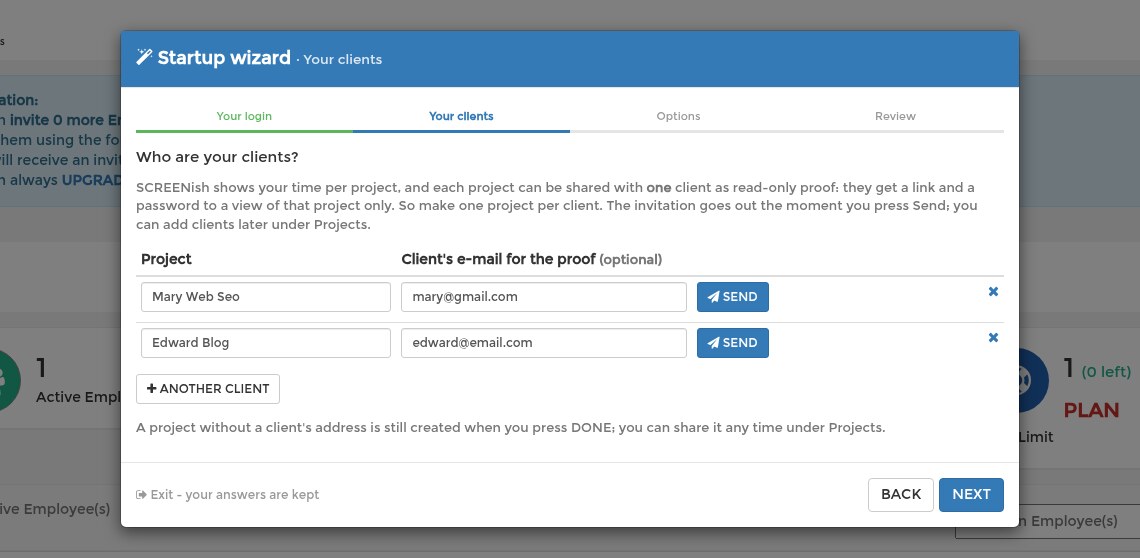
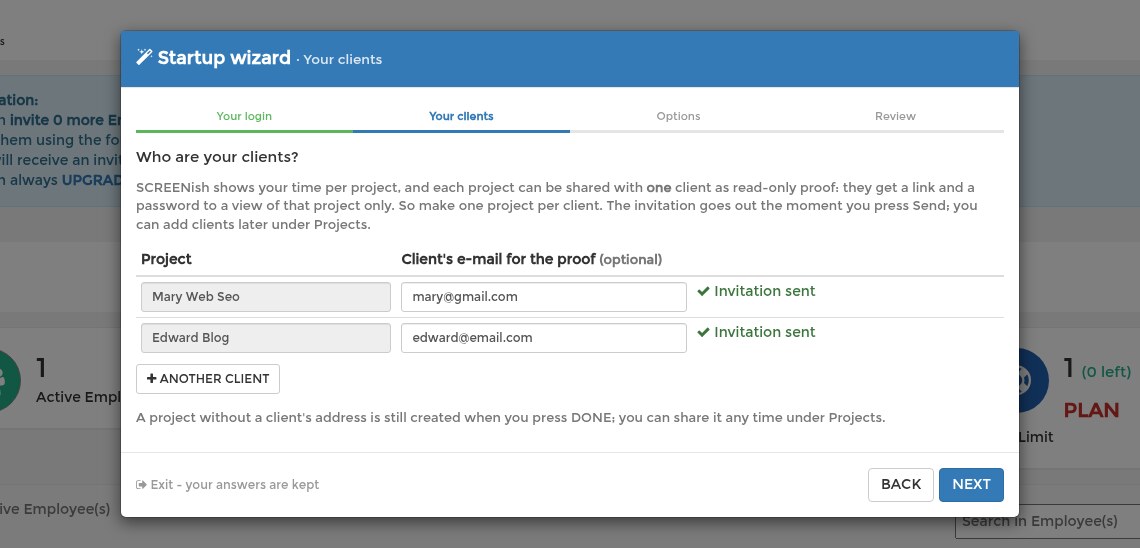
A project without a client's address is still created at the end. You can share it, re-send an invitation or make a project private at any time under Projects.
6. What the app records
Eight short questions, each with the default already set. They decide what the app records about your own work, and therefore what your clients can see. Everything can be changed later under Projects.
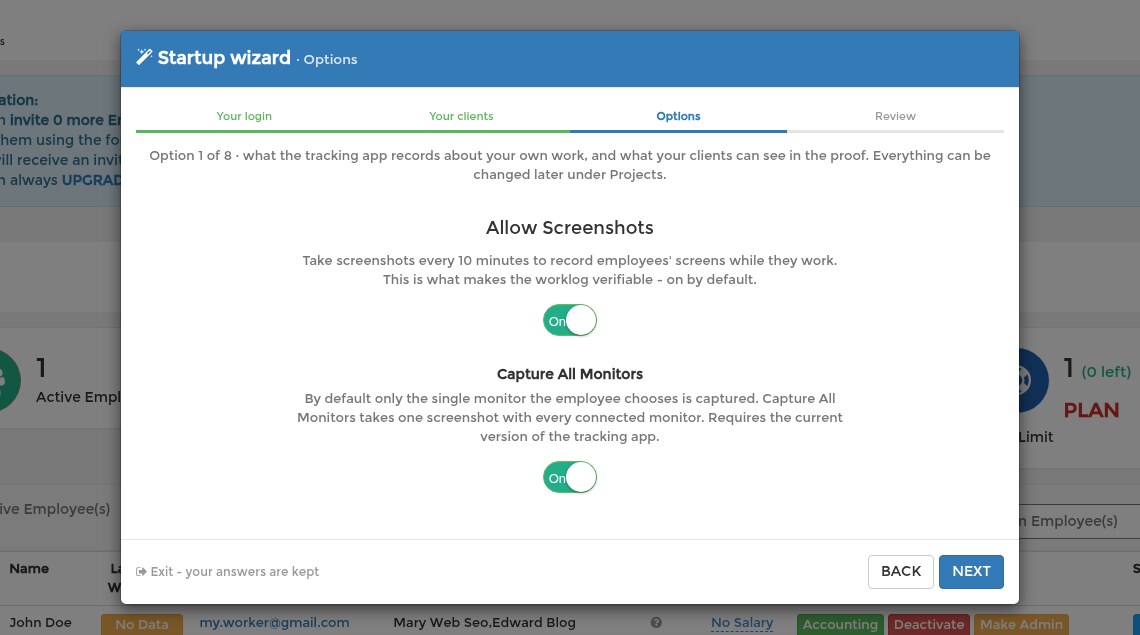
Screenshots every ten minutes are what make the record verifiable; they are on by default, and you can capture all monitors or just one. Blurring is worth a thought when your screen carries other people's data: the whole screen can be blurred just enough to make text unreadable, or an AI model can blur only sensitive fields.
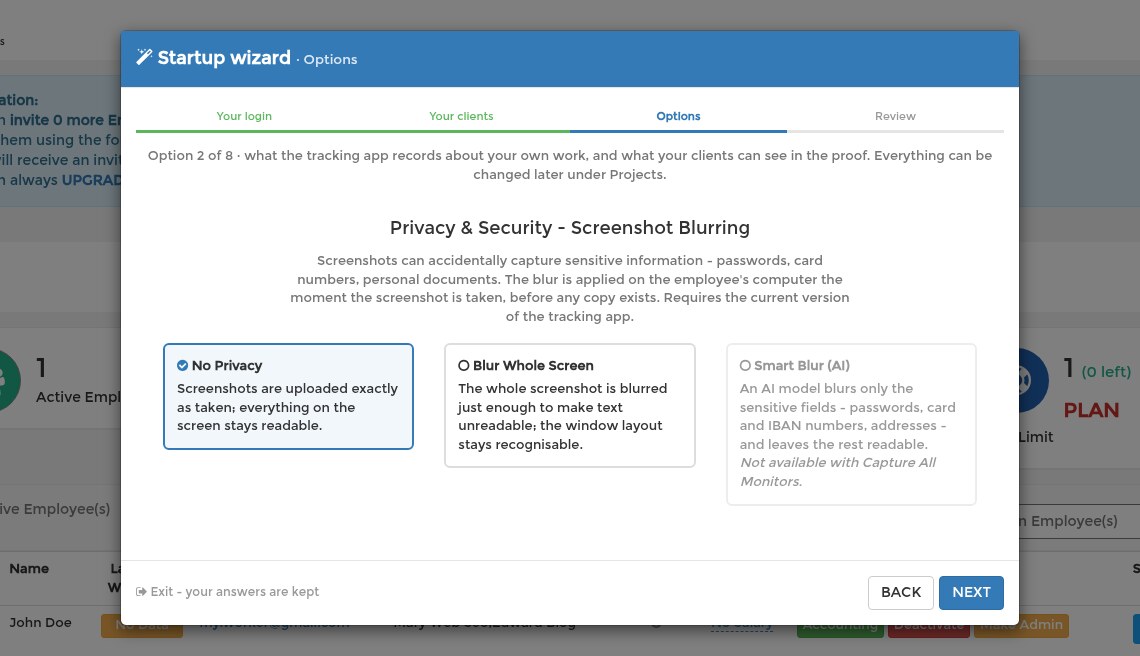
Then program reports (which programs and window titles were in use), idle time reports, manual time for work done away from the computer, PC or phone (the Android app records GPS instead of screenshots), and a weekly limit if you want one. The last question is how screenshots get approved; for someone reviewing their own work, auto-approve is the sensible answer.
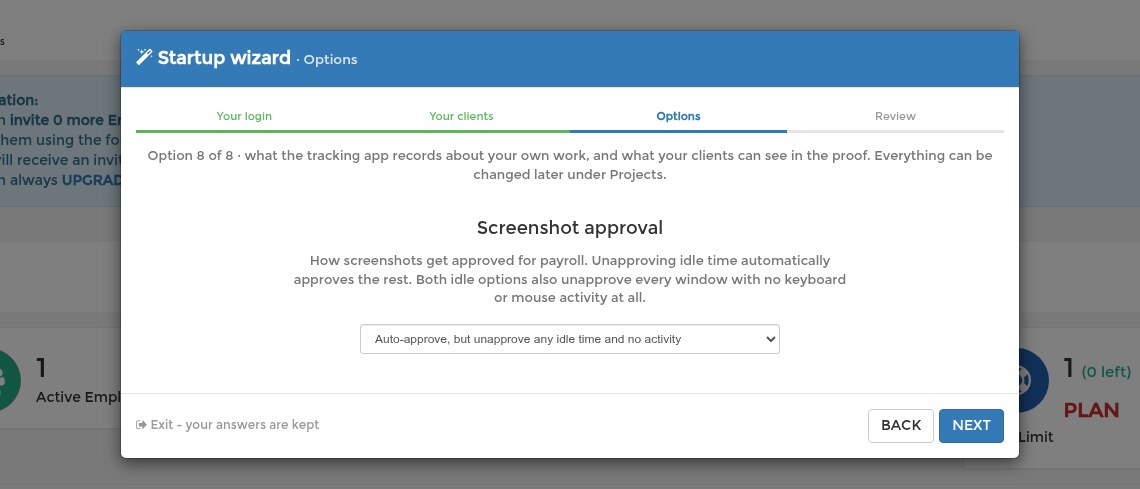
7. Review and a password for the app
The review lists everything. Choose a password for the tracking app (at least 8 characters) and press DONE. This is the password you will type into the app together with the second address; your dashboard keeps its own.
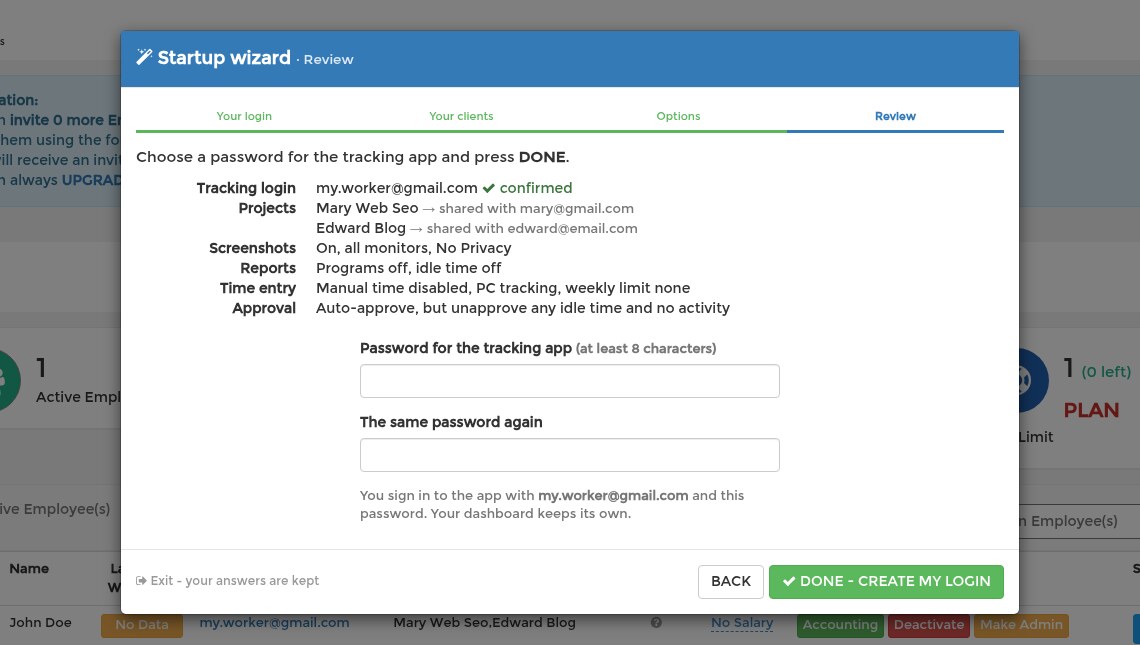
8. Download the app
The last screen shows your tracking login and one download button for the system your browser runs on; the other systems are a small line underneath. The app updates itself. If your computer runs an older system and the app will not start, write to us in the chat at the bottom right and we will send you a build that does.
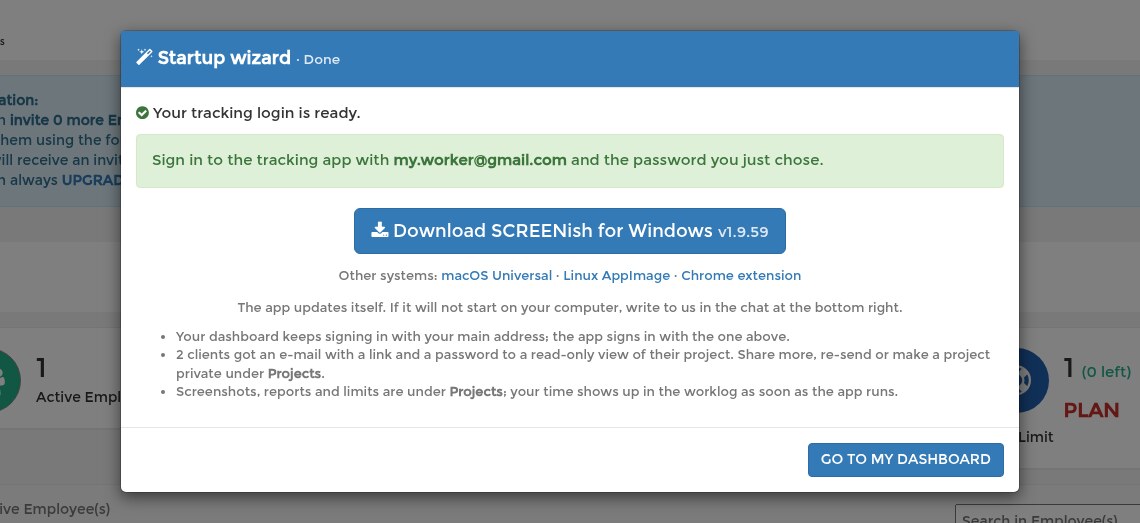
What you see afterwards
Under Users you are your own single employee, with your projects next to your name. Your time and screenshots appear in the worklog as soon as the app runs.
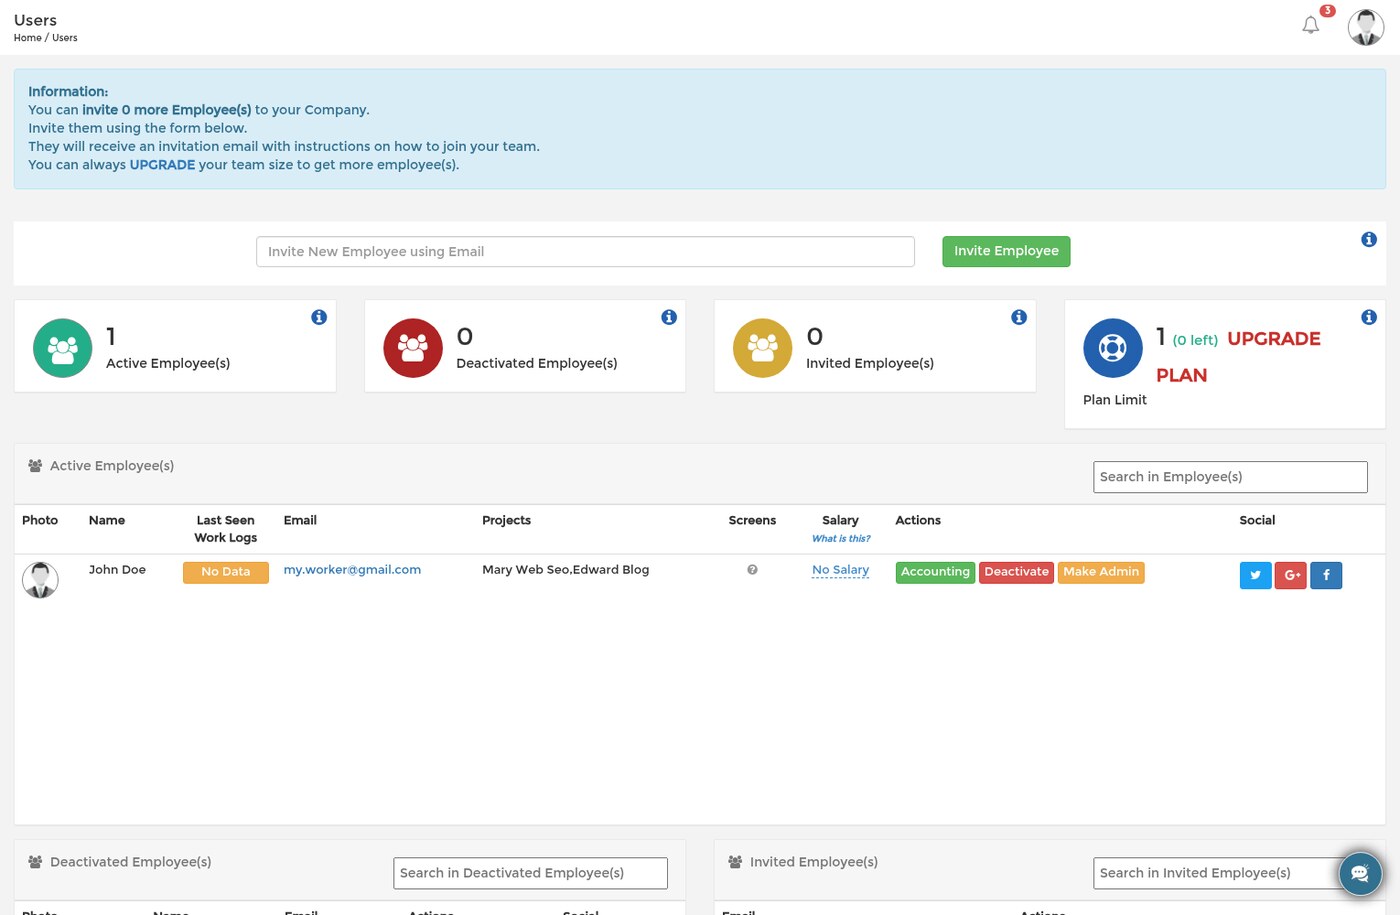
Under Projects each client's project shows who it is shared with, with Resend Invitation and Make Private next to it.
Signing in to the app
Open the app and sign in with the second address and the password from the review step. Pick the client's project and start. When you need the app again, on a new computer for instance, see Getting the App Again.
Open as its own page TopTrello: Pushing Tracked Time to Cards
Connect Trello under API & Integrations and SCREENish adds a comment to a Trello card with each member's approved time on that project for the day, named after the member and the project. When a day changes because more entries are approved, the same comment is updated, so a card never collects duplicates. Optionally an activity review opens a card on a list you choose.
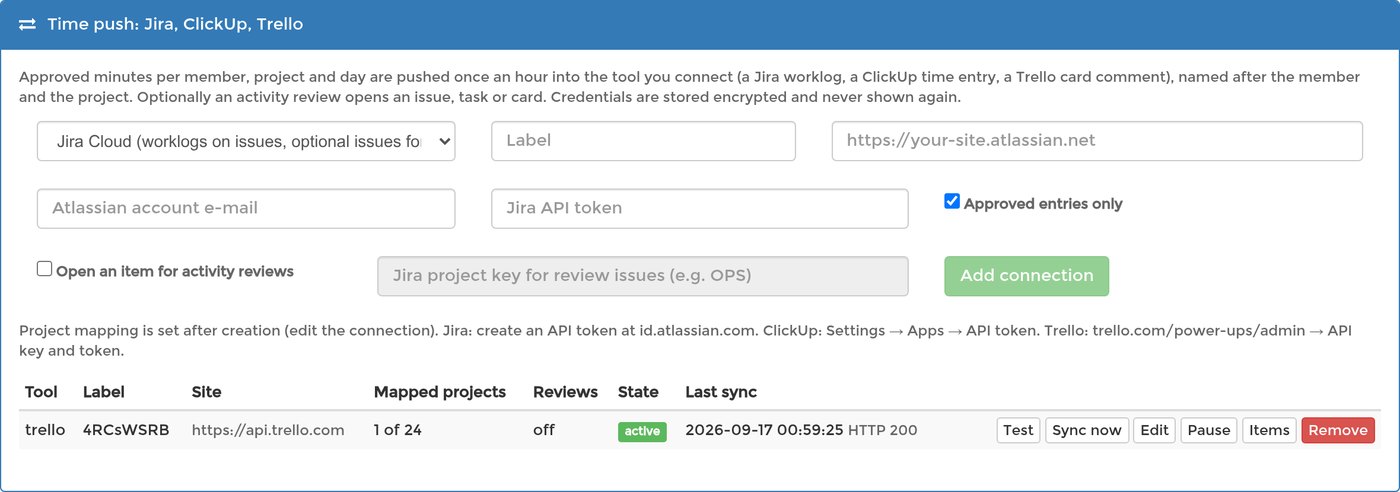
What you need from Trello
- An API key. Open trello.com/power-ups/admin, create a Power-Up (any name, your workspace), open its API key tab and generate a key.
- A token. On the same tab follow the Token link ("manually generate a Token"), allow access and copy the token. The token acts as you in Trello; you can revoke it at any time from your Trello account, and SCREENish stores it encrypted and never shows it again.
- The card for each project. Open the card and copy the eight characters after
/c/in its address, the card's short link. One SCREENish project maps to one card.
Connecting
- Open API & Integrations in the left menu. If it is your first connection, accept the API access terms shown at the top.
- In Time push: Jira, ClickUp, Trello choose Trello, give the connection a label, paste the API key and the token, and press Add connection.
- Press Edit on the new row and, next to each project that should reach Trello, paste the card's short link. Projects left empty are skipped. Press Save.
- Press Test: it should read Connected as your Trello username. Then press Sync now.
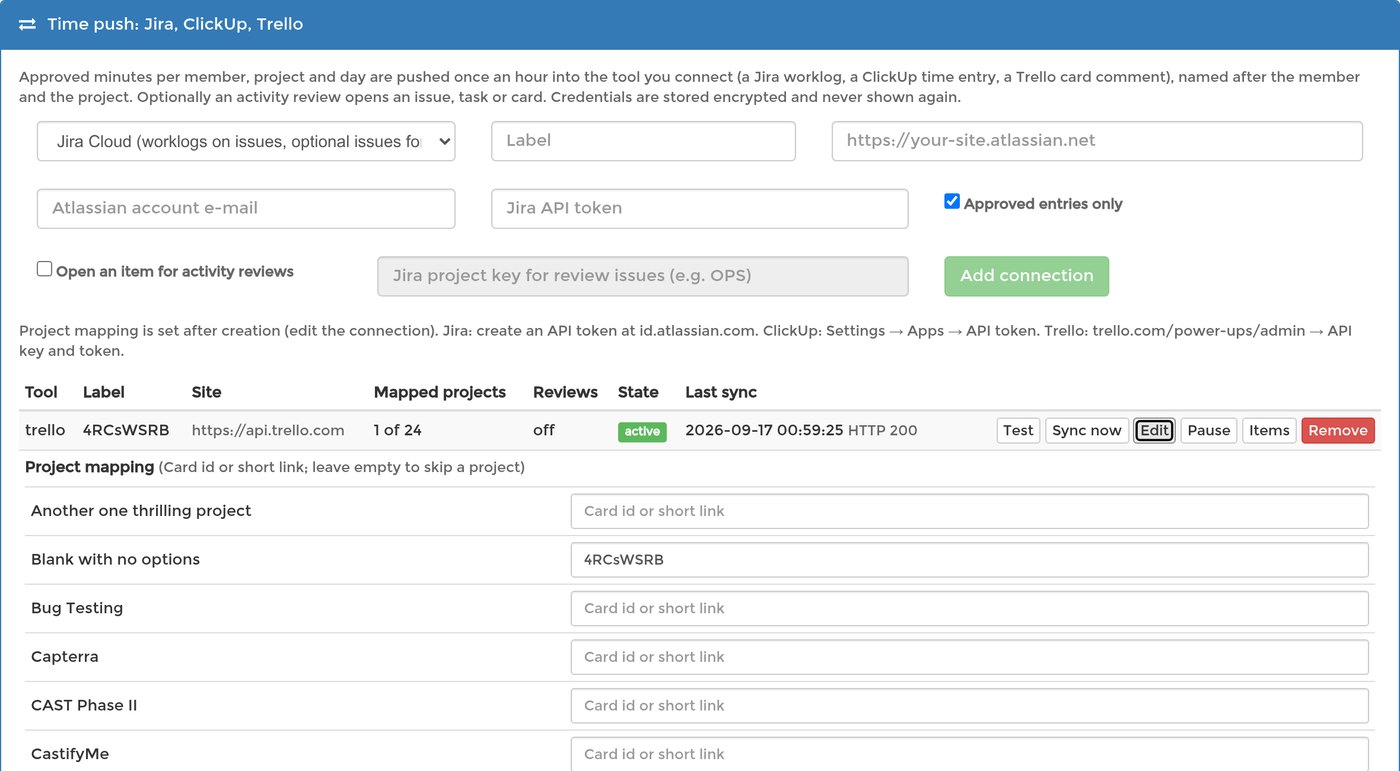
What appears in Trello
Each mapped card receives one comment per member and day, for example Screenish: Ann Lee, Support Team, 2026-09-17: 7h 40m. The comment carries the member's name, the project and the duration and nothing else: no screenshots, application names, window titles or pay rates ever leave SCREENish through a connection.
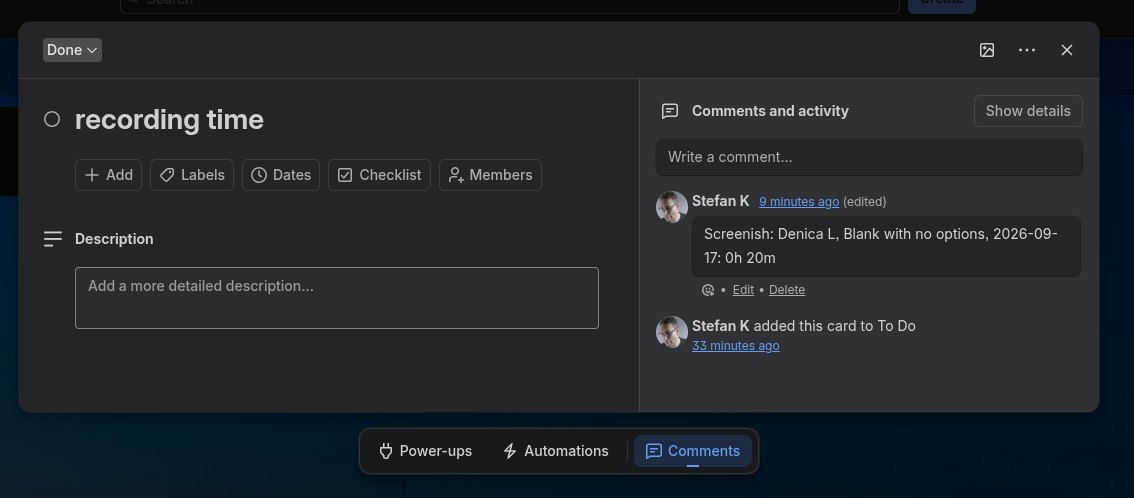
How often, and what is pushed
- SCREENish pushes automatically once an hour and looks at the last three days, so time approved later still reaches the card. Sync now runs the same push immediately.
- With Approved entries only (the default) only approved time is pushed; a day with no approved entries produces no comment. Turn it off in Edit to push every entry.
- Items lists what was pushed: the member, project and day, the Trello comment it became, and the minutes it carries.
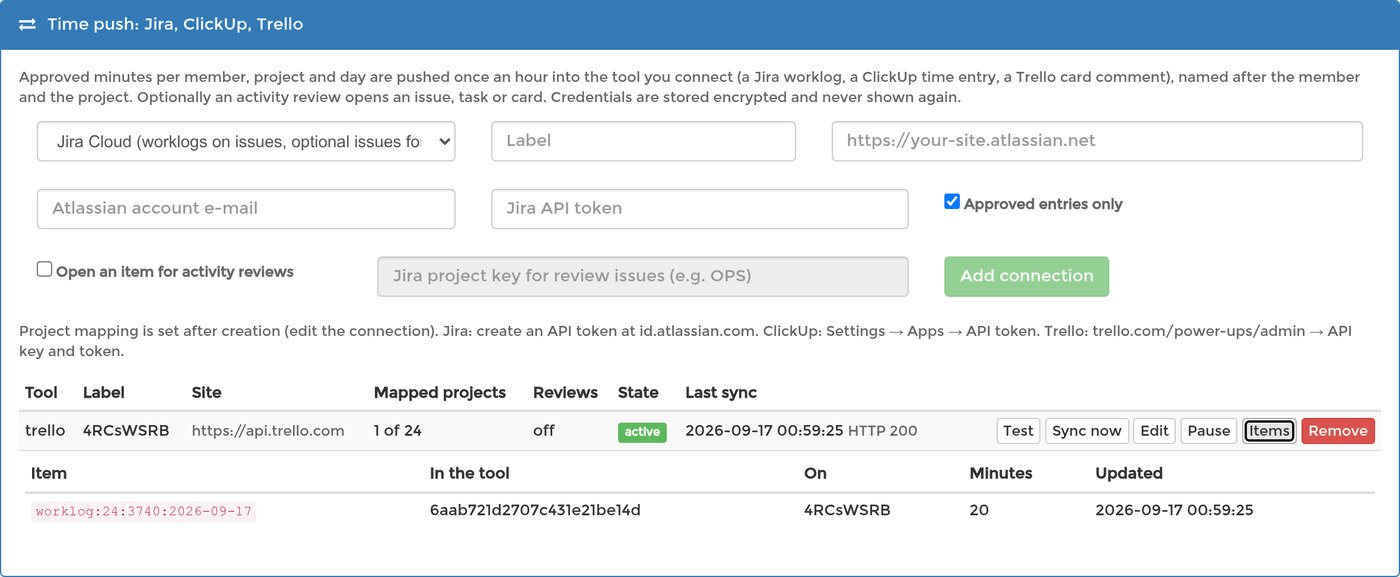
Activity reviews as cards
Turn on Open an item for activity reviews in Edit and enter the id of the Trello list that should receive them. To find a list id, open the board, add .json to the end of its address and look for the list's id under lists. Each new activity review then creates a card named after the member, the severity and the day, with the time window in its description. It is a flag for human review, not a finding; nothing about how the review was detected is sent.
Pausing, replacing the token, removing
- Pause stops pushing without losing the mapping; Resume continues.
- If Trello keeps refusing the connection (for example after you revoke the token) SCREENish pauses it after repeated failures and shows the reason on the row. Paste a new token under Edit → Replace credentials and resume.
- Remove erases the stored credentials and the list of pushed items; comments already added to cards stay in Trello.
The same panel connects Jira Cloud (worklogs on issues) and ClickUp (time entries on tasks) in the same way, with an issue key or a task id instead of a card.
Open as its own page TopUsing Active Programs Reports
Go to Assign Project To Employee(s) > Advanced Options > Allow Programs Reports.
This tracks all applications used while time tracking runs. Reports show how long each program was active and what windows were open.
Weekly email reports include both idle time and active programs data.
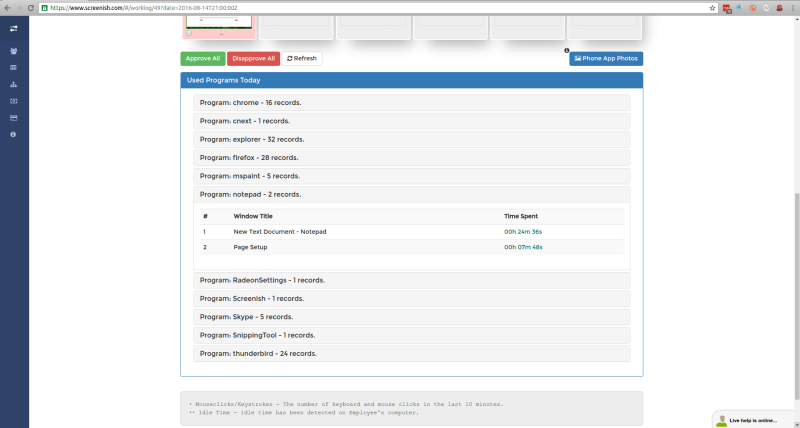
Using Notes and Reminders
When you start tracking, a notes window appears. Enter a brief description of what you're working on. Set a reminder interval in the bottom-left corner to get prompted to update your notes.
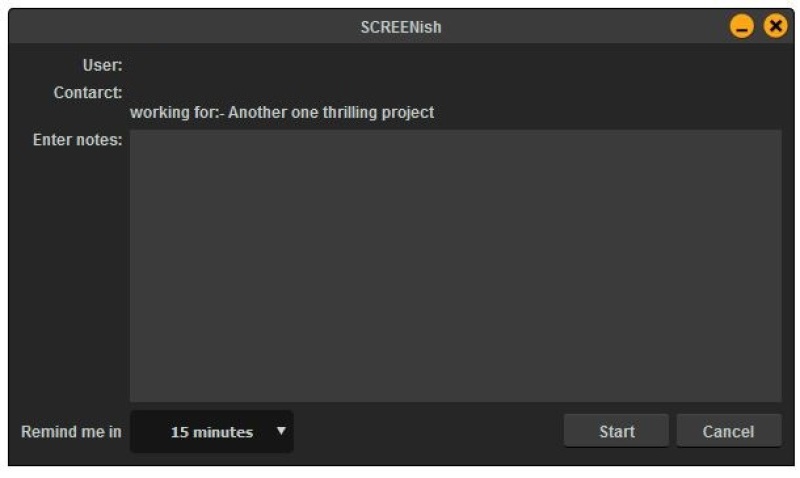
Using the Idle Time Feature
Go to Assign Project To Employee(s) > Advanced Options > Allow Idle Time Reports.
When enabled, employees get an alert if there's no keyboard/mouse activity. If they don't respond within 30 seconds, time is recorded as idle until they resume activity.
You'll receive weekly email reports showing idle time and active programs for all employees.
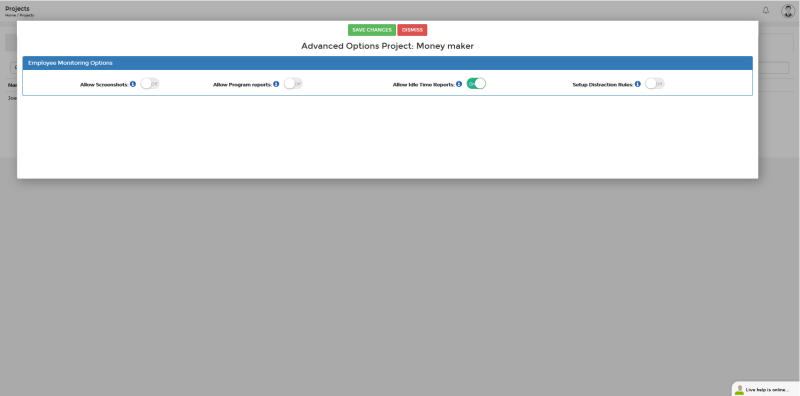
Using the Prevent Distractions Feature
Distraction reporting shows you how much time each employee spends in the websites and programs you mark as distracting — without interrupting anyone. Nothing pops up on the employee's screen. The time is measured quietly and reported, and a human decides what it means.
Turn it on per employee: PROJECT > Assign Projects to Employee(s) > Advanced Options > Distraction Reporting. It needs Program Reports on the same assignment — the time is counted from the program log, and the panel will ask you to enable it if it is off.
Where you see the numbers:
- The employee's worklog — a "Distractions: N min" total next to the day's hours, with the top entry on hover.
- Team Overview > Integrity — the whole team's distraction time for the week, with CSV export. Click an employee's row to open the breakdown — which apps and sites the minutes went to, each with its site icon.
- A weekly e-mail every Monday — one line per employee, sent to you; each employee also receives their own number.
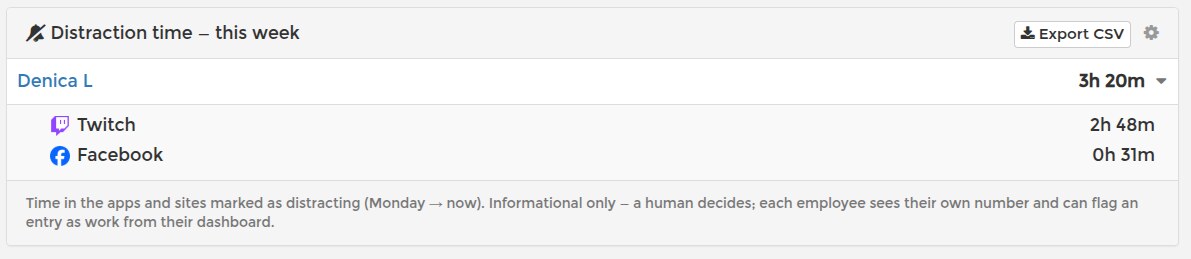
What the employee sees: their own dashboard shows the same number, the breakdown by site or program, and the exact rules that apply to them. If something is part of their job — say, an employee who edits YouTube videos — they press This is work next to the entry and explain why.
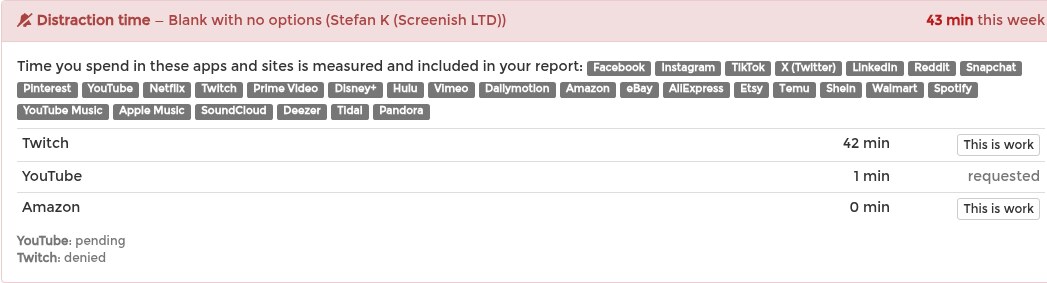
Resolving a request: a red counter appears in your dashboard menu and on the Projects page the moment a request is filed. Click it — the employee's Advanced Options opens by itself, with the request and four choices: stop counting that entry for this employee, turn the whole category off for them, exclude the entry for the entire project, or deny with a note. Approving also recalculates the current week, so the number you both see stays fair.

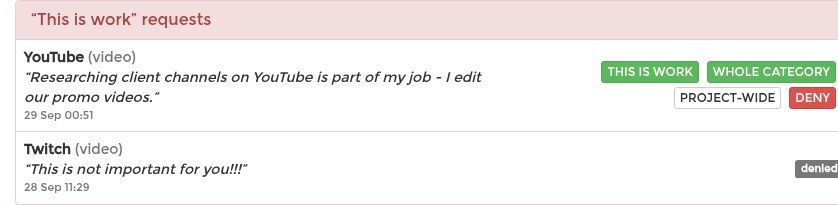
Distraction time is informational. It never docks time or pay by itself.
Open as its own page TopVideo Presentations and Screen Sharing
Secure Communication: SCREENish uses WebRTC peer-to-peer connections—no central server stores your data. Everything stays between participants only.
Participant Limits: Peer-to-peer means each participant uses more resources. The number of people you can include depends on everyone's computer capabilities.
Open as its own page TopViewing Active Employees
After an employee accepts your invitation and registers, they'll appear in the Active employees in your Team section of the INVITE EMPLOYEE menu.
Viewing Employee Payroll
Go to ACCOUNTING, select an employee, set your date range, and check the Payroll box to see earnings based on their hourly rate.
Note: Payroll only works if you've set an hourly rate for the employee.
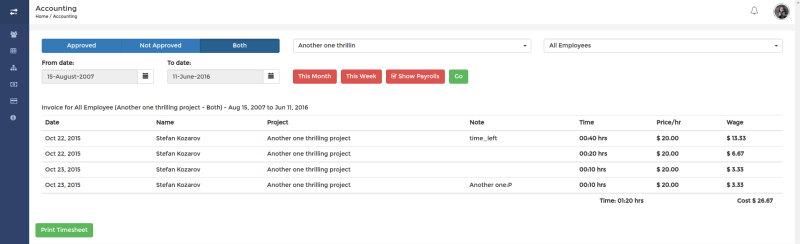
Viewing Hours Spent on a Project
Go to ACCOUNTING and select a project from the All Projects dropdown. Set your date range and filter by Approved, Disapproved, or Both. You'll see a breakdown of hours worked by all employees assigned to that project.
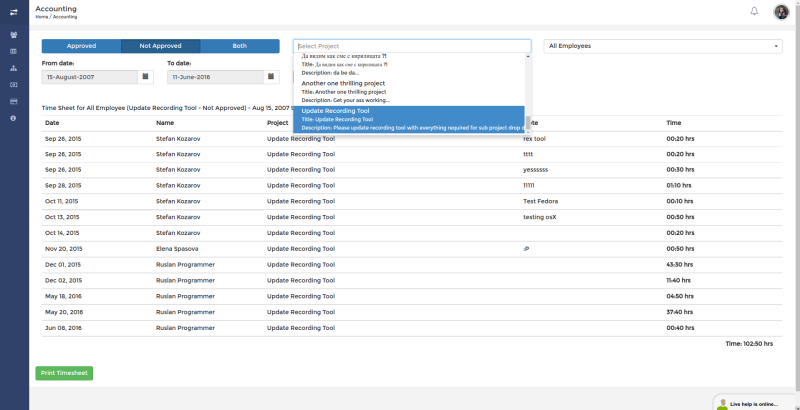
Viewing Project Payroll
Go to ACCOUNTING, select a project from the dropdown, set your date range, and check the Payroll box. You'll see total earnings for all employees on that project.
Note: Payroll only works if you've set hourly rates for employees.
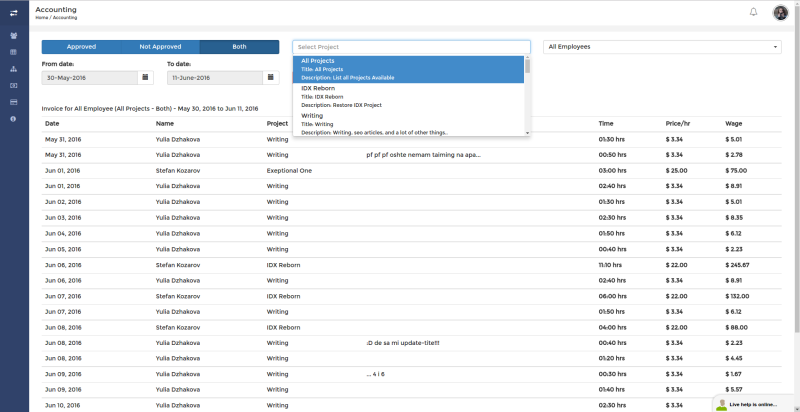
Viewing Team Workflow
The old dashboard workflow graph has grown into the Team Overview page — open TEAM in the menu.
The Rankings & trend tab shows Team hours per day, your team's total tracked time for each of the last 7 complete days, alongside the most and least working employees. The Overview tab shows who is online and tracking right now, and every widget exports to CSV.
For the full tour, see Team Overview: Your Whole Team on One Page and Team Overview: Rankings and the 7-Day Trend.
Open as its own page TopViewing Your Total Hours (Employee View)
Go to ACCOUNTING, optionally select an employer, and choose a date range. Filter by Approved, Disapproved, or Both. Use This week or This month for quick selection.
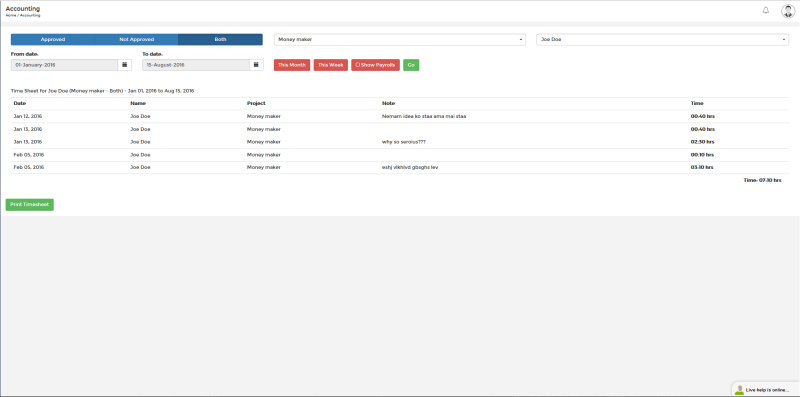
Windows: Fixing the 0xc0000142 Startup Error
Follow this guide if SCREENish closes the moment you start it and Windows shows SCREENish.exe — Application Error with the message The application was unable to start correctly (0xc0000142). Your PC is missing a standard Microsoft component that SCREENish needs — reinstalling SCREENish will not add it, but the steps below fix it for good.
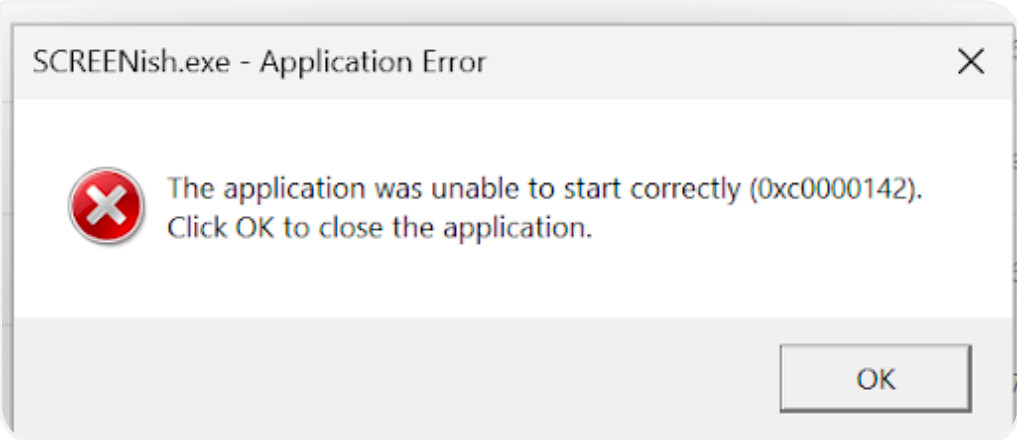
Fix it (about 5 minutes)
You do not need to uninstall or reinstall SCREENish. Leave it where it is.
- Download the Microsoft runtime. Open this official Microsoft link — it downloads a file called
vc_redist.x64.exe. - Run it. Double-click
vc_redist.x64.exe, tick I agree to the license terms and conditions, then click Install. If it tells you the runtime is already installed, choose Repair instead. - Restart the computer. Do not skip this — Windows finishes putting the runtime files in place during the restart.
- Open SCREENish and log in. It should start normally and your timer should work as usual.
aka.ms link above or Microsoft’s own download page. Sites that offer to send you single missing system files are a common way to pick up malware, and they do not fix this error anyway.If it still will not start
- Check whether your antivirus removed something. Open Windows Security > Protection history. If SCREENish or one of its files appears as blocked or quarantined, restore it and add the SCREENish folder as an exclusion.
- Clear out an old installation. Uninstall SCREENish from Settings > Apps > Installed apps, then check whether
C:\Program Files\SCREENishis still there and delete it if it is. Install again afterwards. - Read the number in the error carefully. A different code points somewhere else:
0xc0000135means a support file is missing altogether,0xc000007bmeans a 32-bit and 64-bit mismatch,0xc0000139means a support file is the wrong version. - Send support the details. Press Windows, type event viewer and open it, then go to Windows Logs > Application. Copy the newest red Application Error entry that mentions SCREENish.exe into your message — the line that says faulting module tells us which support file failed.
Check the result
Start SCREENish, log in and start your timer. Within a minute or two you should appear as active in the dashboard and screenshots should start showing up in your work log. If hours were lost while the app would not start, ask your manager to add that time manually.
Related: Downloading the SCREENish App · Low Memory: Freeing Up Space on the Windows System Drive (C:)
Open as its own page TopWork Logs: Camera Notices During Face Verification
When Face Recognition is on and the camera does not give a usable picture, the day shows a notice in WORK LOGS reporting how many checks were affected and when. It means the camera may not have been available — not that anyone did anything wrong.
There are plenty of ordinary reasons: another app holding the camera, a closed laptop lid, a privacy shutter left across the lens, a driver that stopped working, or simply a broken webcam. If the employee was warned about it, the notice says so.
Treat it as a prompt to check the equipment. Ask first — it is nearly always a hardware or software problem.
One notice deserves special mention: “Camera malfunction”. It appears when the camera switched on but never sent any video — typically a stuck driver, a USB power glitch, or a failing webcam. In that case the employee also sees a popup on their own screen (at most once every 30 minutes) advising them to restart the computer, and your work log shows the notice at the same time.
You don’t need a technician for this one. Send the employee our step-by-step guide: Fix the “Camera malfunction” popup on Windows. It shows how to confirm the problem in one minute with the built-in Windows Camera app and walks through the usual fixes, from a simple restart to drivers — ending with a clear answer on whether the camera needs replacing. Once the camera works again, face checks resume on their own; nothing needs to be reset in SCREENish.
Open as its own page TopWork Logs: Machine and System Info
Open the Machine & System Info panel in WORK LOGS to see the computers an employee tracks time on. Every machine running a recent version of the desktop app is listed automatically, with a green dot when it is online now.
Each card shows the operating system, the monitors and their resolution, how many screens are being captured, the CPU, the RAM and any cameras. It is useful when you are working out why screenshots look wrong, why a second screen is missing, or whether a machine can run face checks at all.
The panel is collapsed by default and is visible only to managers. Employees can always see what is collected about them in the privacy policy.
Workforce Monitoring Notice: The Screen Workers See at Sign-In
Follow this guide if, after signing in to the SCREENish web dashboard, you see a screen titled Required Information with the words Before you continue: please review the notice below. It shows the Workforce Monitoring Notice: a plain-language text explaining what the time tracking your employer uses records about your work. Every worker sees it once. Confirming that you have read it takes a few seconds and nothing else about your account changes.
How to continue past the notice
- Scroll through the notice text. The text box scrolls on its own, separately from the page.
- Tick the checkbox I have read this notice. If a second line, I consent to Face Verification, is shown, tick it too. Every line must be ticked before the button becomes active; otherwise it stays grey and the screen says Please confirm each item above.
- Press Continue. The button reads Saving... for a moment, then the dashboard opens.
Your confirmation is recorded together with the version of the text you were shown, so the screen does not come back at the next sign-in. It appears again only if the notice text is updated later.
The screen cannot be closed with the Esc key or by clicking outside it. That is by design: the dashboard opens only after the confirmation is recorded.
If the screen does not go away
- The button stays grey. One of the lines is not ticked. Scroll down inside the screen; a second line can sit below the notice text.
- You pressed Continue and nothing happened. Reload the page (Ctrl+F5 on Windows, Cmd+Shift+R on Mac) and sign in again. The screen shows once more only if the confirmation was not recorded.
- It still does not move. Try a private (incognito) window, or another browser. Ad blockers and privacy extensions sometimes block the request that records your confirmation; allow screenish.com in them, or turn them off for this step.
- A red message says the confirmation could not be recorded. Wait a minute and press Continue again. If it keeps failing, write to support with the browser you use and a screenshot of the screen.
The SCREENish desktop app does not show this screen, and your tracked time is not affected by it.
Open as its own page TopZapier, Make and n8n: Automating SCREENish Without Code
Zapier, Make and n8n can all react to what happens in SCREENish today, without waiting for a published app. They listen on a webhook URL, and SCREENish sends events to any address you give it. From there the automation does whatever those platforms do — write a row, open a ticket, send a message, start an approval.
The shape of it
- The trigger is a webhook. In Zapier it is Webhooks by Zapier > Catch Hook; in Make, a Custom webhook; in n8n, the Webhook node. Each of them gives you a URL.
- The action side, when your automation needs to look something up or write manual time back, is an API key used as a bearer token in an HTTP request step.
Connecting
- Create the webhook in your automation platform and copy its URL.
- In SCREENish open API & Integrations. If it is your first connection, accept the API access terms shown at the top.
- In Connections: webhooks and chat choose Custom webhook (signed JSON to your own system, Zapier, Make, n8n), label it, paste the URL, tick the events you want, and press Add connection.
- Copy the signing secret from the yellow box — it is shown once.
- Press Test. The platform should show one caught request; use it to build the rest of the scenario.
What arrives
A JSON object with an id, the event name, when it happened, the account and the event's own fields — a member id, a project id, minutes, a severity, a time window. Member and project ids match what the API returns, so a lookup step can turn them into names. The events available are the same ones listed in Slack: Getting SCREENish Alerts in a Channel; the exact field-by-field description is on the developers page.
Watch the volume
Automation platforms charge by the task or the operation. Every 10-minute entry fires six times an hour per tracking member — on a team of ten that is several hundred runs a day, and it will show up on your bill. The daily summary, activity reviews and approval changes are the events that usually earn their keep.
Two things worth doing properly
- Keep the URL secret. A catch hook URL is unguessable but not authenticated: anyone who has it can feed your scenario invented events. Do not paste it into a ticket or a shared document.
- Verify the signature where you can. Every delivery carries a timestamp and a signature computed with the signing secret. n8n and Make can check it in a code or function step, which is the difference between "an event arrived" and "an event arrived from SCREENish". Zapier's Catch Hook cannot check it before the Zap runs; there, treat the URL itself as the secret.
Answering, retries and pausing
Answer with any success status within 10 seconds. A failed delivery is retried after 1, 5 and 30 minutes, then 2 and 6 hours, and abandoned after five attempts; a destination that keeps failing is paused automatically and the row says why. Deliveries shows each attempt and the answer received, which is the first place to look when a scenario stops firing.
Letting the automation register itself
With a read + write key, a platform can create and delete its own webhook subscriptions over the API instead of your adding them by hand — the pattern Zapier and Make expect from a published app. See the developers page and API Keys: Creating, Limiting and Revoking Them.
Open as its own page Top